
How to Clean Cast Iron Barbecue Grill: Tips from Experts
To keep a cast iron barbecue grill in prime condition, it all comes down to a simple daily ritual: scrape it down while it’s still warm, wipe away the grease, and then apply a thin coat of oil to keep the grates seasoned. This quick end-of-service routine is your best defense against rust and gunk, making sure the grill is always ready to perform.
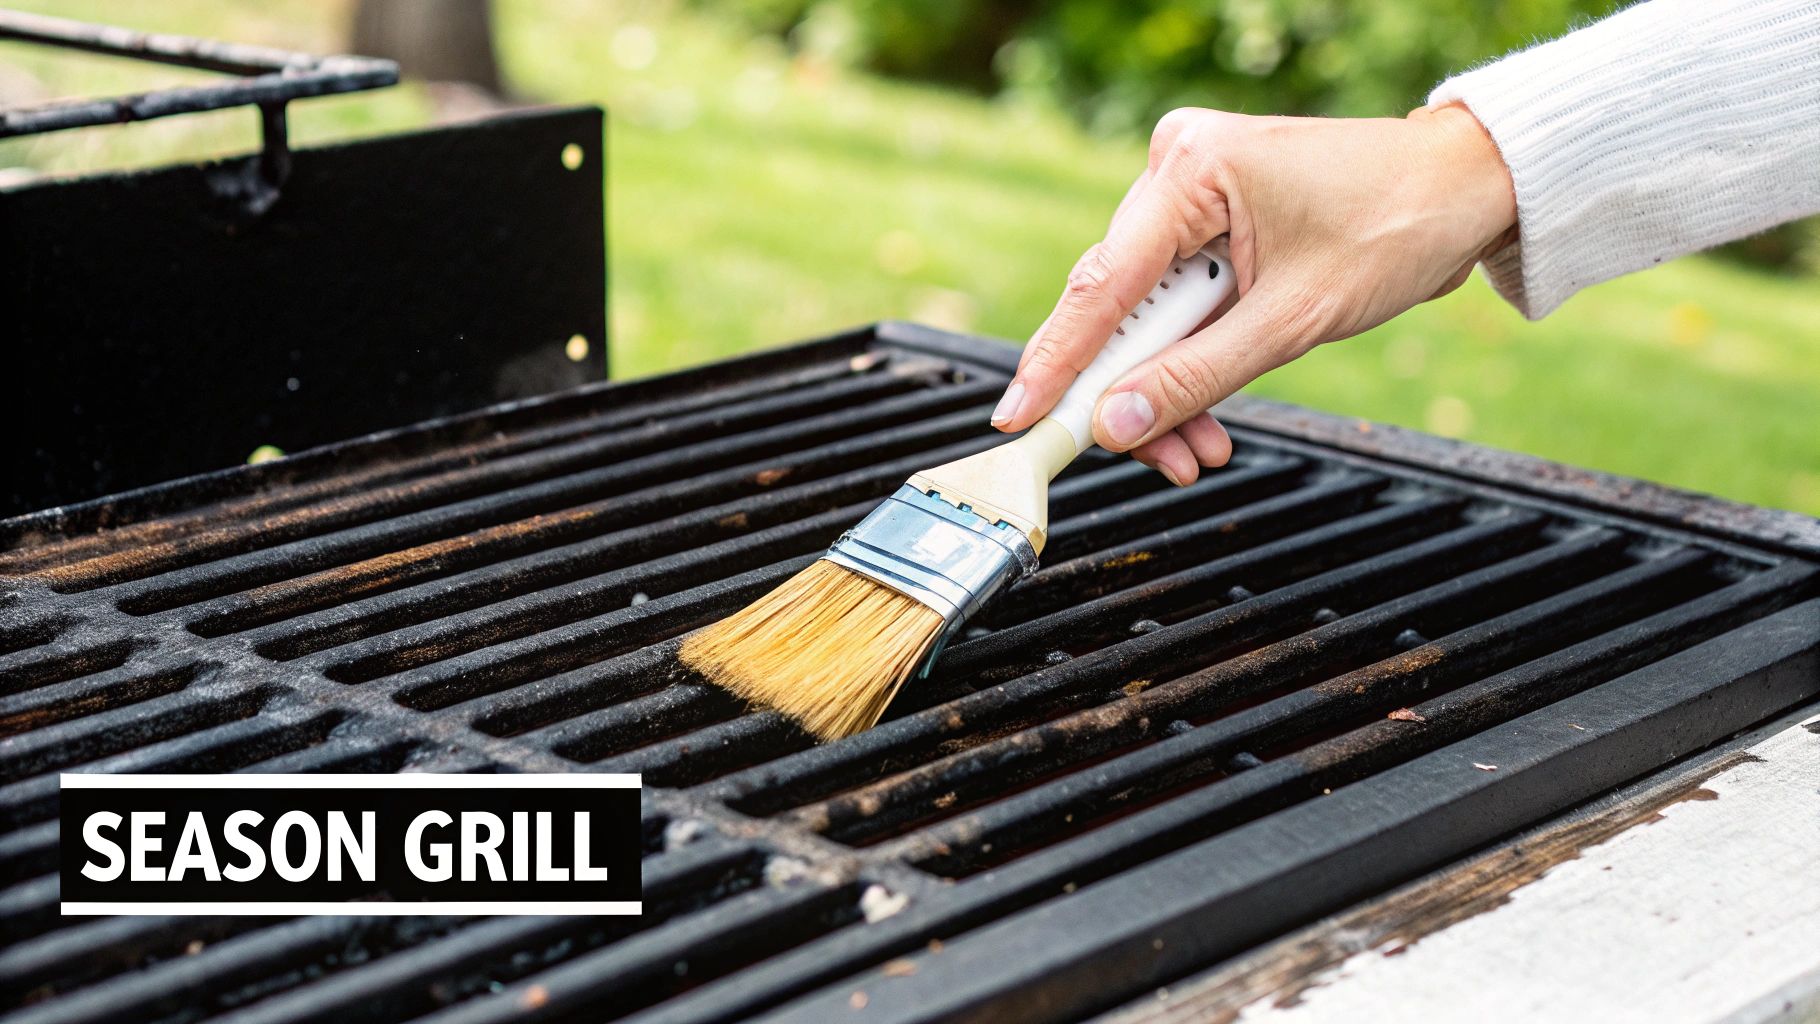
Your Essential Daily Grill Cleaning Ritual
I get it. In a slammed commercial kitchen, the last thing anyone wants is another task tacked onto the closing checklist. But when it comes to your cast iron grill, spending a few minutes on it each day isn't a chore—it’s an investment. This isn’t about a deep, heavy-duty scrub with harsh chemicals. It’s about a consistent habit that protects your equipment and guarantees killer results.
Think of it just like wiping down your stainless steel prep station. A little attention every day prevents a massive headache later. This simple step stops grease and food crud from carbonizing into a stubborn mess that causes rust and creates an uneven cooking surface. You want perfect sear marks, not the ghost of last night's salmon.
The Scrape, Wipe, and Season Method
The best approach is the one that seasoned chefs have trusted for generations. It’s a simple three-step dance that protects the iron and maintains that all-important non-stick seasoning layer. This daily maintenance is your frontline defense against rust and poor performance.
Most experts agree that a dedicated 10-15 minutes is all you need. The process involves scraping off debris with a metal spatula, wiping the surface clean with a tough cloth, and then rubbing on a thin coat of neutral oil before a quick heat-up. This flash re-seasons the surface, creating a protective shield against moisture and preventing food from sticking. For some more great insights on grill maintenance, the team at Schweid and Sons has some solid advice.
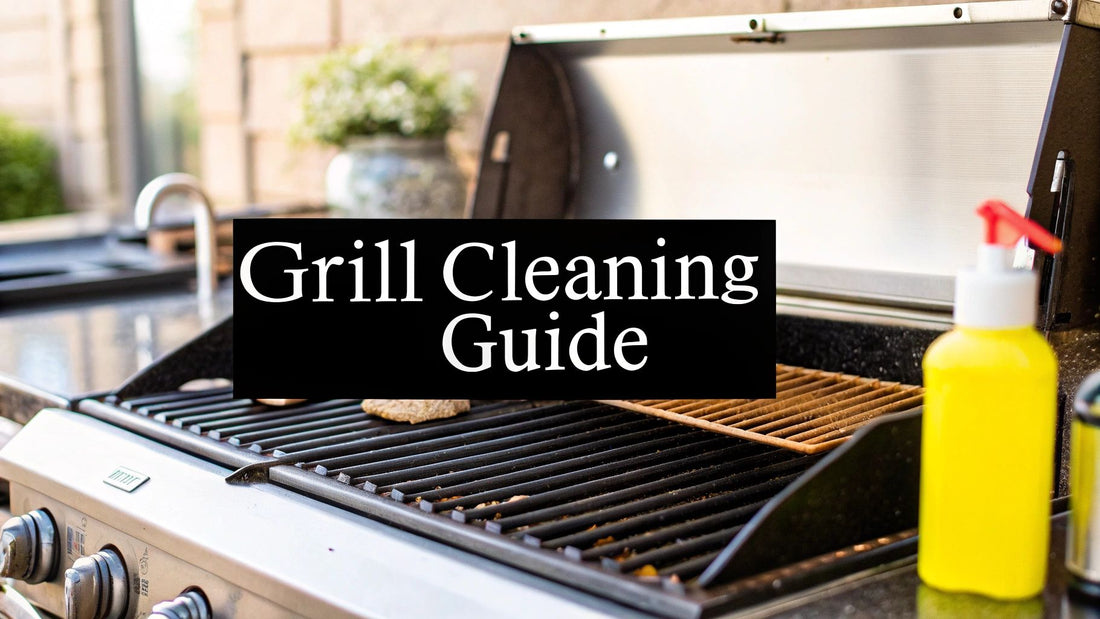
Choosing Your Tools Wisely
Having the right tools on hand makes this daily ritual quick and painless. A wire brush might seem like the obvious choice, but its bristles can snap off and end up in food. Plus, they're often too abrasive and can strip away the delicate seasoning you've worked so hard to build.
Your best friend here is a sturdy, wide-bladed grill scraper or a solid metal spatula. It has the muscle to lift off stubborn, cooked-on bits without gouging the iron.
After scraping, follow up with a dedicated, clean cloth or a few heavy-duty paper towels to wipe away the loose grime and any leftover grease. For seasoning, keep a small squirt bottle of a neutral, high-smoke-point oil right by the grill.
- Vegetable Oil: This is the go-to for a reason. It's cheap, effective, and gets the job done.
- Canola Oil: Another fantastic, affordable option with a high smoke point.
- Grapeseed Oil: If you want to get a little fancier, this oil builds an incredibly durable seasoning layer over time.
A well-maintained cast iron grill is a sign of a disciplined kitchen. This daily ritual isn't just about being clean; it's about respecting your tools and making sure every single dish you send out is as good as the last. It’s one of those small things that separates the good kitchens from the truly great ones.
Mastering the Deep Clean for Your Commercial Grill
While your daily wipe-down routine is non-negotiable, every high-volume kitchen knows there comes a time when the grill grates need a serious reset. This isn't your end-of-shift cleanup; this is a deep clean designed to tackle the stubborn, carbonized gunk that builds up over weeks of hard service.
Getting this right is the key to maintaining that beautiful, non-stick seasoned surface you've worked so hard to build. It's about performance, not just looks.
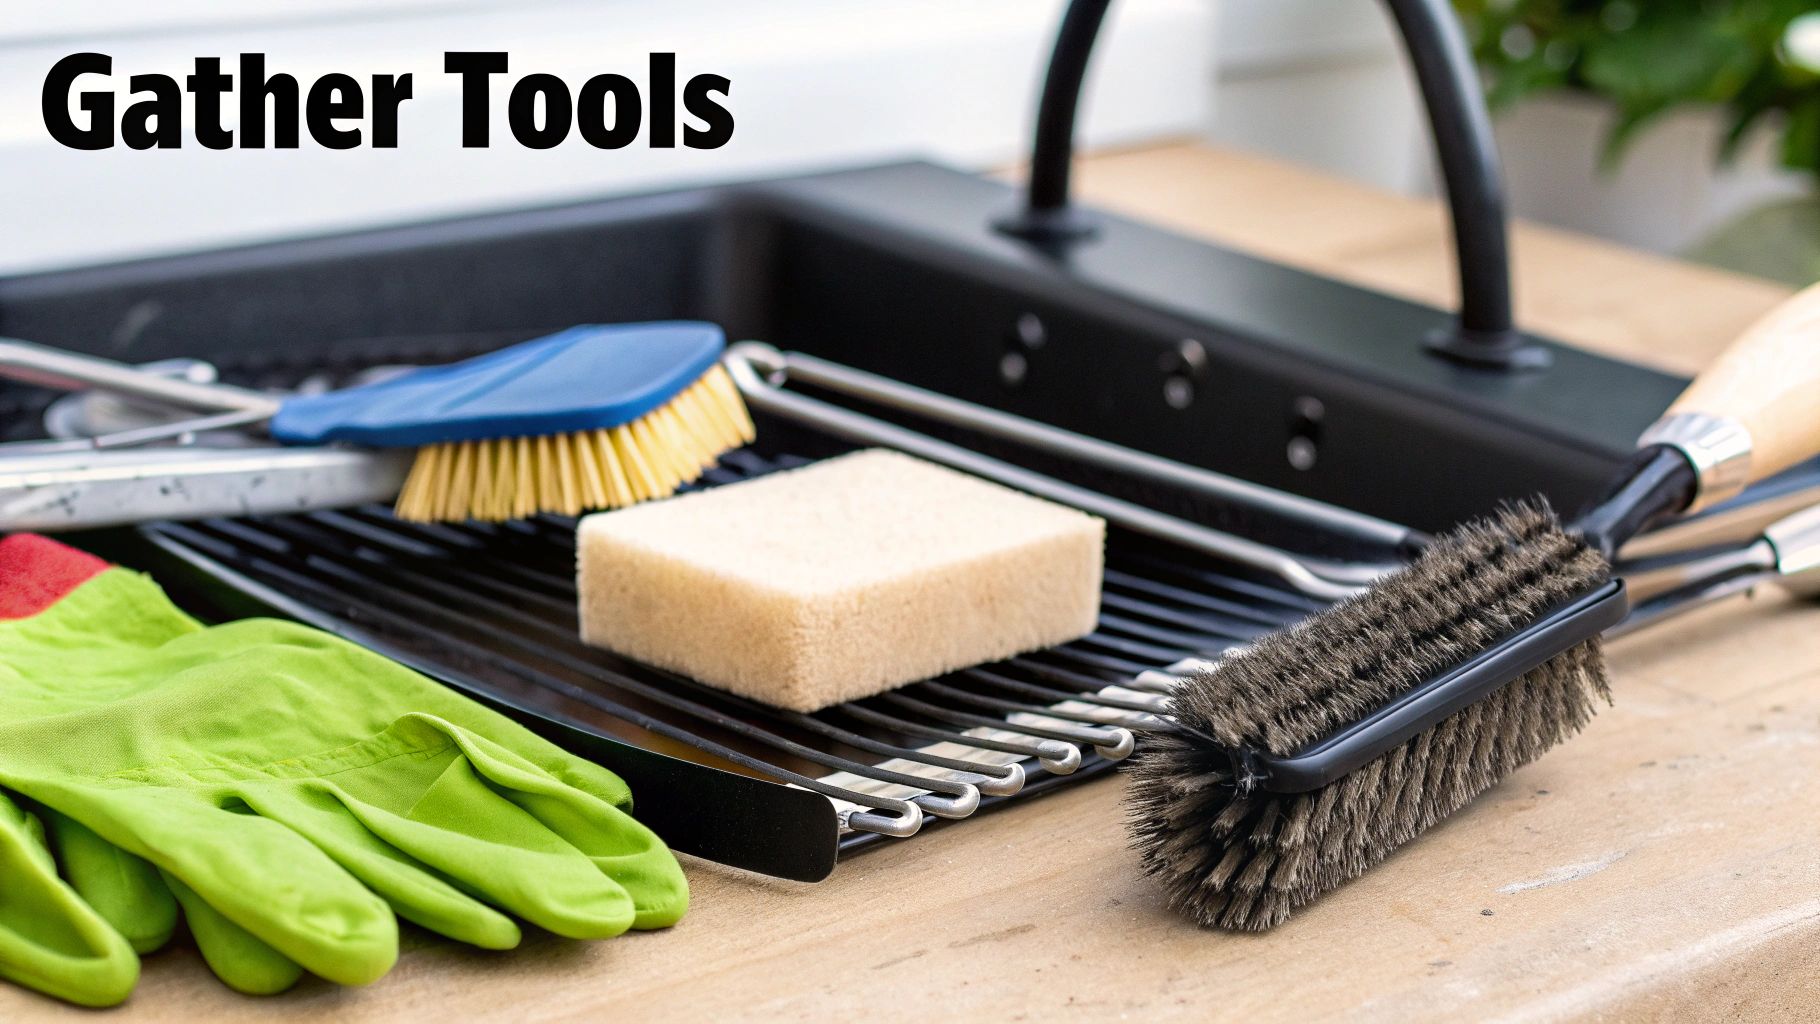
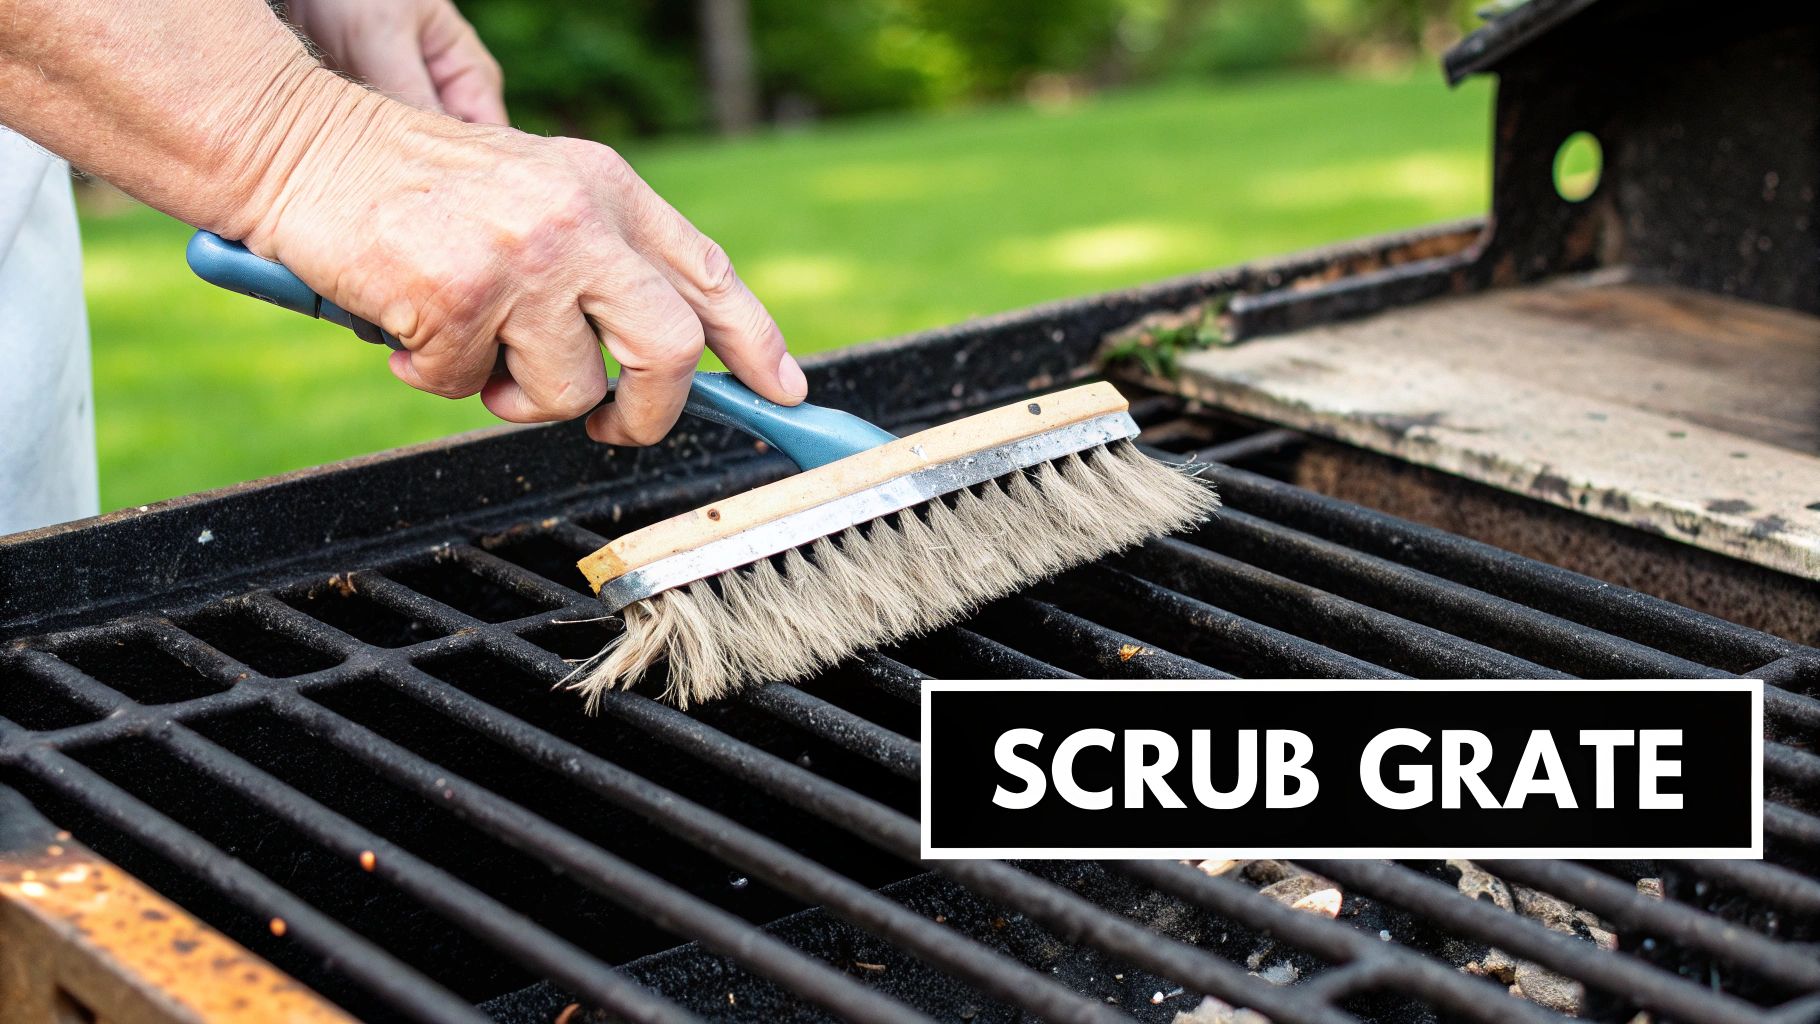
First things first, let's use heat to our advantage. Firing up the grill is the oldest trick in the book because it works—it loosens the most caked-on grime and makes the scraping part a whole lot less of a workout. But don't just crank it to max; a controlled, strategic preheat is far more effective.
The image below breaks down the ideal preheat times and temperatures to get that residue ready to pop right off.
As you can see, a moderate heat for 10-15 minutes is the sweet spot. You're aiming for hot enough to carbonize all those leftover food bits without torching the seasoning or risking damage to the grates. Once you hit that mark, kill the gas and grab your scraper. A good, sturdy, wide scraper will lift away that now-brittle residue way more effectively than a flimsy wire brush ever could.
When to Bring in the Soap
I know, I know. This is where cast iron purists start to sweat. But in a commercial kitchen, reality sometimes calls for a little bit of soap. If you’re staring down a thick, sticky layer of polymerized grease that scraping just won't touch, a mild soap solution is your friend.
The key is to be fast. Get the grates cooled down, scrub only the problem spots with a little dish soap and hot water, and then get rinsing. Your goal is to cut through that heavy-duty grease, not strip the seasoning you've carefully built up.
Never, ever let your cast iron grates soak. I can't stress this enough. Soaking is the fastest way to invite rust, which can literally start forming in minutes on bare iron. The entire soap-and-water operation should be a quick, targeted strike—in and out.
The Critical Drying and Re-Seasoning Finish
Leaving even a hint of moisture on those grates is asking for trouble. After rinsing, the most foolproof way to get them bone-dry is to pop them back on the grill. A few minutes over a gentle flame will evaporate every last water molecule, stopping that dreaded "flash rust" in its tracks.
Once they're completely dry and still warm to the touch, it's time to re-season. Grab a clean cloth and apply a very thin, even layer of a high-smoke-point oil—canola or grapeseed oil work great. Wipe it on, then wipe it off until it looks like there's almost nothing left.
Crank the heat up until the oil just starts to smoke, then turn it off and let everything cool down. That simple step rebuilds the essential protective layer, bringing your grates right back to their non-stick glory.
For a full breakdown of charbroiler care from top to bottom, be sure to check out our complete guide to commercial charbroiler cleaning.
Understanding when to perform these tasks is just as important as knowing how. It's easy to confuse the quick daily upkeep with a full-blown deep clean, but they serve very different purposes in a busy kitchen.
Daily Maintenance vs Deep Cleaning Tasks
| Task | Frequency | Time Required | Primary Goal |
|---|---|---|---|
| Scraping & Oiling | Daily (after service) | 5-10 minutes | Remove fresh food debris and maintain the non-stick surface. |
| Burn-Off | As needed (for minor buildup) | 10-15 minutes | Carbonize small amounts of residue for easy scraping. |
| Deep Scrub (with soap) | Monthly or Quarterly | 20-30 minutes | Remove heavy, polymerized grease buildup that daily cleaning misses. |
| Full Re-Seasoning | After a deep clean or rust removal | 15-20 minutes | Restore the protective, non-stick layer of seasoning on the iron. |
This table helps clarify the different levels of care. Daily tasks are about prevention, keeping things in top shape shift after shift. The deep clean is your periodic reset, ensuring the grill performs flawlessly for the long haul.
For restaurant owners looking to build a kitchen around reliable, high-performance equipment, our wide selection of commercial charbroilers has you covered. We offer powerful infrared, precise gas, and efficient electric char broilers, all designed for the rigors of a commercial environment.
The Science of Seasoning Your Cast Iron Grill
That beautiful, slick, non-stick surface on a cast iron grill isn't some factory coating—it's earned. The real secret is a process called polymerization. It's just a fancy way of saying you’re turning liquid oil into a solid, protective layer, and it’s the absolute foundation of cast iron performance.
Here’s what’s happening on a molecular level. When you rub a thin layer of the right oil onto cast iron and heat it past its smoke point, the fat molecules literally break down and reorganize. They bond with each other and fuse directly into the porous surface of the iron, creating a tough, plastic-like coating.
This isn’t just oil sitting on top of the metal; it's a completely new, hardened layer that is chemically bonded to the grill. This does two incredible things: it fills in the microscopic pits and pores to create that prized non-stick surface, and it forms a barrier against oxygen and moisture—your number one defense against rust.
Building Your First Layer of Seasoning
For brand-new grates, or ones you’ve just stripped down to bare metal, this initial seasoning is everything. It truly sets the stage for years of reliable cooking.
First, wash the grates with a little soap and water to get rid of any factory residue, then dry them completely. The best way to do this is right on the grill over low heat to make sure every bit of moisture is gone.
Once they're dry and warm to the touch, apply a very thin coat of a high-smoke-point oil. I always recommend grapeseed, canola, or basic vegetable oil. These are your best bets for building a durable finish that will last.
Apply the oil with a paper towel, then grab a clean one and wipe it all off until the grate looks almost dry. Any leftover oil will just turn into a sticky, gummy mess instead of that hard, protective layer you're after. Less is definitely more here.
Now, heat the grill until you see the oil start to smoke, then let it cool down completely. You’ll want to repeat this whole process three to five times to build up a solid foundational layer. Learning how to properly season cast iron grates is a fundamental skill that pays off big time in any professional kitchen.
Maintaining and Strengthening the Seasoning
A good base is just the start. Consistent care is what transforms that base into a bulletproof, non-stick surface. For restaurant owners managing a wide selection of cooking equipment—from infrared and gas to electric charbroilers—making this a habit is the key to longevity.
The numbers don't lie. Data shows that about 65% of grill owners perform daily cleaning. Among those who grill often, over 80% report that a quick seasoning after each cleaning dramatically cuts down on sticking and rust.
This simple habit can extend the life of your grates by as much as 50%. You can dig deeper into these grill maintenance findings on argentineasado.com. This really drives home why a quick, post-service seasoning isn't just a suggestion—it's a best practice for protecting your investment in high-quality commercial charbroilers.
Look, I've seen it happen a thousand times. A chef puts in all the work to clean their cast iron, only to make one simple mistake that sends them right back to square one—or worse, damages the grates for good. Knowing how to clean these things is half the battle; knowing what not to do is the other, more important half.
Let’s get one thing straight: never, ever soak your cast iron grates. It seems like a logical way to loosen up that stubborn, baked-on gunk, but water is the absolute arch-nemesis of cast iron. The metal is porous, meaning it drinks up moisture and will start to rust almost instantly. A quick scrub and rinse? Fine. A long bath in the sink? You’re asking for trouble.
That "Easy Clean" Promise Can Ruin Your Grates
It’s tempting to reach for the heavy-duty stuff—oven cleaners, aggressive degreasers—but that's a huge mistake. Those chemicals are designed to strip everything off a surface, and they'll take that beautiful, non-stick seasoning you've worked so hard to build right along with the grime. It leaves the raw iron completely exposed and vulnerable.
And please, keep your grates out of the dishwasher. It’s the perfect storm of everything cast iron hates: tons of water, high heat, and harsh detergents. Running them through a cycle is the fastest way I know to strip the seasoning and invite a full-blown rust invasion. Always wash by hand. No exceptions.
Taking care of cast iron this way isn't some new-age kitchen hack. People have known since the 19th century that bad cleaning habits lead to rust and make food taste off. Long before we had fancy scrapers, they were cleaning grills and seasoning them with animal fats. You can learn more about these traditional cast iron care techniques and see how little the core principles have changed.
Don't Skip the Final Touches
Here’s where a lot of people drop the ball: drying. Even a tiny bit of leftover water can cause flash rust—those annoying orange spots that show up out of nowhere. The best way to make sure they're bone-dry is to put them back on the grill over low heat for a few minutes. Let the heat do the work and evaporate every last drop.
Finally, don't forget to re-oil after a deep clean. This isn't just for brand-new grates. Wiping on a fresh, thin coat of oil reinforces that protective layer that keeps your equipment in prime condition. It doesn't matter if your kitchen runs on infrared, gas, or electric char broilers; this last step is what ensures your grates are seasoned, protected, and ready for the next service.
Troubleshooting Common Cast Iron Grill Problems
Even when you've nailed down a perfect daily cleaning ritual, cast iron can throw you a curveball. One day your grill is laying down flawless sear marks, and the next, you’re staring at annoying rust spots or dealing with food that inexplicably glues itself to the grates. Don't panic. These are common issues, and the fixes are usually straightforward.
Think of this as your field guide for grill first aid. Knowing how to diagnose and treat these minor problems quickly will keep your equipment performing at its peak and stop small issues from turning into major headaches.
Tackling Annoying Rust Spots
Seeing a patch of orange rust on your grates is disheartening, I get it. But it's usually just a surface-level problem. It means a small area of the seasoning has worn thin, letting moisture get to the raw iron underneath. How you fix it depends on how bad it is.
For minor spots, a little elbow grease is all you need. Drizzle some vegetable oil on the area and scrub it with a firm, non-abrasive pad or even a wadded-up ball of heavy-duty foil. The oil helps lift the rust while protecting the seasoning around it.
If you're dealing with more stubborn patches, you might need to break out the steel wool. After scrubbing, wipe the area clean, dry it thoroughly with heat, and then apply a fresh, thin layer of seasoning oil. For a deeper dive, our guide on how to remove rust from a grill provides a complete walkthrough: https://charbroilers.com/blogs/chabroilers/how-to-remove-rust-from-grill
Why Is Food Suddenly Sticking?
If your once-perfect non-stick surface starts grabbing onto food, it’s a dead giveaway that your seasoning layer needs some attention. This usually happens for one of two reasons: either the seasoning has been weakened by acidic ingredients (like tomato sauce or citrus marinades) or it has been accidentally scraped away during cleaning.
The solution is all about reinforcing that protective layer. After your daily scrape-down, take an extra minute to do a quick "touch-up" seasoning. Just apply a very thin coat of a high-smoke-point oil and heat the grill for a few minutes. This simple step helps patch any weak spots and brings back that slick, non-stick performance you rely on.
A flaking or peeling seasoning layer is a different beast altogether. This means the original layers of oil were put on way too thick, creating a brittle, uneven coat instead of a durable, polymerized surface. In this case, your best bet is to strip the grates back to bare metal and start the seasoning process from scratch.
Finding the Right Commercial Charbroiler
The foundation of exceptional grilled food isn't just your technique—it's the equipment you trust day in and day out. While knowing how to clean cast iron barbecue grill components is vital, starting with the right unit sets your kitchen up for success from day one.
Choosing the perfect commercial charbroiler really comes down to three things: your menu, your kitchen layout, and what kind of fuel you have access to.
Our extensive selection of commercial charbroilers is built to handle the diverse demands of a professional kitchen. We offer a wide range of high-performance models designed to elevate your workflow and, most importantly, the food you send out.
Choosing Your Ideal Heat Source
Let's break down the main types of charbroilers. Getting this right is the key to matching the equipment to what your restaurant actually needs.
-
Infrared Charbroilers: These are the champs for delivering intense, even heat that seriously cuts down on flare-ups. The result? Faster cooking times and juicier burgers and steaks. If you're running a high-volume operation, our selection of infrared units is where you want to look.
-
Gas Charbroilers: A true kitchen workhorse. Our gas units give chefs that precise, immediate temperature control they love. Their responsiveness is perfect for kitchens grilling a wide range of items, from delicate seafood that needs a soft touch to thick-cut meats that need a hard sear.
-
Electric Charbroilers: If your building has gas line restrictions or specific ventilation requirements, don't sweat it. Our electric char broilers provide an efficient and powerful solution without forcing you to compromise on quality, making them a great choice for any restaurant.
Cast Iron Grill FAQs from the Trenches
When you're running a busy kitchen, you don't have time for guesswork. Taking care of cast iron grills always brings up a few key questions, especially when you're trying to keep things moving during a dinner rush. Let's clear up some of the most common ones I hear from chefs and kitchen managers.
Can I Really Use Soap on My Cast Iron Grill?
This is probably the number one question, and the answer is: yes, but carefully. For your daily wipe-down, soap is overkill and can actually start to break down that beautiful seasoning you’ve worked so hard to build. Just hot water and a good scraper are your best friends here.
However, if you're facing a serious, caked-on mess after a particularly busy service, a tiny bit of mild dish soap isn't going to ruin everything. The trick is to be surgical. Hit the problem spots, scrub, and rinse with hot water immediately. The most important step? You must dry the grates completely. The easiest way is to pop them back on the grill over low heat until every drop of moisture is gone. Then, finish by wiping on a fresh, super-thin coat of seasoning oil to patch up the protective layer.
What’s the Best Way to Tackle Rust?
Seeing a spot of rust can make your heart sink, but don't panic. It's almost always a simple surface issue that's easy to fix. For minor rust, just put a little cooking oil on the spot and give it a good scrub with a stiff brush or even a crumpled-up ball of aluminum foil. The oil helps lift the rust without scraping away the good seasoning around it.
If you're dealing with a more serious patch of rust, you'll need to bring out the steel wool. Get in there and scrub off all the orange stuff right down to the bare metal. Once it's gone, wash the grate with a little soapy water, dry it completely on the grill, and then go through a full re-seasoning process. You're basically building that non-stick surface back up from scratch.
Your cleaning routine is the bedrock of consistent grilling, but remember that the grill itself matters. The nuances of infrared, gas, and electric char broilers differ, but the fundamental need for proper cast iron care never changes. Knowing your specific unit inside and out is the key to making it last.
Which Oil Should I Be Using for Seasoning?
When it comes to seasoning, it’s all about the oil's smoke point. You need an oil that can handle high heat, polymerize (that's the magic chemical reaction that creates the non-stick surface), and not turn into a sticky, burnt mess.
Here’s the breakdown:
- Your Go-To Oils: Grapeseed, canola, and basic vegetable oil are perfect. They have high smoke points and create a tough, durable seasoning layer that performs beautifully.
- Oils to Keep Away: Steer clear of oils with low smoke points, like extra virgin olive oil. It will just burn and smoke at seasoning temperatures, leaving you with a gummy, flaky coating that does more harm than good.
The real secret is in the application: wipe on a very thin layer of oil, and then pretend you made a mistake and wipe it all back off with a clean cloth. The microscopic film left behind is exactly what you want.
At Charbroilers, we know that no two kitchens are the same. That's why we carry a wide selection of commercial charbroilers designed for any scenario—from high-powered infrared models that deliver incredible searing power, to versatile gas units for chefs who demand precise control, and even efficient electric char broilers for locations with fuel or ventilation constraints. See what fits your restaurant's needs by exploring our full collection at https://charbroilers.com.