
How to Season Cast Iron Grates for a Perfect Finish
Seasoning your cast iron grates is an old-school trick that’s absolutely essential. It’s a simple process: you apply a super-thin layer of oil and then heat the grates until that oil bakes on, creating a natural, non-stick cooking surface. This technique, called polymerization, is what stops rust in its tracks and builds up that slick, durable coating that just gets better every time you grill. The result? Perfect sears and cleanup that doesn't feel like a chore.
Why Seasoning Cast Iron is a Grilling Game Changer
Ever wonder how seasoned chefs get those perfect sear marks and stop food from sticking, every single time? The secret is in their well-seasoned cast iron grates. This isn’t just some cleaning step you can skip; it's the foundation that transforms your grill's performance from good to great.
The process is simple science. When you apply oil to cast iron and heat it up, the fats bond to the metal and create a hard, slick cooking surface through polymerization.
But this natural coating does a lot more than just prevent food from sticking. It’s doing several crucial jobs behind the scenes that take your grilling game from average to exceptional.
- Rust Prevention: Cast iron is tough, but it's also porous and loves to rust when it gets wet. A good layer of seasoning creates a barrier that seals out moisture and stops corrosion before it can even start.
- A Natural Non-Stick Surface: Forget chemical coatings that flake off. A proper seasoning builds a slick layer that actually improves with use, making it easy to flip delicate stuff like fish or veggies without tearing them apart.
- Even Heat Distribution: A seasoned grate spreads heat more evenly across the entire surface. This gets rid of those annoying hot spots that scorch one part of your food while leaving another part undercooked.
The art of seasoning cast iron is fundamental to its performance and longevity. This technique comes from traditional cooking, where heating oil on the iron creates a tough, non-stick, and rust-proof coating that seriously enhances how it distributes heat.
Ultimately, knowing how to season cast iron grates is what unlocks the real potential of your grill. For restaurant pros trying to get consistent, high-quality results, the right equipment is just as critical. Paired with perfectly seasoned grates, the right gear ensures flawless performance, dish after dish.
Getting Your Grates Ready for a Flawless Seasoning
Before you can even think about building that beautiful, non-stick seasoning, you've got to give your cast iron grates a fresh start. The game plan is a little different depending on whether you're unboxing them for the first time or bringing some well-loved (and maybe a little rusty) ones back to life.
For new grates, the job is pretty simple. You just need to get rid of the protective wax coating the factory puts on to stop rust in transit.
What to Do with Brand-New Grates
Most new grates arrive with a thin, food-safe wax on them. All it takes is a good scrub with a stiff brush or a scouring pad and a little mild dish soap to get it off. Give them a thorough rinse with hot water afterward to make sure every bit of soap is gone.
This prep work isn't just for looks. When you properly prepare and season cast iron, you can cut down on rust and degradation by 70-90% with regular upkeep. Bare, unseasoned iron that gets wet can start to oxidize in no time, which messes with your cooking and the grate's long-term health. You can find more industry insights on cast iron care that back this up.
Bringing Old or Rusted Grates Back to Life
If you're dealing with older grates that are showing their age with a bit of rust, the process takes a little more elbow grease, but it’s just as straightforward.
- Break out the Wire Brush: Grab a sturdy wire brush and really go to town on any visible rust spots. You want to scrub right down to the bare, clean metal underneath.
- Give Them a Good Wash: Once you've brushed off the rust, wash the grates with warm water and a small amount of dish soap. This gets rid of all the rust dust and any old grime that's hanging on.
- Rinse Like You Mean It: Make sure you rinse the grates completely. You don't want any soap left behind.
Here's the most critical step for both new and old grates: they have to be bone-dry. Any moisture left on the surface will cause flash rust almost instantly, and all that hard work will be for nothing.
The surefire way to get them perfectly dry is to pop them in a warm oven or on your grill over low heat for about 10-15 minutes. This little trick drives off every last molecule of moisture, creating the perfect canvas for that first layer of seasoning oil.
Now your grates are prepped and ready for the main event.
Building That Perfect Seasoned Surface
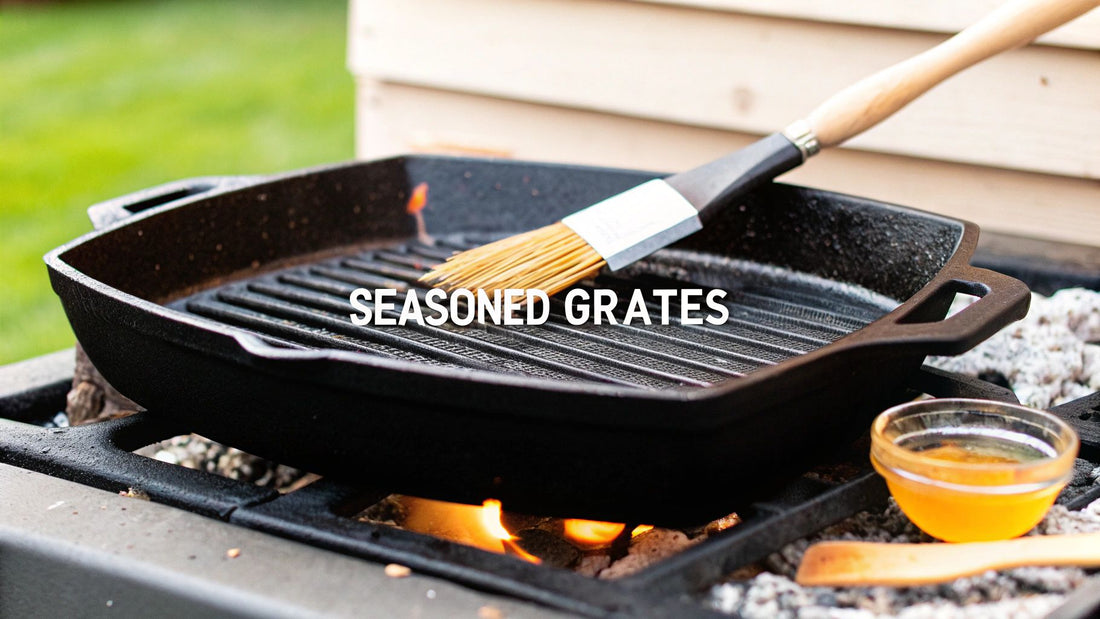
Alright, your grates are clean, dry, and ready to go. Now for the fun part—the alchemy that transforms bare iron into a slick, non-stick cooking surface. This process is called polymerization, which is just a fancy way of saying we're going to bake oil onto the metal until it creates a tough, plastic-like coating.
The biggest secret to a flawless finish? It’s not about slathering on the oil. It’s actually the complete opposite. You need an incredibly thin, almost invisible layer.
Applying the Perfect Oil Coat
Your mission here is to get a whisper-thin layer of oil over every square inch of the iron, with absolutely no drips or pools. A lint-free rag or a sturdy paper towel is your best friend for this job. Think of it like you're waxing a car—you want a minimal, even layer that you buff until it barely looks wet.
This simple step of rubbing in the oil is where a good seasoning foundation begins.
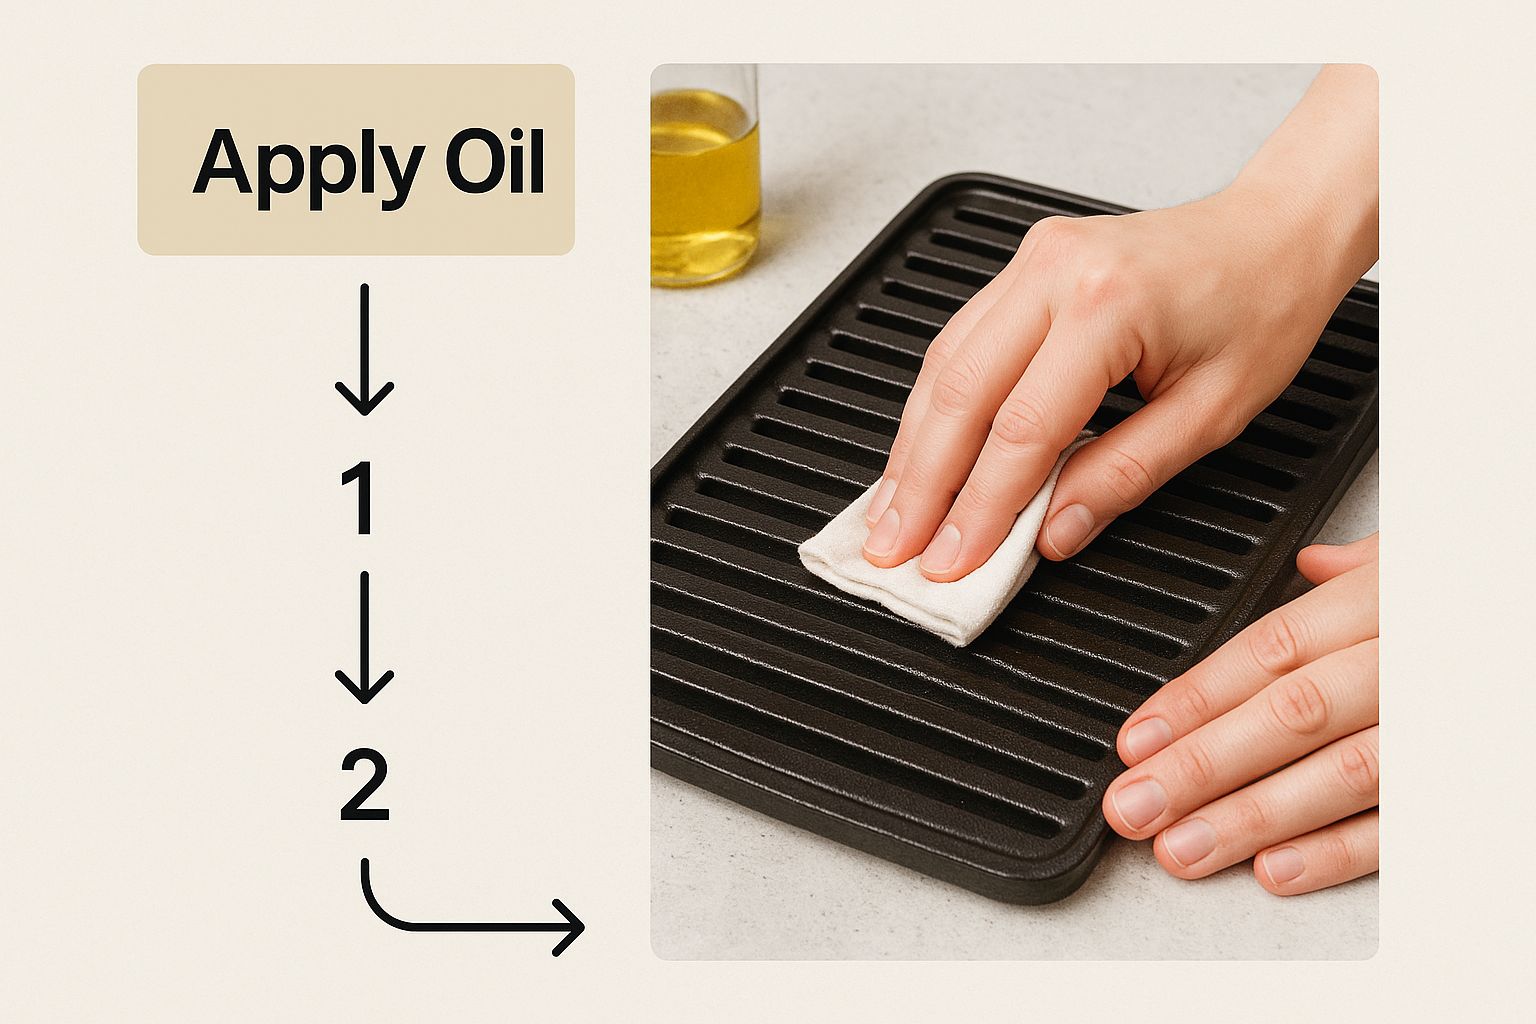
After you've applied the oil, grab a new, clean cloth and wipe the grates all over again. I know, it feels completely wrong, like you're undoing your work. But trust me, this is the most critical step to prevent a sticky, gummy disaster. You're just removing the excess, leaving behind the microscopic film that will actually bond to the iron.
Choosing the right oil can make a difference, but you don't need anything fancy. Most common cooking oils will do the trick, but they have different smoke points and characteristics.
Choosing the Right Oil for Seasoning Cast Iron
| Oil Type | Smoke Point (Approx.) | Key Benefit | Consideration |
|---|---|---|---|
| Grapeseed Oil | 420°F (216°C) | Neutral flavor, affordable, and polymerizes well. A great all-around choice. | Can sometimes be harder to find than other oils. |
| Canola/Vegetable Oil | 400°F (204°C) | Inexpensive and available everywhere. A reliable workhorse. | Can produce a slightly softer seasoning layer initially. |
| Flaxseed Oil | 225°F (107°C) | Creates the hardest, most durable seasoning layer due to its high omega-3 content. | Expensive, has a low smoke point, and can be prone to flaking if not applied perfectly. |
| Lard/Bacon Grease | 370°F (188°C) | The traditional choice. Imparts a fantastic flavor and builds a slick surface. | Not suitable for vegetarian/vegan cooking; can go rancid if stored improperly. |
Ultimately, consistency is more important than the specific oil you choose. Pick one that's accessible and stick with it.
The Heating Process: Oven vs. Grill
Once your grates are oiled and wiped down, it's time to bring the heat. You can do this in your kitchen oven or right on your grill—the goal is the same. You need to get the iron hotter than the oil's smoke point and hold it there for a good while.
A target temperature of 450-500°F (232-260°C) is the sweet spot for most common oils.
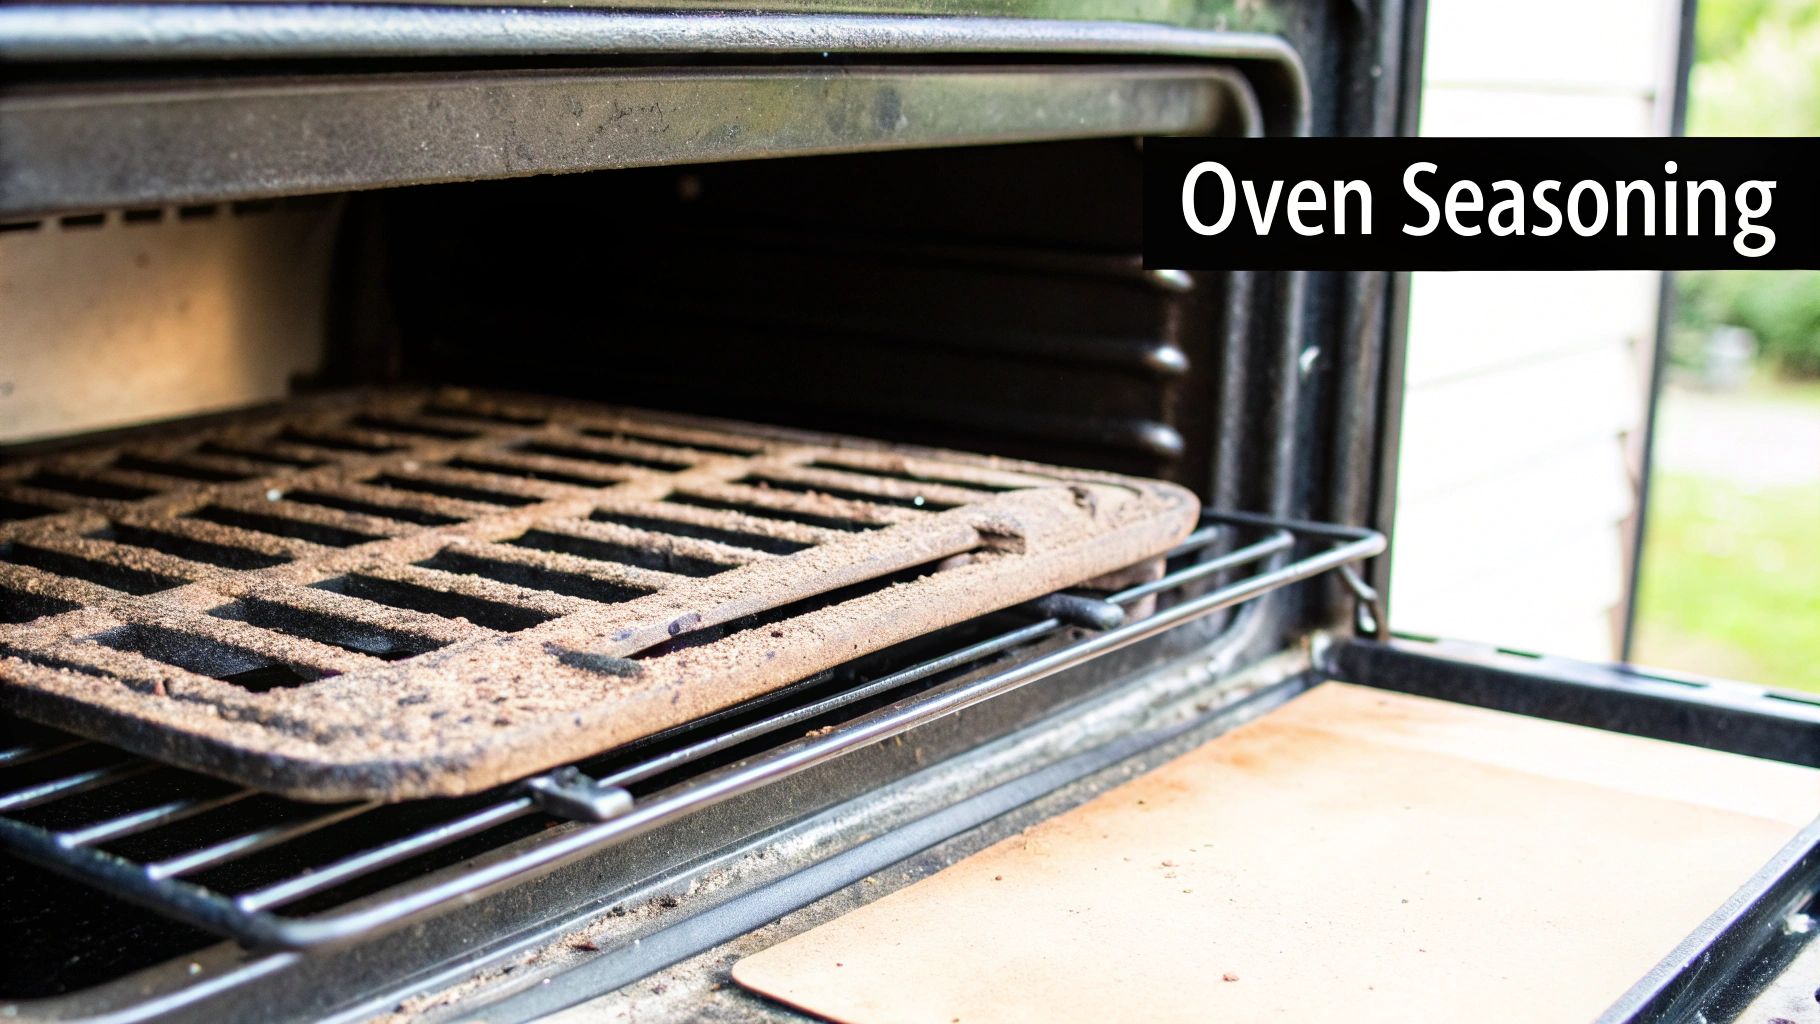
- Using an Oven: Pop the grates in upside down on a middle rack. This simple trick prevents any rogue oil drips from pooling on the cooking surface. Bake them for one hour, then just turn the oven off and let them cool down completely inside without opening the door.
- Using a Grill: Put the grates back in place, close the lid, and crank the heat up to 450-500°F. Let them bake in that heat for at least 45-60 minutes. Then, kill the heat and let them cool down with the grill.
This high-heat process is what transforms that liquid oil into a hard, slick coating. If you're new to this style of cooking, understanding your equipment is half the battle. To get a better handle on different grill types, take a look at our guide on what is a charbroiler.
The number one mistake people make is using too much oil. A thick coat won't polymerize correctly, leaving you with a sticky, splotchy surface instead of that beautiful, non-stick finish. Less is always more.
For a brand-new grate or one you've just stripped down to bare metal, I highly recommend repeating this whole process—oiling, wiping, and baking—at least two or three times. Each layer builds on the last, creating a rock-solid, resilient surface that will make grilling an absolute pleasure for years to come.
Keeping Your Seasoning Strong and Fixing Common Problems
A great seasoning layer isn't something you create once and forget about. It's an ongoing relationship with your cast iron. The good news? Daily care is incredibly simple and takes just a few minutes after each cookout. This quick routine is the real secret to keeping that perfect, non-stick surface you worked so hard to build.
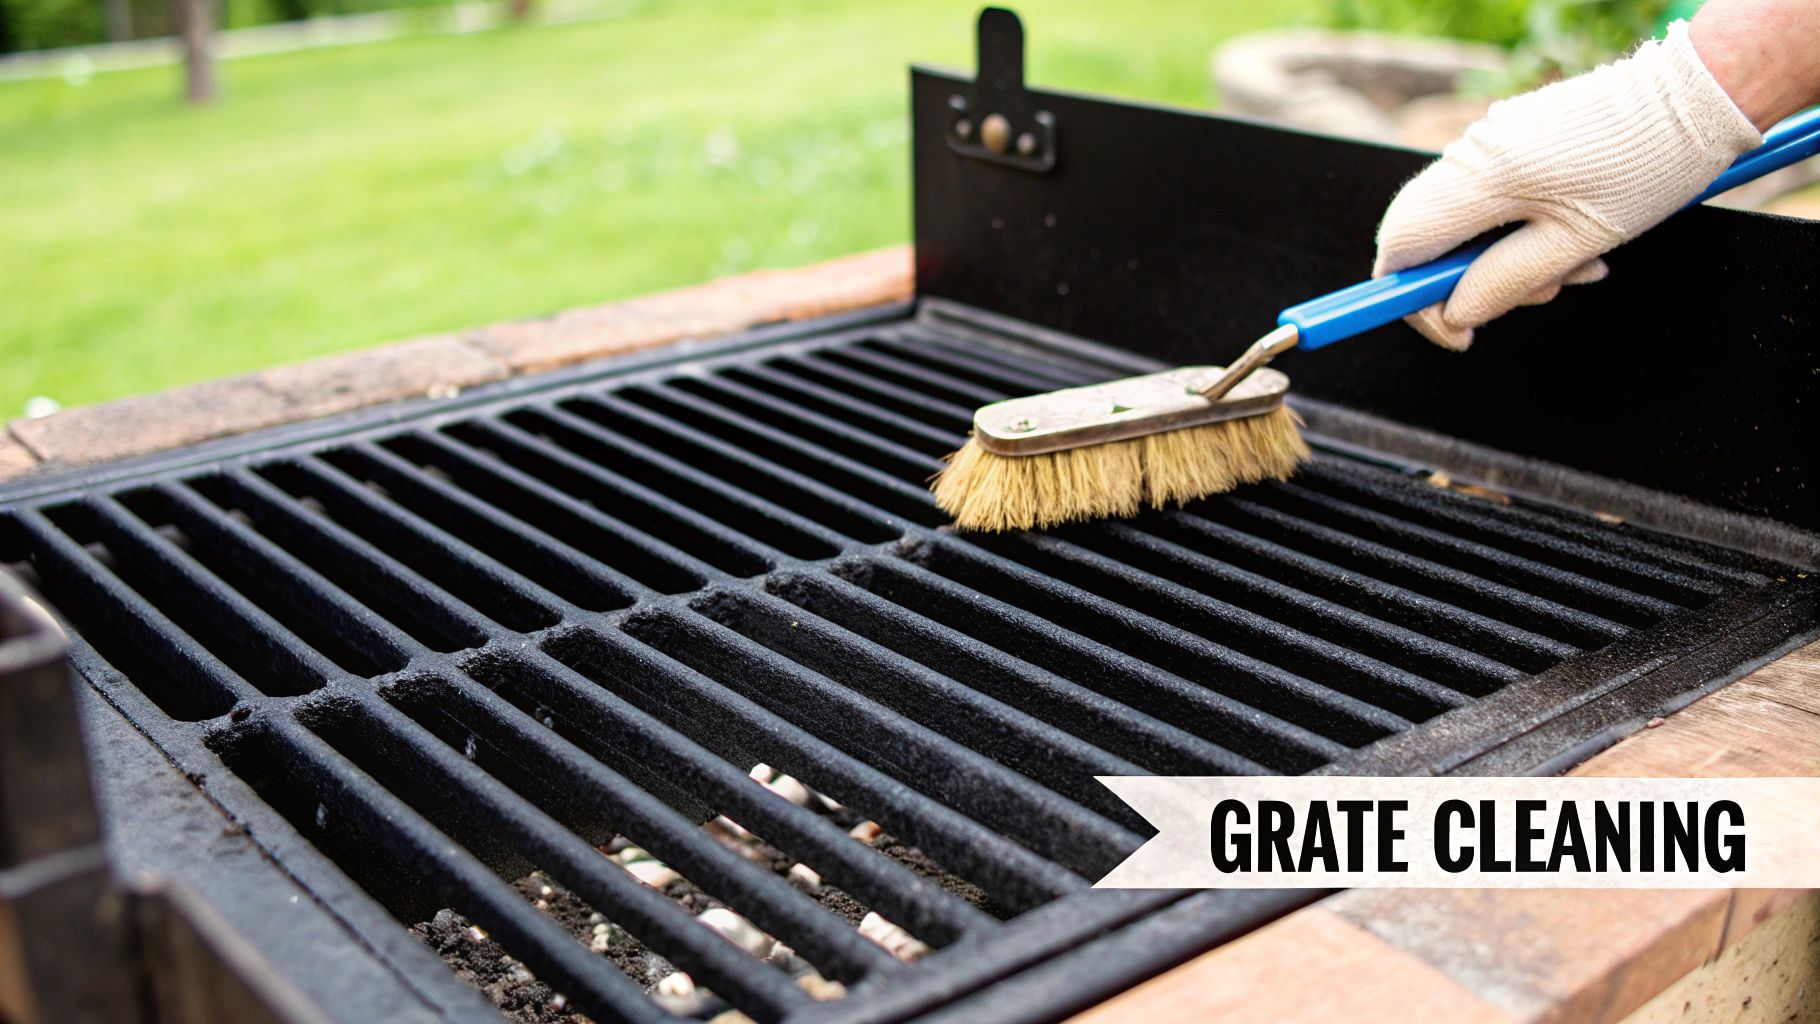
Think of it as your post-grill ritual. Once the grates are cool enough to handle but still have some warmth, give them a good scrape with a grill brush to knock off any leftover food. A quick rinse with hot water, a thorough drying, and then you'll apply one last, whisper-thin layer of oil. That residual heat helps the oil spread evenly and bond to the iron, reinforcing the seasoning for your next meal.
Troubleshooting Those Inevitable Seasoning Hiccups
Even with the best care, you're going to run into a few bumps along the road. Don't sweat it. Most issues are easy fixes and are just part of the learning curve with cast iron.
- Pesky Rust Spots: See a few orange patches? That's just a sign that some moisture got to the bare iron. Simply scrub the rust away with a wire brush or some steel wool. Wash and dry that spot completely, then dab on a thin coat of oil before heating the grates for a bit.
- A Sticky or Gummy Surface: This is the most common rookie mistake, and it almost always comes from using way too much oil. When there's excess, it can't fully polymerize, leaving behind a sticky mess. The fix is to give the grates a good scrub with soap and hot water to cut through that gummy layer, then you can start the seasoning process over.
- Flaky Seasoning: If your seasoning is peeling off in spots, it could be from a weak initial bond or from using an oil like flaxseed, which can sometimes turn brittle. Just scrape off any loose flakes, wash and dry the grate, and then build the layer back up with a few new, thin coats of a different oil.
The most important thing to remember is that cast iron is incredibly forgiving. There's almost no problem—from a bit of rust to a completely botched seasoning job—that can't be fixed by stripping the grates down to bare metal and starting fresh.
Beyond your initial efforts, consistent care is what truly matters. For a deeper dive, you can find some excellent tips for maintaining your cast iron cookware that will help it last a lifetime.
Equip Your Kitchen with Professional Charbroilers
In any professional kitchen, your equipment is your workhorse. Consistency and quality aren't just goals; they're requirements, and that starts with high-performance gear. The magic of a perfectly seasoned cast iron grate is something home cooks love, but in a commercial kitchen—where every minute counts—that durability and performance become absolutely non-negotiable.
We offer a wide selection of commercial charbroilers for your restaurant, built to take a beating day in and day out while delivering incredible results. Whatever your kitchen's demands or specific performance needs, we've got you covered.
Find the Perfect Fit for Your Kitchen
- Gas Charbroilers: These are the classic choice, the go-to for chefs who want that authentic, flame-grilled flavor customers can't get enough of.
- Infrared Charbroilers: If precision and efficiency are your game, these are for you. Infrared models give you incredibly even heat control and seriously cut down on those pesky flare-ups.
- Electric Charbroilers: A powerful and versatile option, especially for kitchens with gas line restrictions or for operators who just want plug-and-play simplicity.
It’s no secret that chefs are leaning back into durable, natural cookware. The demand for cast iron continues to climb, with North America leading the charge. The market is projected to grow at a compound annual rate of around 5%, driven by a preference for gear that's built to last. You can dive deeper into the numbers with this global cast iron cookware market report from dataintelo.com.
The bottom line is simple: when you pair our top-tier equipment with the seasoning techniques we've laid out here, you create a formula for flawless cooking. It’s how you guarantee every dish hits the table with the perfect sear and amazing flavor, service after service.
Common Questions About Seasoning Cast Iron Grates
Even after years of working with cast iron, questions still pop up. Getting the finer points of seasoning right can save you a lot of headaches down the line and keep your grates in perfect grilling shape. Let's tackle some of the most common questions I hear.
What Is the Best Oil for Seasoning?
The best oils for the job are the ones with a high smoke point. Think grapeseed oil, canola oil, or even plain old vegetable shortening. These are affordable, easy to find, and they polymerize beautifully under heat, creating that tough, non-stick layer we're all after.
You’ll see some folks swear by flaxseed oil, and while it can create a famously hard finish, it's also notoriously finicky. If you don't apply it just right, it can get brittle and start flaking off. Honestly, the most important thing isn't which oil you choose, but that you apply it in a super-thin, even layer and wipe off every last bit of excess.
How Often Should I Re-Season My Grates?
A full, strip-it-down-to-the-metal re-seasoning is an emergency procedure. You only need to do it for big problems like a serious rust takeover or if the seasoning is badly flaked and damaged.
For regular upkeep, a simple wipe-down with a light coat of oil after you clean the grates is all you need. If you want to really build up a bulletproof surface, doing a more involved session—maybe two or three fresh, baked-on layers—once or twice a year is a great idea.
The old wive's tale about never, ever using soap on cast iron comes from the days when soap was made with harsh lye that would eat seasoning for breakfast. Modern, mild dish soaps are totally fine for a well-seasoned grate and won't hurt it a bit.
Why Is My Seasoning Sticky?
If your grate feels sticky or gummy, I can tell you the problem without even looking: you used too much oil. It’s the #1 rookie mistake.
When the oil goes on too thick, it can't fully bake into that hard, slick polymer layer. Instead, it just sort of pools and turns into a tacky, half-cured mess.
Thankfully, the fix is easy. Just give the grate a good scrub with hot, soapy water to get that gummy residue off, and start the seasoning process over. This time, really focus on wiping away the oil until the grate looks almost dry before you bake it. Less is definitely more.
For culinary professionals seeking consistent results, pairing these techniques with the right equipment is key. At Charbroilers, we offer a wide selection of commercial charbroilers built for performance, including powerful gas, efficient infrared, and versatile electric models for any restaurant. Explore our collection at https://charbroilers.com.