
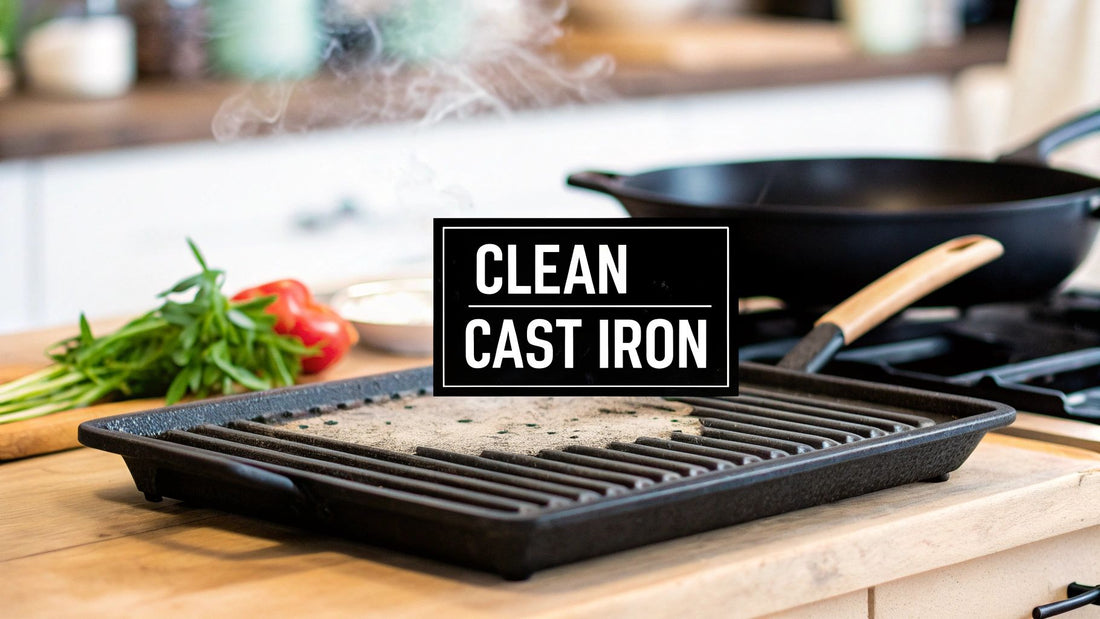
How to Clean Cast Iron Grill: Easy Tips for Perfect Results
Cleaning your cast iron grill grates is pretty straightforward. While the grill is still warm, just scrape off any leftover food bits, give it a gentle scrub with a wire brush, and then wipe the grates down with a lightly oiled cloth. This quick routine protects that all-important seasoned surface, keeps rust away, and makes sure your charbroiler is ready for the next service.
Why Bother Cleaning Your Cast Iron Grill?
Look, keeping your commercial cast iron grill clean is about way more than just appearances. It’s fundamental to the flavor you produce, the safety of your kitchen, and the lifespan of your equipment. All that built-up grease and carbon doesn't just look bad; it can make food taste bitter and burnt, cause dangerous flare-ups, and permanently wreck your charbroiler grates over time. In any professional kitchen, consistent cleaning is simply non-negotiable.
The magic of cast iron is its "seasoned" surface. This is a natural non-stick layer built up from oil polymerizing and bonding directly to the metal. You have to clean it in a specific way to protect that layer. If you hit it with harsh chemicals or scrub too aggressively, you'll strip that crucial coating right off, leading to rust and food that sticks like glue. Proper maintenance is all about preserving that seasoning, which ensures you get consistent results and protects your investment.
First, Size Up the Situation
Before you grab a brush, take a second to see what you’re up against. A quick look will tell you if you're dealing with a simple daily clean-up or if you need to schedule a more serious deep clean. Skipping this step is a classic mistake that can lead you to use the wrong method, potentially damaging the seasoning or just not getting the stubborn gunk off.
If you find your current setup is constantly needing a deep clean, it might be time to think about an upgrade. Exploring our wide selection of commercial charbroilers can give you the reliability you need for your restaurant. We offer models to suit any kitchen's demands and fuel type.
- Infrared Charbroilers are fantastic for that intense, even heat that gives you a perfect sear.
- Gas Charbroilers offer that classic grilling performance with very precise temperature control.
- Electric Char Broilers are a great solution for kitchens where running a gas line isn't an option.
This infographic breaks down a simple three-step process for checking out your grill before you get to work.
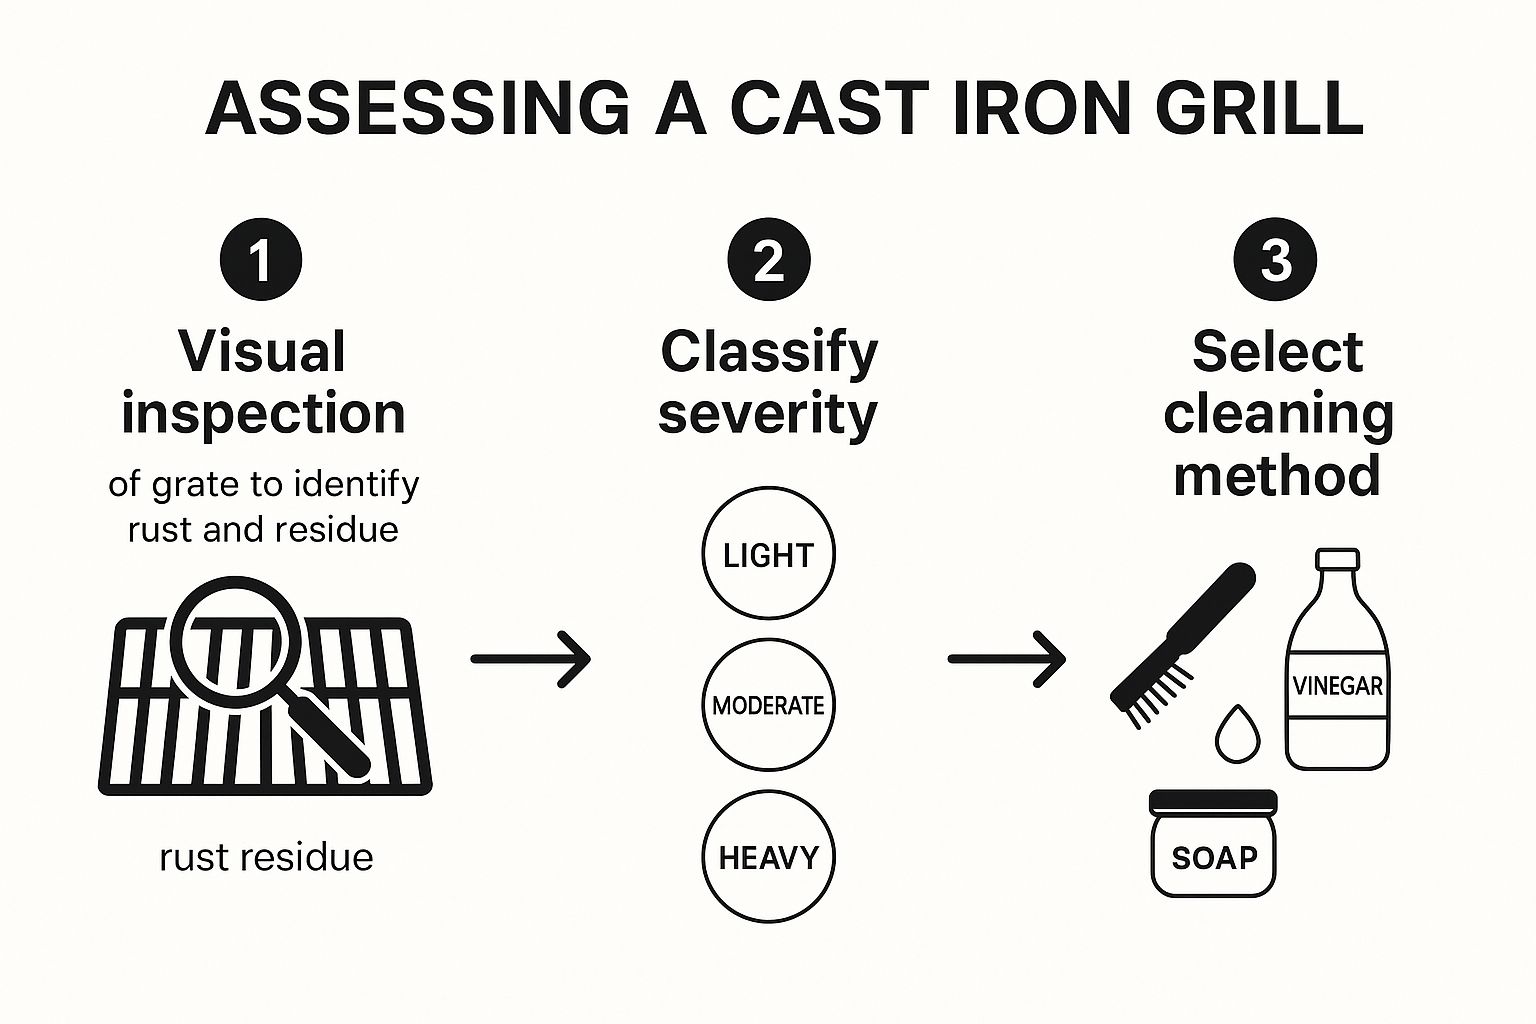
As you can see, figuring out if the residue is light, moderate, or heavy tells you exactly which cleaning method will be most effective. Of course, daily cleaning is just one piece of the puzzle. The big picture of holistic care is covered in things like comprehensive equipment maintenance checklists, which are designed to ensure any valuable asset lasts as long as possible.
Regular, thoughtful cleaning isn't just a chore. It's a core technique that extends the life of your charbroiler and guarantees every single dish you serve has the clean, pure flavor your customers expect. When you protect your seasoned surface, you're protecting your bottom line.
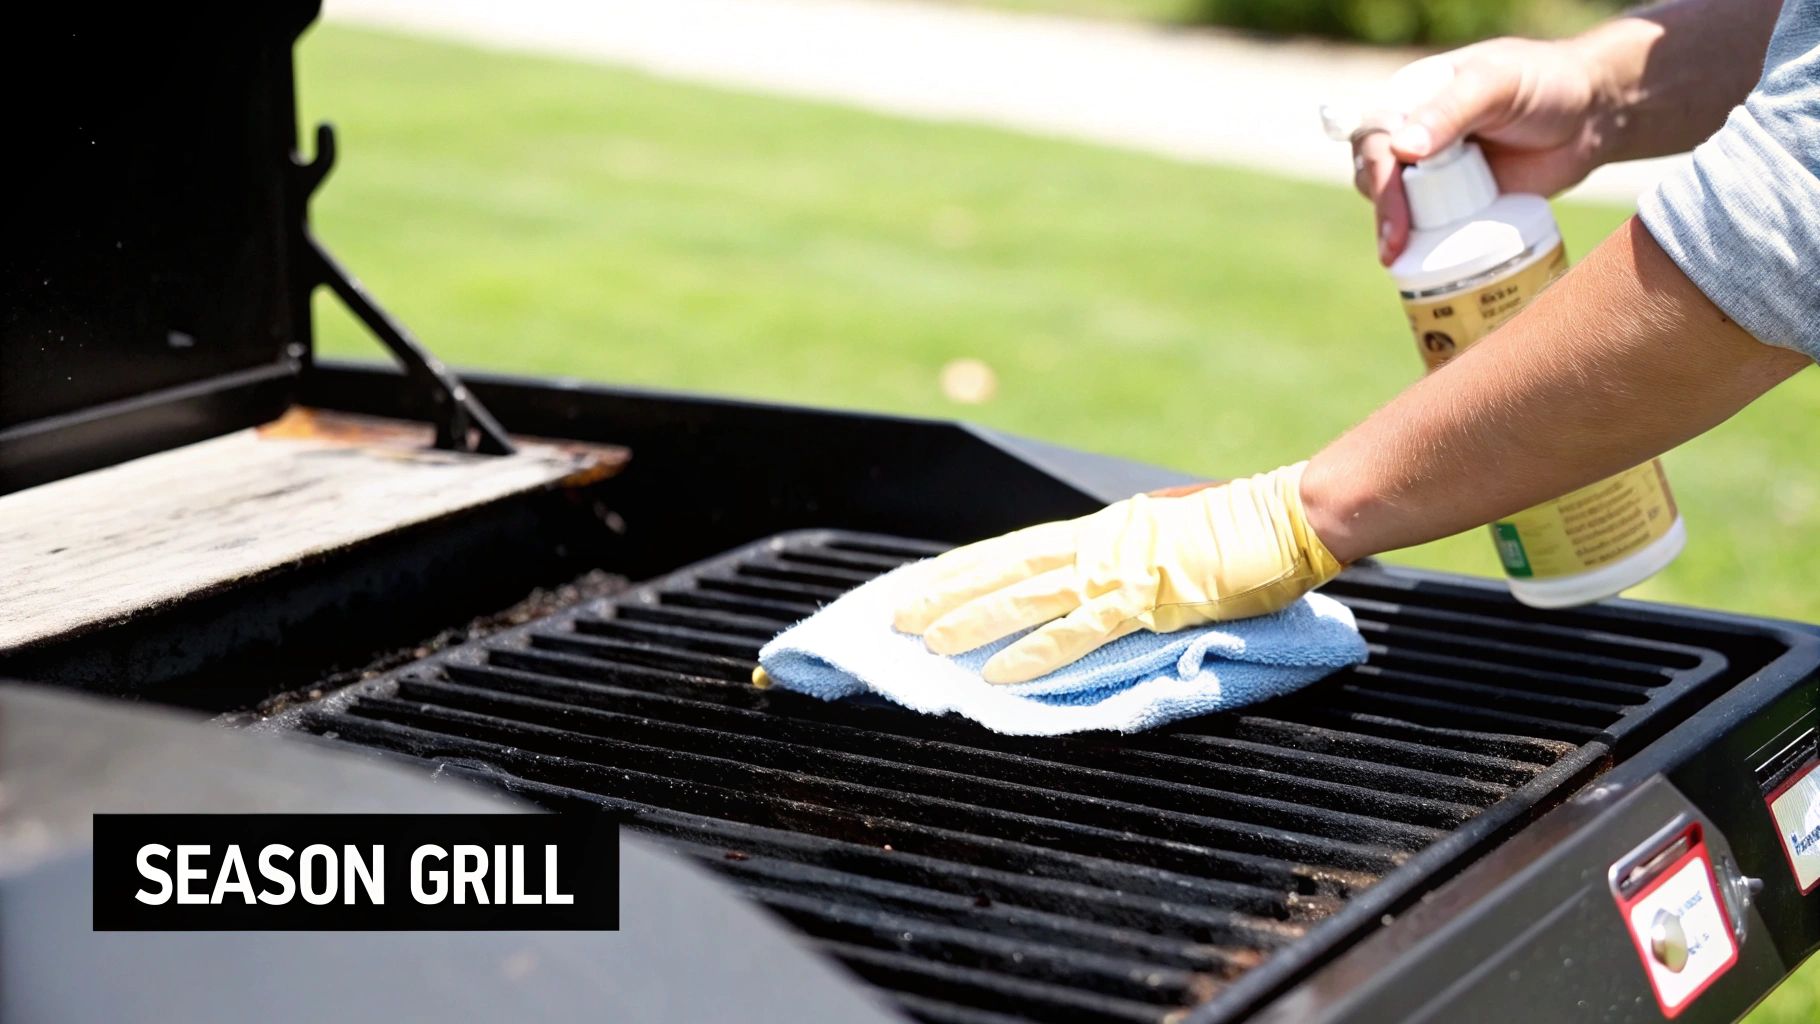
Your Daily End-of-Service Cleaning Routine
In a busy kitchen, a solid end-of-service routine is your best defense against the grease and carbon that builds up shift after shift. The most efficient method I’ve seen used in high-volume kitchens is the classic "burn and scrape" technique. It’s simple, effective, and protects that all-important seasoned surface on your cast iron grates.
This whole process is about letting high heat do the heavy lifting for you. The idea is to incinerate any stubborn food residue, turning it into brittle carbon that’s a breeze to scrape away. This completely avoids the need for harsh chemicals or excessive scrubbing that can strip away the seasoning you’ve worked so hard to build up.
The Burnout Process
First things first, crank up the heat. For this to work, you need to get the grill hot—I mean, really hot. Most pros will tell you to get the grill up to around 500-550°F to properly incinerate all the leftover grease and food particles. This intense heat blast, often called a "burnout," is what turns stuck-on marinades and fats into ash.
Just let the grates sit at that high temperature for about 15 minutes. You’ll see any gunk start to smoke and eventually turn into a white-gray ash. That's the signal you're looking for. It means the residue has carbonized and is no longer clinging to the iron.
Scraping and Wiping Down
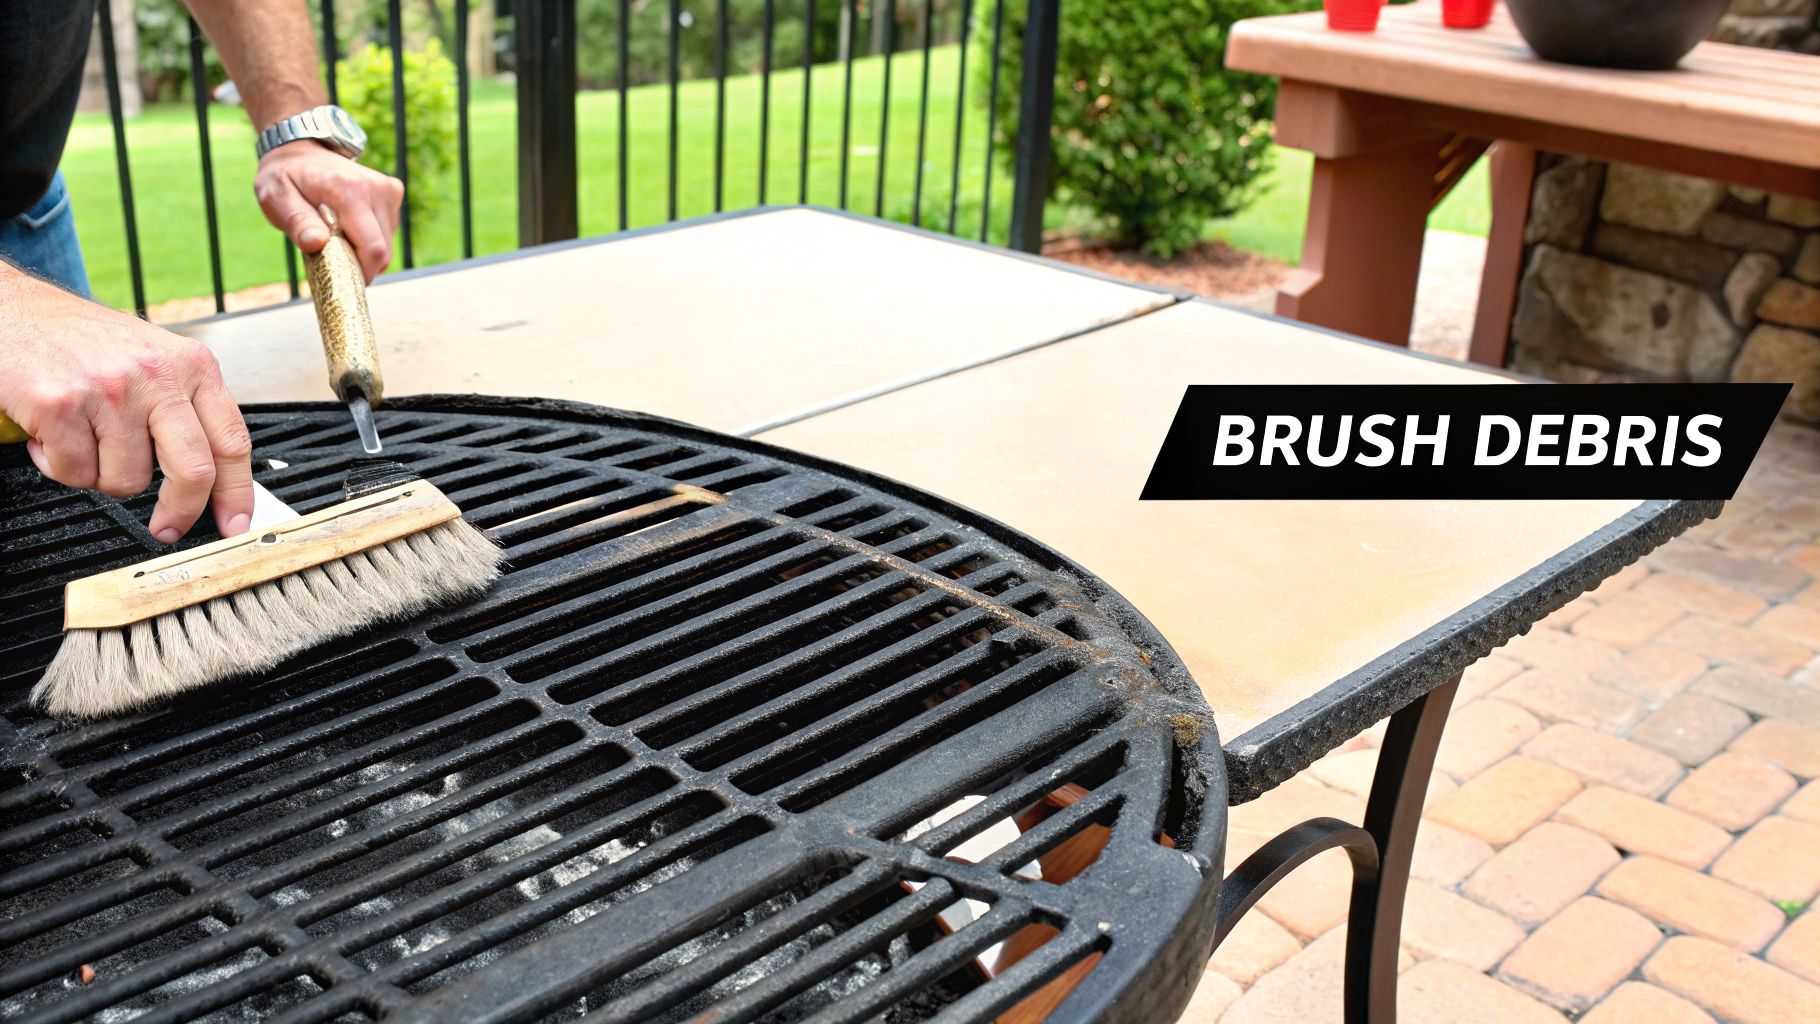
Once the burnout is done, it's scraping time. And using the right tool here is critical. A heavy-duty grill brush with brass or stainless steel bristles is your best bet—it's tough on carbon but won't tear up your cast iron. Stay away from standard steel wool; it’s just too abrasive and will strip that seasoning right off.
While the grill is still hot (but with the burners off), use firm, steady strokes to scrape the debris from the grates. Make sure you work in the direction of the grate bars to really get into those grooves. The ash should flake off without much of a fight.
The final step is the most important one: the wipe-down. While the grates are still warm (but not so hot they’ll ignite your towel), grab a clean, folded cloth or a wad of paper towels with some long-handled tongs. Dip it in a neutral, high-smoke-point oil like canola or vegetable oil, and give the entire surface a quick wipe.
This light coat of oil does two things at once. It picks up any leftover carbon dust, leaving the surface perfectly clean. More importantly, it lays down a fresh micro-layer of seasoning that protects the iron from moisture and rust until your next service. Skipping this step is one of the most common mistakes I see, and it leaves your grates vulnerable. For a more comprehensive look at grill care, check out our guide on https://charbroilers.com/blogs/chabroilers/how-to-clean-your-grill.
This daily habit is non-negotiable for keeping your equipment in top shape, whether you’re using infrared, gas, or electric charbroilers. It’s a small investment of time that pays off big in performance and longevity.
Even with the best daily habits, every busy commercial kitchen eventually runs into that stubborn, baked-on crud on the cast iron grill grates. It’s just a fact of life. When your daily burn-and-scrape routine just isn't cutting it anymore, it’s time to pull out the big guns for a proper deep clean. This is the method for tackling those thick layers of carbon that build up over weeks or months of heavy service.
First thing’s first: make sure the charbroiler is completely off and the grates are cool enough to handle. I can't stress this enough. Trying to wrestle with hot cast iron is a recipe for a nasty burn. Once they’re safe, carefully lift the grates off the charbroiler. Set them on a sturdy, protected surface—a heavy-duty prep table or your dedicated cleaning station is perfect.
Tackling Thick Carbon Layers
Now that the grates are out in the open, you have way better leverage to attack that gunk. Your best friends for this job are a stiff putty knife or a dedicated metal grill scraper. Forget the wire brush for now; these tools let you apply real, focused pressure to chip away at the thick, flaky layers of carbon that have basically become one with the iron.
Hold the scraper at a low angle and use some solid, controlled force to get under the buildup. Work your way across each grate, paying special attention to the areas with the heaviest deposits. You'll usually find the worst of it down between the bars where grease and food bits love to hide. The goal here isn't to strip it down to bare metal, just to knock off that excessive carbon crust.
Be patient with this part. Years of polymerized grease can be as tough as concrete, but it will give way eventually. Physically scraping it off is the best way to deal with extreme buildup without having to resort to methods that could wreck your core seasoning.
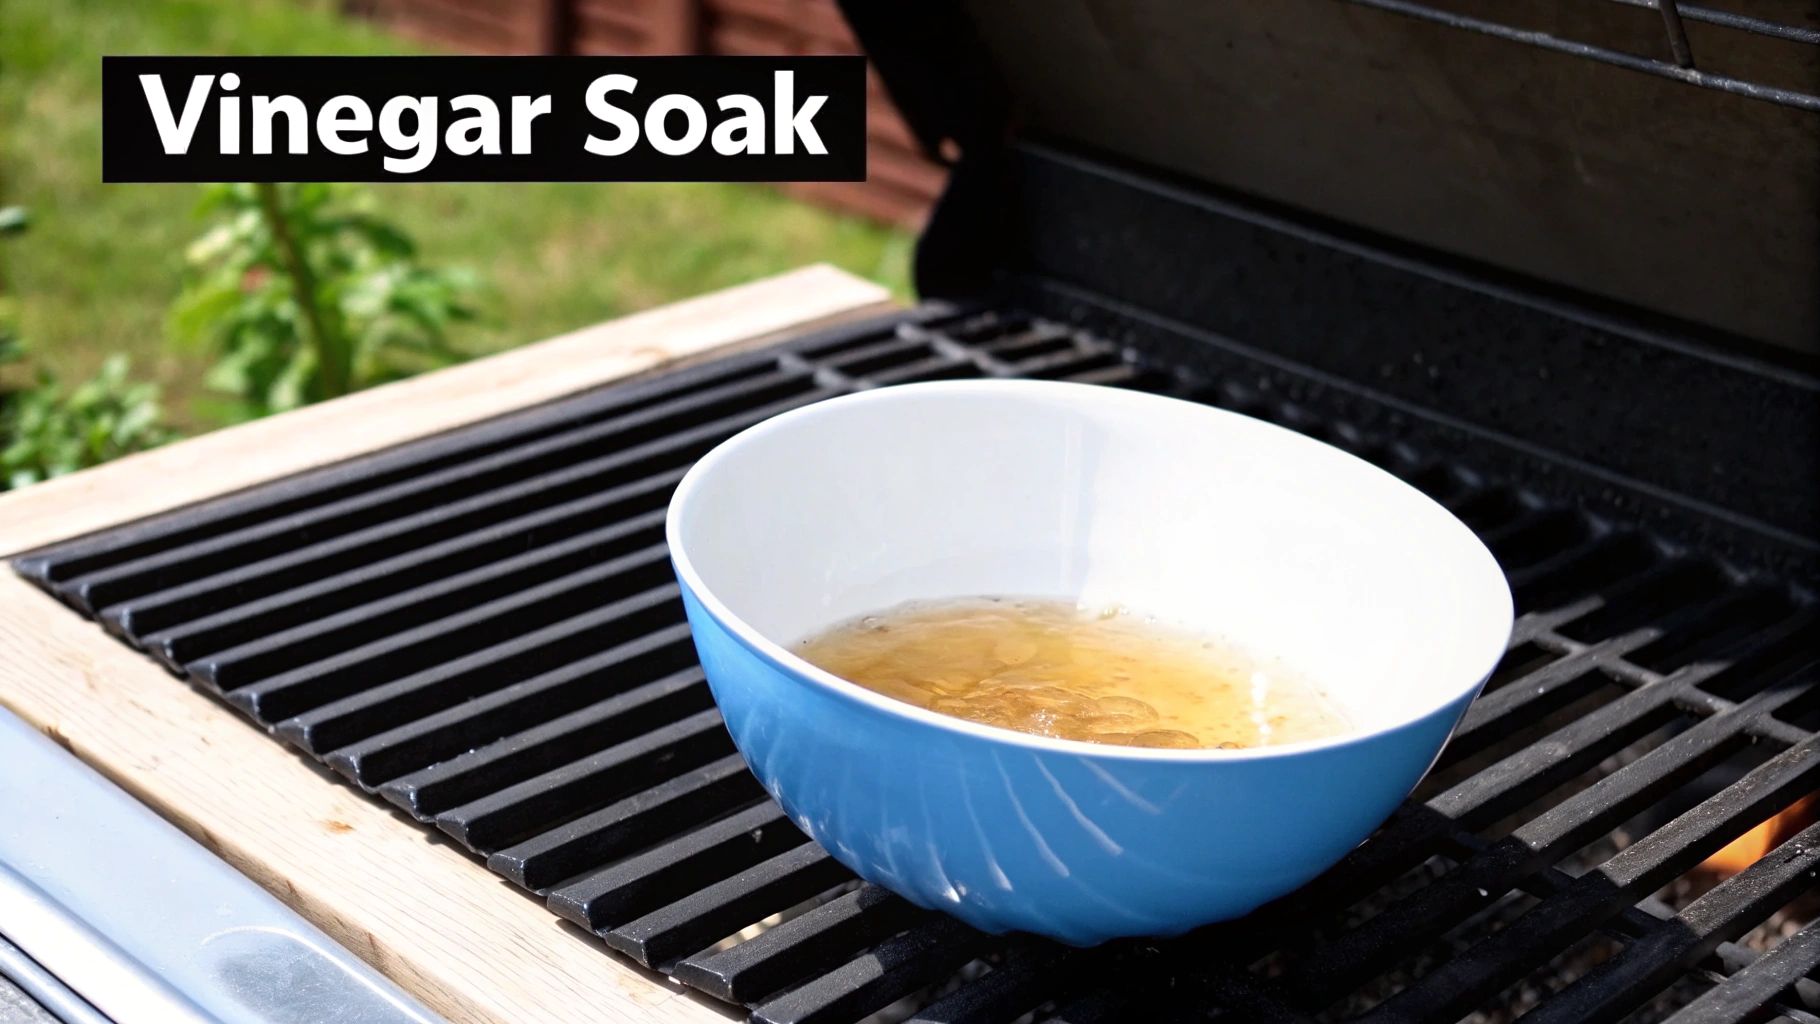
Using Soap and Water Safely
Okay, let's talk about the elephant in the room: soap and water on cast iron. I know, I know—it sounds like a cardinal sin. But for a truly gnarly cleaning situation, a little mild soap and hot water can be a lifesaver, but only if you do it right. Think of this as a last resort, not your Tuesday night cleaning routine.
After you've scraped off the heavy debris, fill a sink with hot water and a small squirt of mild dish soap. Grab a stiff, non-metallic brush or a scouring pad and give the grates a thorough scrub. That combo of hot water and soap will break down the greasy residue the scraper left behind.
Now for the most critical part of the whole process. Get this wrong, and you'll regret it.
- Rinse Immediately: Get those grates under clean, hot water right away to wash off every bit of soap.
- Dry Thoroughly: This step is non-negotiable. Dry the grates with a towel, then pop them back on the charbroiler over low heat for 10-15 minutes. This evaporates any lingering moisture and prevents the dreaded flash rust.
- Re-season Immediately: While the grates are still nice and warm, wipe on a thin coat of a high-smoke-point oil. Seasoning them right away protects the bare iron and starts rebuilding that beautiful non-stick surface.
This deep cleaning process is your reset button, whether you're working with gas, electric, or infrared units from our extensive selection of commercial charbroilers. Follow these steps carefully, and you’ll get your grates back to peak performance without doing any long-term damage.
How to Revive Rusted Cast Iron Grill Grates
Spotting rust on your beautiful cast iron grill grates can feel like a disaster. I get it. But don't panic. Rust is the arch-nemesis of cast iron, but it's a battle you can absolutely win.
With a few simple, non-toxic ingredients you probably already have in your kitchen, you can tackle that corrosion head-on and bring your grates back to their former glory. This isn't just about looks; getting rid of rust is critical for food safety and restoring that perfect, non-stick cooking surface we all love.
The key is using a gentle but effective method that dissolves the rust without damaging the iron itself. This process perfectly sets the stage for a proper re-seasoning, which is the most important step in making sure that rust doesn't come right back.
Creating Your Rust-Busting Paste
Forget the harsh chemicals. You can make a surprisingly powerful cleaning paste from just baking soda and white vinegar. This duo creates a chemical reaction that does most of the heavy lifting for you. The baking soda acts as a mild abrasive, while the acid in the vinegar starts dissolving the iron oxide—the technical term for rust.
Here's a practical, effective ratio: mix one part baking soda with two parts distilled white vinegar. Apply this paste directly onto the rusted areas. You'll see it start to bubble and foam up—that's a good sign! Let it sit and work its magic for about 30 minutes.
Once the paste has had time to do its thing, it’s time to put in a little elbow grease.
Scrubbing Away the Corrosion
After the vinegar and baking soda have loosened the rust, you need to physically scrub it off. For light surface rust, a heavy-duty scouring pad or a stiff grill brush will often get the job done. Just work in small, circular motions, applying firm pressure to lift the rust particles away from the grates.
For more stubborn or widespread rust, you'll need to step up your game. Fine-grade steel wool is your best friend here. It’s abrasive enough to remove the corrosion without gouging the cast iron. If you're dealing with some really heavy-duty rust, you might even need to use fine-grit sanding pads for the most pitted spots.
Remember, the goal is to remove the rust completely, exposing the bare iron underneath. Don't be afraid to be thorough; any remaining rust will just become a problem again down the line.
Once all the rust is scrubbed away, wash the grates thoroughly with warm, soapy water. This is one of the very few times soap is acceptable on cast iron because you're about to completely reset the surface. We cover more on this in our detailed guide on how to remove rust from grill grates.
The Critical Final Step: Re-seasoning
Removing the rust is only half the job. You’ve now exposed raw, bare iron, making it extremely vulnerable to "flash rust" from moisture in the air. You must immediately and thoroughly dry the grates. The best way to do this is to pop them back on the charbroiler over low heat for about 10-15 minutes. This ensures every last drop of water has evaporated.
As soon as they are bone-dry and still warm to the touch, it's time to season. Apply a very thin layer of a high-smoke-point oil (grapeseed or canola oil works great) over the entire surface. Wipe off any excess, then heat the grates to polymerize the oil. This re-seasoning process creates a new, protective barrier, making your grates non-stick, food-safe, and ready for action once again.
Mastering the Art of Re-Seasoning Your Grill
Once your cast iron grates are stripped down to the bare metal—whether from a deep clean or a serious rust battle—they're a blank canvas. This is where the real work begins, turning that vulnerable iron into the slick, non-stick workhorse you need in a commercial kitchen.
Re-seasoning is the process that builds that beautiful black patina, giving you killer sear marks, preventing food from welding itself to the grates, and protecting your investment from future rust.
It all comes down to a neat bit of science called polymerization. When you apply an ultra-thin coat of the right oil and crank up the heat past its smoke point, the fatty acids in the oil literally bond to the iron on a molecular level. This reaction creates a tough, plastic-like coating that’s fused right into the metal. Each new layer you add makes that surface even stronger and more non-stick.
Choosing the Right Oil
The oil you choose here is critical. You absolutely need something with a high smoke point. If you try to use an oil with a low smoke point, like butter or extra virgin olive oil, you’re just going to make a sticky, smoky disaster.
For seasoning, stick with oils that can take the heat.
- Grapeseed Oil: A personal favorite. It has a super high smoke point (around 420°F) and a neutral flavor that won’t interfere with your food.
- Canola Oil: Easy to find, affordable, and reliable. With a smoke point of about 400°F, it gets the job done consistently.
- Flaxseed Oil: Many chefs swear by this as the "gold standard." It creates an incredibly hard and durable surface, though it has a lower smoke point, so it polymerizes fast.
- Vegetable Shortening/Lard: The old-school, traditional fats. They work great and create a tough, dependable non-stick layer.
No matter which oil you choose, your technique is what really matters.
The Re-Seasoning Process Explained
Here's the golden rule of seasoning: less is more. I've seen countless people slather on a thick, greasy layer of oil, thinking more is better. All that does is create a weak, sticky, uneven surface that will flake off the first chance it gets. You're aiming for a microscopic layer.
Grab your clean, bone-dry, and slightly warm grates. Pour a tiny bit of your oil onto a lint-free cloth or a sturdy paper towel—never directly onto the iron itself. Now, meticulously wipe that oil over every square inch of the grates. Get the tops, the sides, the bottom, every nook and cranny.
This next part is the most important step of all. Take a new, clean, dry cloth and wipe off all the oil you just applied. Seriously. It will look like you're undoing your work, but you're actually leaving behind that perfect, invisible micro-layer that's essential for proper polymerization.
With the grates oiled and wiped down, put them back on your charbroiler. Fire it up and get them hot, aiming for a temperature between 450-500°F. Let them "bake" at that temperature for about an hour. You'll see some smoke, and that's a good thing—it's the oil transforming into seasoning. After an hour, kill the heat and just let the grates cool down slowly right there in the charbroiler.
For a truly bulletproof surface, you'll want to repeat this whole process two to three times. Each round builds another thin, interlocking layer, creating that slick, jet-black patina that only gets better with every cook. To dial in your long-term maintenance, check out our guide on how often to season cast iron. This is what separates amateur gear from truly professional-grade equipment.
Common Questions About Cleaning Cast Iron Grills
Even when you have a solid routine down, questions still come up. It's totally normal. Getting the little details right is what separates a good cook from a great one and keeps your charbroiler performing flawlessly day in and day out. Let's dig into some of the most common questions I hear from chefs in busy commercial kitchens.
What's the Best Oil for Seasoning?
This one's a classic debate. While you can use a lot of different oils, the goal is always to pick one with a high smoke point that won't break down under the intense heat of a commercial charbroiler.
My go-to recommendation is grapeseed oil. It has a smoke point around 420°F and a perfectly neutral flavor that won't interfere with your food. Canola oil and even good old-fashioned vegetable shortening are also fantastic, budget-friendly choices that build up a tough, durable non-stick surface.
Can You Ever Use Soap on Cast Iron?
Ah, the big one. For generations, the rule has been screamed from the rooftops: "Never use soap!" For your daily wipe-downs, that's absolutely correct. You want to protect that hard-earned seasoning.
However, there's a time and a place for everything. When you're doing a major deep clean to strip off old, rancid grease or after you've scrubbed away some rust, a little bit of mild dish soap and hot water isn't just okay—it's necessary. It gets rid of all the gunk and residue from scrubbing.
Here's the non-negotiable part: you must immediately and thoroughly dry the grates with heat and re-season them right away. Soap strips the iron bare, and if you don't dry and re-season it, flash rust will appear in minutes. Think of it as hitting the reset button, not something you do every week.
How Often Should You Really Deep Clean?
Honestly, this all comes down to your kitchen's volume. A high-traffic steakhouse that's charring hundreds of items a night might need a full scrape-down once a month. A smaller cafe could easily go a few months between deep cleans.
The real signal is performance.
When your daily "burn and scrape" routine starts feeling like a real fight against the buildup, it's time. If you notice more flare-ups than usual or food is starting to stick despite your daily care, don't wait for it to become a major problem. That's your cue for a more intensive cleaning session.
At the end of the day, consistent care is what makes cast iron last a lifetime. A well-maintained grill is one of the most valuable assets in any professional kitchen.
For a top-tier cooking experience, explore the wide selection of commercial charbroilers at Charbroilers. Whether you need the searing power of infrared, the classic control of gas, or the convenience of electric char broilers, find the perfect equipment to elevate your restaurant's menu.