

Mastering Salt Curing Pork at Home
Salt curing pork is one of those foundational skills that seems almost magical. You take a fresh piece of meat, add some salt, and with a little time, transform it into something completely new—think rich, savory bacon, delicate pancetta, or even prosciutto. The whole process hinges on a simple principle: osmosis. Salt pulls moisture out of the meat, which not only preserves it but also concentrates all that amazing pork flavor.
It’s a Timeless Craft, Not Just a Recipe
Learning to salt cure pork is about more than just following a few steps. It’s a way of connecting with a craft that’s been around forever, bringing ancient preservation methods right into your modern kitchen. Long before refrigerators were a thing, people all over the world relied on salt to make their food last.
What started as a necessity has since become a true culinary art. When you understand the science—how salt dehydrates the meat and stops spoilage—you’re not just making food. You're taking part in a tradition that has literally sustained civilizations for thousands of years. This guide is here to walk you through it, giving you the confidence to turn fresh pork into something incredible.
A Legacy Thousands of Years in the Making
Salt curing isn’t some new trend. We’re talking about a technique with roots stretching back at least 6,000 to 7,000 years. Archaeologists have found evidence of sodium and potassium nitrates being used to preserve meat in places like the Atacama Desert, the Dead Sea, and ancient Egypt.
These naturally occurring salts were the key to preventing spoilage while keeping the meat’s color and taste. We even know that sophisticated curing methods using saltpeter were well-established in China’s Tarim Basin over 1,500 years ago. That shows a deep understanding of preservation long before our time. If you’re a history buff, you can dig into the epic history of salt and its role in how we eat.
The real beauty of salt curing is how simple and effective it is. All you really need is salt, time, and a good cut of pork to create something truly special, honoring a long history of culinary skill.
Why Bother Curing Pork Today?
With all the modern conveniences we have, you might wonder why anyone would take the time to cure their own pork. For me, and for many others who get into this craft, the reasons are pretty compelling.
- Flavor You Can’t Buy: Let's be honest, the stuff you make at home will blow most commercial products out of the water. The flavor is deeper and far more complex.
- You’re in Complete Control: You choose everything. The quality of the pork, the exact blend of spices, and you can skip all the unnecessary additives.
- It’s Just Plain Satisfying: There’s a real sense of accomplishment that comes from mastering a skill this old and sharing the amazing results with friends and family.
Choosing Your Pork and Essential Tools
Your salt curing project is won or lost long before you even touch a grain of salt. It all starts at the butcher counter. The quality of pork you choose dictates the flavor, texture, and most importantly, the safety of what you make. Rushing this step is a mistake you can't afford to make.
Think of it like building a house – you wouldn't start with a shaky foundation. For us, high-quality pork is that foundation. You're looking for meat with a healthy, vibrant pinkish-red color and firm, creamy-white fat. If you see any discoloration, notice an off-smell, or feel a slimy texture, walk away. Those are all deal-breakers.
Selecting the Right Cut of Pork
Different cuts are destined for different charcuterie projects, so knowing what you want to create is half the battle. If you've got homemade bacon on the brain, then a good slab of pork belly—skin-on or skin-off—is what you need. The best bellies have a beautiful, even ratio of fat to meat, with distinct layers that will render down perfectly.
For other classic charcuterie, you might want to look at:
- Pork Loin: This is your cut for leaner, elegant cures like lonza or a classic Canadian bacon.
- Pork Shoulder (Boston Butt): A fantastically marbled cut that’s just begging to be turned into coppa. That beautiful intramuscular fat is what gives you that melt-in-your-mouth texture.
- Pork Leg: The big one. This is the traditional cut for anyone ambitious enough to tackle a homemade prosciutto.
Don't be shy about talking to your butcher. Ask where the pork comes from. Meat from heritage breeds or pasture-raised pigs often has a much deeper flavor and a higher quality of fat, and trust me, you can absolutely taste the difference after weeks or months of curing.
Here's the one thing you can't compromise on: freshness. Curing is a method of preservation, not resurrection. It can't save meat that's already on its way out. Always, always start with the absolute freshest, highest-quality pork you can get your hands on.
Gathering Your Essential Curing Equipment
Once you've got the perfect piece of pork, it's time to make sure your toolkit is ready. When you’re salt curing pork, precision and food safety aren't just suggestions; they're the rules of the game. This isn’t about collecting fancy gadgets, but about having a few reliable, accurate tools to guarantee a safe and successful cure.
Here's what you absolutely must have:
- A Reliable Digital Scale: This is, without a doubt, your most important tool. Curing is science, and it all comes down to precise, weight-based measurements for your salt and any curing agents. A scale that measures in grams is non-negotiable. Trying to measure by volume with cups or spoons is far too inaccurate and can lead to some seriously dangerous mistakes.
- Non-Reactive Containers: Salt and certain metals are not friends. You'll need containers made of food-grade plastic, glass, or stainless steel to hold your meat while it cures. Steer clear of aluminum and cast iron, as the salt will react with them and can leave a metallic, off-taste on your pork.
- Zip-Top Bags: For smaller cuts of meat, a few large, heavy-duty zip-top bags are fantastic. They let you squeeze out most of the air, which keeps the cure in constant, direct contact with every surface of the meat.
- A Designated Refrigerator Space: Your pork needs to cure at a consistent, cold temperature, usually somewhere between 36-40°F (2-4°C). You need a clean, dedicated spot in your fridge where the meat can hang out, undisturbed, and let the salt work its magic.
Getting Your Salt Ratios and Cure Mix Right

This is where the real craft of salt curing pork begins. Forget guesswork. Everything from here on out needs to be measured precisely by weight to guarantee a safe, delicious product. The foundation is salt, of course, but which kind and how much you use makes all the difference.
Believe it or not, not all salts were created equal for this job. Historically, certain salts were prized for their knack for preserving pork. Bay salt, for instance, was known to have higher nitrate levels, which was exactly what was needed for proper curing. We know now from looking at seventeenth-century samples that this nitrate content was the magic ingredient for developing that classic cured color and flavor. You can actually read up on how historical salts influenced meat preservation on cambridge.org.
Thankfully, we don’t have to hunt for special bay salt today. Modern, standardized curing salts give us the same results with far more consistency.
Understanding Modern Curing Salts
Modern curing relies on salts that contain sodium nitrite and sometimes sodium nitrate. These compounds are your frontline defense against nasty bacteria, especially Clostridium botulinum, which causes botulism. They're also responsible for that signature pinkish hue and savory flavor profile we all associate with cured meats.
For our purposes, there are two you need to know:
- Prague Powder #1 (Curing Salt #1): This stuff is a mix of 6.25% sodium nitrite and 93.75% table salt. It’s always dyed pink so you don’t accidentally mistake it for regular table salt. This is your go-to for shorter cures that will be cooked, like bacon, ham, and pastrami.
- Prague Powder #2 (Curing Salt #2): This one contains 6.25% sodium nitrite, 4% sodium nitrate, plus table salt. The nitrate is key here—it slowly breaks down into nitrite over time, making it perfect for long, dry-aged projects like prosciutto or coppa that won't be cooked.
Using the right powder for the right job isn't just a suggestion; it's a critical food safety rule.
A Quick Look at Different Salts for Curing
To make sense of it all, let's break down the different salts you'll encounter. While we mainly use standardized powders today, understanding the role of each helps you appreciate the process.
Comparison of Curing Salts for Pork
| Curing Agent | Composition | Best For | Key Function |
|---|---|---|---|
| Table Salt | Sodium Chloride (NaCl) | Flavor, moisture removal | The primary agent for drawing out water and seasoning the meat. Lacks preservative agents. |
| Bay Salt (Historical) | NaCl with natural nitrates | Traditional curing (pre-modern) | Historically valued for its natural nitrate content, which aided in color and preservation. |
| Prague Powder #1 | 6.25% Sodium Nitrite, 93.75% NaCl | Short cures (bacon, ham) | Prevents bacterial growth and adds classic cured color/flavor to cooked products. |
| Prague Powder #2 | 6.25% Nitrite, 4% Nitrate, NaCl | Long dry-aging (prosciutto) | Nitrate converts to nitrite over time, providing extended protection for air-dried meats. |
As you can see, the evolution from natural salts to precisely formulated powders gives us incredible control and safety. For any recipe that will be cooked, Prague Powder #1 is the modern standard.
Calculating Your Cure The Right Way
Put away the measuring spoons. The only way to get this right every single time is to calculate your ingredients as a percentage of your meat’s total weight. This is called equilibrium curing, and it's how the pros ensure perfect results.
The industry-standard ratios are simple:
- Salt: 2.5% of the meat's weight. This is the sweet spot for preservation without making the final product a salt bomb.
- Prague Powder #1: 0.25% of the meat's weight. This is the USDA-approved amount for safety. No more, no less.
- Sugar (Optional): 1-1.5% of the meat's weight. A little brown or white sugar helps mellow the saltiness and gives you better browning when it's time to cook.
Crucial Takeaway: Always weigh your meat after you’ve trimmed it. Your calculations must be based on the final, ready-to-cure weight. This is non-negotiable for getting your ratios right.
Let's walk through a real-world example. Say you have a five-pound pork belly you're turning into bacon. First things first, convert that weight to grams to make the math easier (5 lbs = 2268g).
Now, let's calculate the cure mix:
- Salt: 2268g x 0.025 = 56.7g
- Prague Powder #1: 2268g x 0.0025 = 5.7g
- Sugar: 2268g x 0.01 = 22.7g
Mix these ingredients together thoroughly, and you've got a perfect, safe cure ready for that pork belly. This precise, weight-based method is the single most important step in the entire process. It removes every bit of guesswork and sets you up for success.
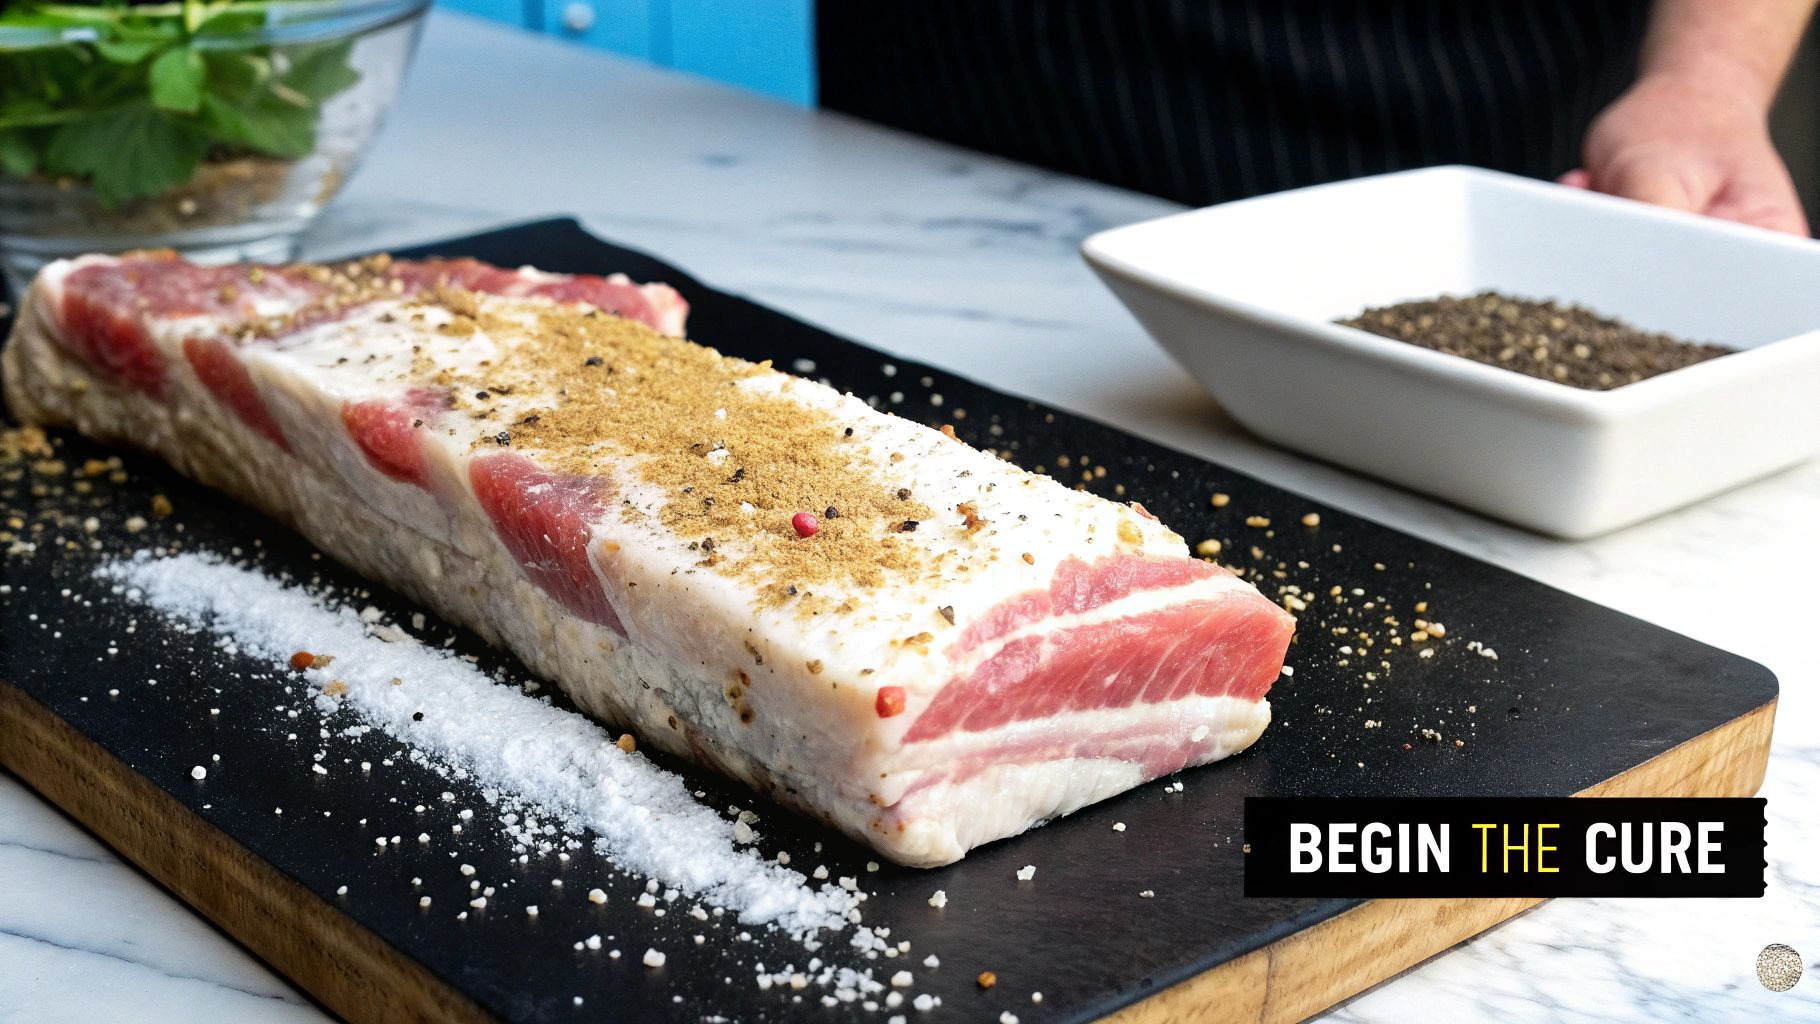
Getting Your Cure on the Meat: Dry vs. Wet Methods
You’ve got your perfectly measured cure mix in hand, and now it’s time for the magic. This is the most hands-on part of the process, where you introduce the salt to the meat and kick off that slow, deliberate transformation.
You have two main paths to choose from: dry curing or wet curing.
Dry curing is the classic rub-and-wait method. Wet curing, on the other hand, means submerging the pork in a seasoned brine. Each has its own army of fans and produces slightly different results, but both work on the same fundamental principle: osmosis.
Your choice really comes down to the final product you’re dreaming of and the gear you have. For a thick, dense piece of charcuterie like prosciutto, a dry cure is the traditional way to go. For something you plan to cook, like bacon or ham, either method will get you fantastic results.
The Dry Curing Technique
Dry curing is about as straightforward as it gets. All you need is your cure mix, the pork, and a non-reactive container or even a big zip-top bag. The goal is simple: coat the entire surface of the meat with your cure. Get into every nook and cranny. This direct contact is what pulls the moisture out most effectively.
Once you’ve applied the cure, you'll need to "overhaul" the meat every day or two. This is just a fancy way of saying you need to flip it over and rub in any liquid that has pooled in the container. Don't you dare throw that liquid out! It’s a super-concentrated brine, and it's pure gold. Rubbing it back into the pork ensures the cure penetrates evenly.
This guide breaks down the first few steps for getting your pork ready for a dry cure.
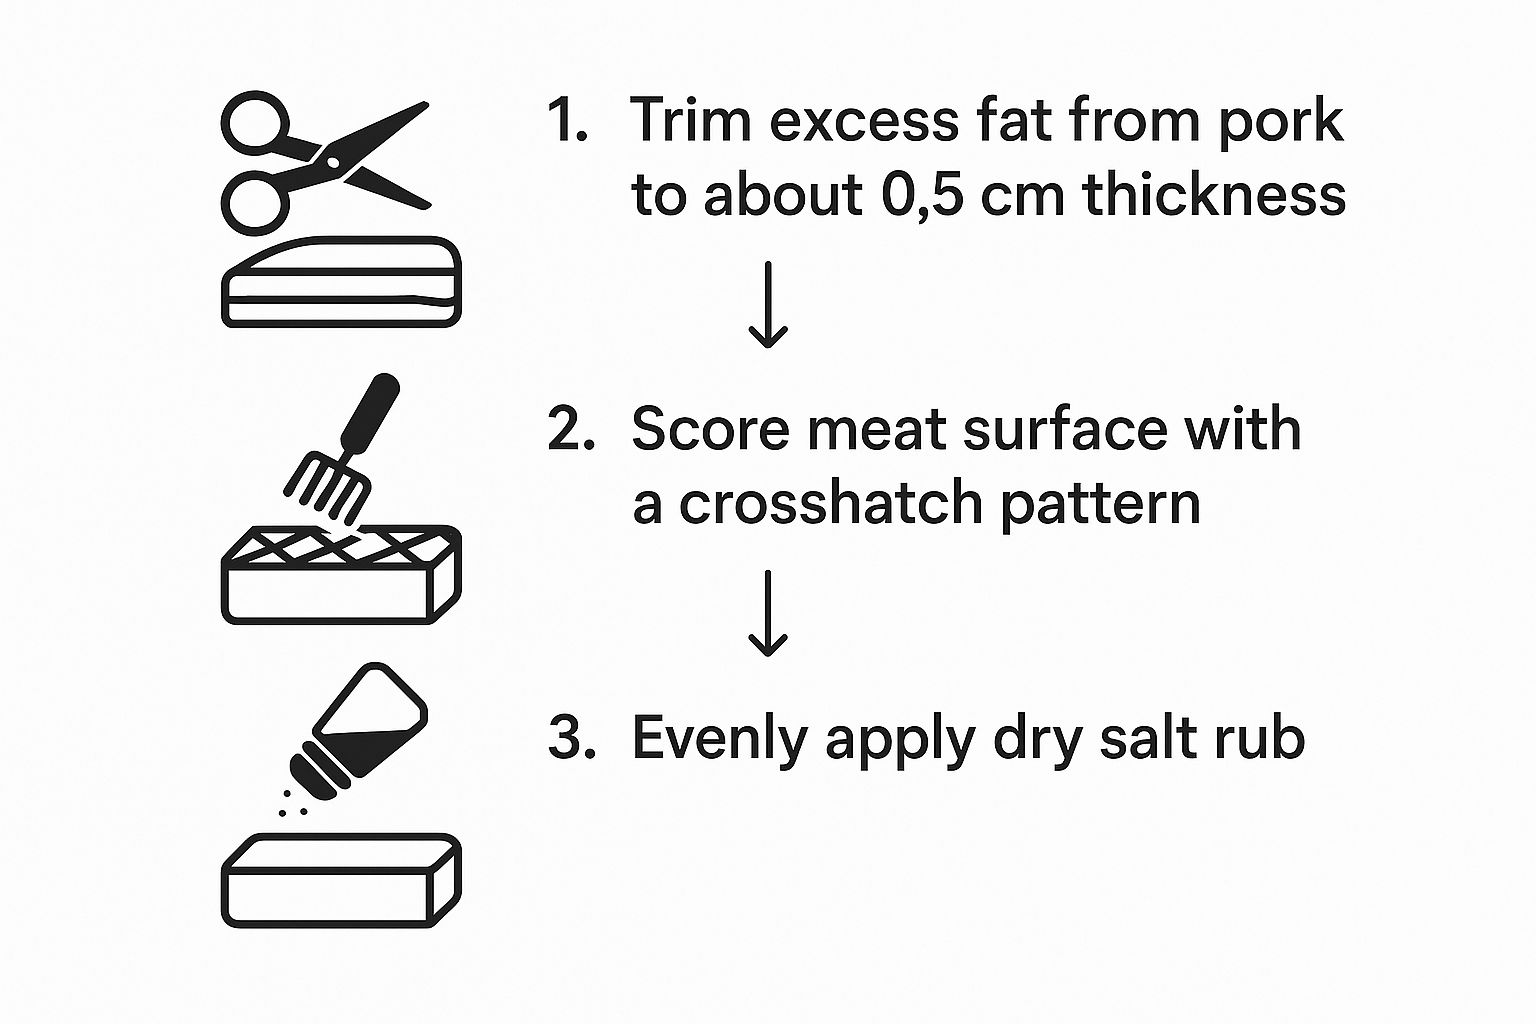
As you can see, a little prep work before rubbing on the salt goes a long way. It ensures the cure can work its way into the meat for a safe, even result.
One of the surest signs of a successful dry cure is weight loss. As the salt does its job pulling water out, the pork will get noticeably firmer and lighter. This is why I always say to track the weight with your digital scale—it's the best way to know when you're ready for the next stage.
Mastering the Wet Cure (Brining)
Wet curing, or brining, is all about creating a flavorful bath for your pork. You’ll dissolve your salt, sugar, and curing agents in water to make a brine. This method is amazing for getting an incredibly even cure because the liquid surrounds the meat completely. It’s my go-to for things like corned beef or a classic holiday ham.
Making a brine is easy—just mix your calculated cure ingredients with water. The real trick is making sure the pork stays fully submerged the entire time. If a piece floats up, it won't cure correctly, and that's a serious safety risk. I use a heavy ceramic plate or a brine bag filled with a bit of water to weigh the meat down and keep it under the surface.
Food Safety is Everything
It doesn’t matter which method you pick; temperature control is non-negotiable. Your fridge absolutely must hold a steady temperature between 36-40°F (2-4°C). This is the sweet spot—cold enough to stop spoilage bacteria in their tracks but warm enough to let the curing salts do their job.
So, Which One Should You Choose?
Deciding between a dry or wet cure often comes down to your end goal and how much space you have in your fridge. Here’s a quick breakdown to help you out.
| Feature | Dry Curing | Wet Curing (Brining) |
|---|---|---|
| Process | Rub cure directly onto meat surface. | Submerge meat in a salt/cure solution. |
| Best For | Bacon, pancetta, long-aged charcuterie. | Hams, corned beef, pastrami. |
| Flavor Profile | Intense, concentrated pork flavor. | Milder, more uniform saltiness. |
| Space | Requires less space (zip-top bags work well). | Needs a large container to hold meat and liquid. |
At the end of the day, both methods will lead you to some seriously delicious, safely cured pork. If you're just starting out, I highly recommend a dry cure for a small pork belly in a zip-top bag. It's a manageable first project that lets you see and feel the science at work.
The Art of Drying, Hanging, and Aging
Once the initial cure is done, your pork is officially preserved. But let's be honest, it's not the complex, deeply flavorful charcuterie you're dreaming of just yet. That magic happens during the drying and aging phase. This is the slow, patient craft that develops the incredible, nuanced flavors that make salt curing pork so damn rewarding.
Before you hang your pork, though, you have to prep it properly. First things first, give it a good, thorough rinse under cold running water. You want to get all that excess salt and any leftover spices off the surface. This is a non-negotiable step for achieving salt equilibrium—it’s what makes sure your final product is perfectly seasoned instead of a salt bomb.
After rinsing, pat the meat completely dry with paper towels. I mean completely dry. A bone-dry surface is your best defense against unwanted bacteria when you first hang it up. Once it's dry, you're ready for the real transformation.
Creating the Perfect Drying Environment
You don't need a thousand-dollar commercial setup to get this right. The secret is simply creating a space where you can consistently control three things: temperature, humidity, and airflow. A dedicated curing chamber is the dream, of course, but a modified frost-free refrigerator works beautifully for most home charcuterie projects.
The target conditions are pretty straightforward, but you need to be precise.
- Temperature: Keep it steady between 50-60°F (10-15°C). This is the sweet spot—cool enough to prevent spoilage while being just warm enough for those beneficial enzymes to do their work.
- Humidity: You're shooting for 70-75% relative humidity. If it's too low, the outside of the meat will dry out way too fast. Too high, and you're inviting the wrong kind of mold to the party.
- Airflow: Gentle, indirect airflow is key. It keeps the air from getting stagnant and helps everything dry evenly. A small computer fan hooked up to a timer is often all you need.
Your goal is a target weight loss of 30-40%. This is the classic benchmark that tells you enough moisture has evaporated for the meat to be considered shelf-stable and ready to eat. Weighing your project regularly is the only real way to know when you’ve hit the mark.
Monitoring for Success and Spotting Trouble
During the aging process, you're not just waiting around—you’re the caretaker. Make a habit of checking on your hanging pork every few days. Pay close attention to how it looks and, just as importantly, how it smells. It should develop a pleasant, slightly sweet, and earthy aroma over time.
One common hiccup to watch out for is case hardening. This is when the exterior dries too quickly, forming a tough, leathery shell that traps moisture inside. It's almost always caused by humidity that’s too low. If you see it happening, you can often fix it by pulling the meat down and vacuum-sealing it for a few days to help that internal moisture redistribute.
You’re also going to see mold, and that's okay. A fine, white, powdery mold (think of the kind you see on a good salami) is perfectly normal and even considered beneficial by many. It's the other stuff you need to worry about. Any black, green, or fuzzy mold is bad news and needs to be wiped off immediately with a clean cloth dampened with a bit of vinegar. Staying vigilant is the best way to make sure your salt-curing project is a massive success.
Finishing and Storing Your Cured Pork
The long, patient wait is finally over. After weeks, or maybe even months, of careful curing and drying, that humble piece of pork has transformed into something special. But before you grab a knife and start slicing, there are a few final touches that can take your charcuterie from good to truly great.
This is your chance to add one last layer of complexity. Think of it as the finishing polish. A piece of guanciale might get a generous dusting of coarse black pepper, or a beautiful pancetta could be cold-smoked over applewood for that subtle, sweet smokiness. These aren't just for looks; they deepen the flavor and help protect the meat's surface.
Preparing Cured Pork for Service
For those of us in the restaurant business, this is where the craft meets the customer's plate. Slicing cured pork thinly is an art form, but how you serve it can make all the difference. While many cured products are perfect served as-is, things like your own house-cured bacon or pancetta really come alive with a bit of heat.
A commercial charbroiler from charbroilers.com is an absolute beast for this. Imagine slices of thick-cut, salt-cured bacon hitting those grates. You get an incredible smoky char that you just can't replicate in a pan. The intense, direct heat renders the fat perfectly, creating a texture that’s somehow both crisp and tender at the same time.
Long-Term Storage for Lasting Quality
Proper storage is non-negotiable. You've invested too much time and effort to let it all go to waste now. Once your cured pork has hit its target weight and you've added your finishing touches, you have to store it correctly to maintain its quality and, most importantly, its safety.
The best way to do this, hands down, is vacuum sealing. It’s a simple process that removes all the oxygen from the package, and that does two critical things for you:
- It stops the drying process right in its tracks, locking in that perfect texture you worked so hard to achieve.
- It dramatically cuts down the risk of spoilage or the fat going rancid, preserving the flavor for months.
After all that work, vacuum sealing is the final step that guarantees your salt-cured pork stays as delicious and safe as the day you finished it. It's the best way to protect your investment and enjoy the fruits of your labor for a long, long time.
If you don’t have a vacuum sealer, wrapping the pork tightly in butcher paper is your next best bet. This allows the meat to breathe just a little, which is much better than plastic wrap that can trap moisture and invite mold.
Whether it’s vacuum-sealed or paper-wrapped, keep your finished product in the fridge. A properly stored, whole piece of dry-cured pork can easily last for six months or even longer, ready to be sliced and enjoyed whenever the craving hits.
Common Questions About Salt Curing Pork

Even with the best guide in hand, you’re bound to have questions pop up when you start salt curing your own pork. It's just part of the process. I've gathered some of the most common queries I hear to give you clear, straightforward answers and help you keep your project on track.
Let's start with the big one: the salt itself. Modern curing salts are standardized for a reason—safety. You'll mainly see two types. Prague Powder #1, which contains 6.25% sodium nitrite, is your go-to for shorter cures that are destined for the frying pan or oven. Think bacon or cured pork chops.
For longer-term projects that will be air-dried, like coppa or lonza, you'll need Prague Powder #2. It adds 4% sodium nitrate to the mix, which acts as a time-release preservative for that extended drying period. Using the right one is non-negotiable for preventing nasty bacteria like Clostridium botulinum and extending the life of your pork from a few days to several months. You can get into the nitty-gritty of how curing salts work at en.wikipedia.org.
Troubleshooting Common Curing Issues
It’s completely normal to feel a little paranoid, especially with your first few cures. Here are a few common hiccups and how to handle them.
- Is This Mold Safe? Seeing some white, powdery mold is usually fine. It’s often a sign of a good aging environment. But if you spot anything black, green, or fuzzy, that’s bad news. Wipe it off immediately with a clean cloth dipped in a bit of vinegar.
- Why Isn't My Pork Losing Weight? If your pork isn't shedding water weight during a dry cure, your humidity might be too high. This can also happen if the cure isn't making good contact. Check that your fridge isn't too damp and make sure you're overhauling (flipping and rubbing) the meat regularly.
- What is Case Hardening? This is what happens when the outside of the meat dries out too fast, creating a hard, leathery shell that traps moisture inside—a perfect recipe for spoilage. It's almost always caused by humidity being too low in your curing chamber.
Your nose is your best friend in this process. Seriously. If the pork develops any off-smells—sour, rancid, or just plain unpleasant—you have to toss it. When it comes to food safety, the rule is simple and absolute: when in doubt, throw it out.
Curing Times And Techniques
Getting the details right is what separates good charcuterie from a failed experiment. Here are a couple of nuanced questions that come up all the time.
How Long Should I Cure My Pork?
The clock starts ticking based on one thing: the thickness of your cut. The rule of thumb for equilibrium curing is to give it one day in the cure for every half-inch of thickness, then add a couple of extra days just to be safe.
So, for a pork belly that's 1.5 inches thick, you’re looking at around 5-7 days in the cure before it's ready for the next step.
Can I Use Less Salt In My Cure?
While you can play around with the spices all you want, the salt and curing agent percentages are there for safety, not just taste. The standard formula—2.5% salt and 0.25% Prague Powder #1 by weight—is a tested and proven ratio.
Cutting back on these will weaken the preservative effect of the cure, potentially creating a product that isn't safe to eat. Stick to the formula.