
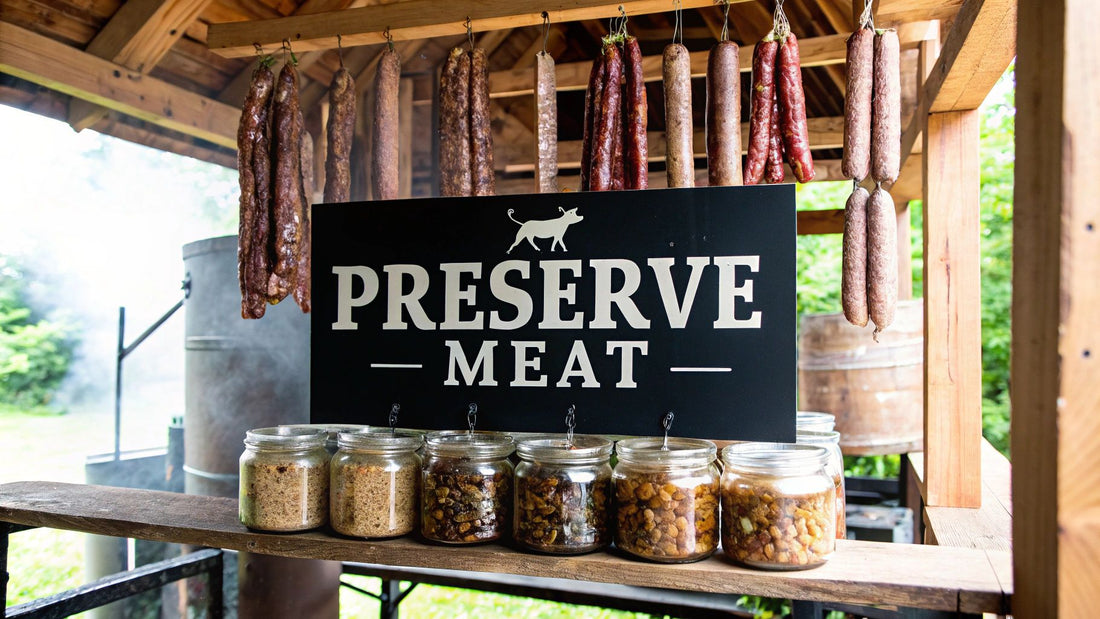
How to Store Meat Without Refrigeration: Expert Survival Tips
Knowing how to store meat without refrigeration is one of those timeless skills that feels more relevant than ever. It all comes down to a few proven, age-old methods: curing, smoking, drying, and canning. These aren't just for historical reenactments; they're practical ways to remove moisture and stop harmful bacteria in their tracks.
Mastering these turns perishable meat into a shelf-stable food source that can last for months, sometimes even years. This is crucial knowledge for anyone serious about emergency preparedness, living off-grid, or just wanting to connect with the way our ancestors ate.
Why Storing Meat Without a Fridge Is a Timeless Skill
Long before refrigerators became the cornerstone of every kitchen, preserving meat was simply a non-negotiable part of life. Today, we're seeing a huge resurgence in these techniques, not just for survival, but for the incredible, complex flavors and textures they create.
When you understand the science behind these methods, you gain real independence from the power grid. It’s empowering. To get a feel for the bigger picture and the sheer ingenuity of what our ancestors accomplished, it's worth exploring the world of natural food preservation techniques.
The Core Principles of Preservation
At its heart, storing meat without a fridge is about making it an awful place for microorganisms—like bacteria and mold—to live. You’re essentially creating an environment where spoilage just can't happen. Every method we’ll cover aims to do one or more of these things:
- Remove Moisture: Bacteria can't multiply without water. Salting and drying are incredibly effective at dehydrating meat, which basically puts a full stop to microbial growth.
- Inhibit Bacteria: Curing with salts, particularly those with nitrites, directly fights off dangerous bacteria like Clostridium botulinum. The smoke from a fire isn't just for flavor, either; it deposits chemical compounds that act as antimicrobials.
- Eliminate Oxygen: When you can meat properly, you remove oxygen and create a totally sterile, vacuum-sealed world inside the jar. Without oxygen, the organisms that cause spoilage can't survive.
Connecting Tradition to Modern Kitchens
While these methods are steeped in history, they have a very real place in today's professional kitchens. Top chefs use curing and smoking to develop those deep, unforgettable flavors in artisanal products like prosciutto, bacon, and salami. The results from these timeless methods can be taken to a whole new level with modern equipment.
For restaurant owners and chefs looking to bring those authentic, smoky flavors to their menu, a high-quality charbroiler is an absolute must-have. We offer a wide selection of commercial charbroilers for your restaurant, perfect for handling the rigors of any professional kitchen. Whether you need the intense, searing power of an infrared charbroiler, the classic flame-kissed taste from a gas charbroiler, or the consistent, even cooking of an electric char broilers, we have the right gear to perfect your dishes. These tools are the perfect bridge between ancient preservation arts and contemporary, restaurant-quality results.
The Art of Salting and Curing Meat
Long before refrigerators were even a dream, salting was the gold standard for keeping meat on the table. This isn't just a preservation method; it's a culinary art form born from sheer necessity. Techniques refined over centuries are responsible for some of the world's most incredible foods, from delicate prosciutto to hearty country ham. If you want to master storing meat without a fridge, this is where you start.
The science behind it is beautifully simple: osmosis. When you pack meat in salt, you're creating a powerful concentration gradient. The salt relentlessly pulls moisture out of the meat's cells. In doing so, it creates an environment so dry that the bacteria responsible for spoilage just can't get a foothold and multiply.
For thousands of years, this was humanity’s ace in the hole for making a hunt or harvest last. From ancient civilizations to colonial settlers packing salt barrels for long voyages, the method is a cornerstone of food history. You can find some fascinating details in these time-tested food preservation practices from the 17th century.
Getting Started with Dry Curing
Dry curing is about as direct as it gets. You're literally rubbing a salt-based mixture all over the surface of the meat. It's the perfect method for creating those dense, intensely flavorful products we all love, like bacon, pancetta, and traditional cured sausages.
This is a hands-on process that demands patience. You'll need a non-reactive container or a traditional salt box to hold the meat while it slowly weeps its moisture. Over days, or even weeks, that salt works its way deep into the muscle, completely transforming the texture and making it safe for long-term storage.
A non-negotiable rule for dry curing is using 2.5% to 3% of the meat's weight in salt. Don't eyeball this. A good digital scale is your best friend here, ensuring the final product is both safe to eat and not overwhelmingly salty.
What I love about dry curing is the profound flavor it develops. As the water leaves, all the natural meat flavors concentrate, creating a rich, complex taste that you simply cannot get any other way. For a restaurant, mastering this means creating signature, high-value menu items that truly stand out.
The Critical Role of Curing Salts
Now, let's get specific about salts. It's crucial to understand the difference between your everyday kitchen salt (sodium chloride) and specialized curing salts. Regular salt is fantastic for pulling out moisture, but curing salts contain sodium nitrite, an ingredient that is absolutely vital for stopping the growth of Clostridium botulinum—the nasty bacteria behind botulism.
You'll often see these salts dyed pink so no one ever mistakes them for table salt. There are two main types you'll work with:
- Prague Powder #1: This is your go-to for meats that will be cooked before you eat them, like bacon or smoked sausage. It contains 6.25% sodium nitrite.
- Prague Powder #2: Reserved for meats that are dry-cured for a long time and might be eaten raw, like prosciutto or hard salami. It contains sodium nitrate as well, which acts like a time-release preservative during those long cures.
Using these curing salts isn't just a suggestion; it's a modern safety standard. While our ancestors relied on incredibly heavy salting alone, incorporating the right curing salt is the responsible way to preserve meat without refrigeration today.
Mastering Wet Curing, or Brining
Wet curing, better known as brining, is all about submerging your meat in a saltwater solution. This method often works faster than a dry cure because the liquid helps the salt penetrate the meat more quickly and evenly. It’s the technique behind classics like corned beef, pastrami, and those picture-perfect holiday hams.
At its core, a brine is just salt, water, and maybe some sugar to round out the flavor. But this is where you can get creative. Tossing in aromatics like peppercorns, bay leaves, and crushed garlic cloves will infuse the meat with incredible layers of flavor.
The make-or-break factor in any brine is getting the salinity just right. Too weak, and it won't preserve the meat properly. Too strong, and you'll end up with a salt bomb. You can get technical with a salinity hydrometer, but honestly, relying on proven recipes and ratios is a great way to start.
A Practical Example: Crafting Salt Pork
Want to dip your toes into the world of curing? Start with salt pork. It’s a forgiving cut that perfectly demonstrates the fundamental principles of storing meat without refrigeration.
Here’s the basic rundown:
- The Cut: Get yourself a fresh, high-quality piece of pork belly.
- The Cure: Weigh the pork belly. Now, measure out 3% of that weight in a non-iodized salt (kosher or sea salt works great) and add the recommended amount of Prague Powder #1.
- The Application: Get your hands in there and rub that curing mixture thoroughly over every single surface of the pork belly. Don't miss any spots.
- The Wait: Place the pork in a non-reactive container (or a vacuum-sealed bag) and stash it in a cool, dark place like a cellar. Let it cure for about a week, making sure to flip it once a day so the cure distributes evenly.
- The Finish: Once the week is up, rinse the excess salt off the surface and pat it completely dry. It's now ready for aging or to be used right away.
This salt pork will keep for months in a cool spot and is a secret weapon for adding a rich, savory punch to everything from beans and stews to classic chowders.
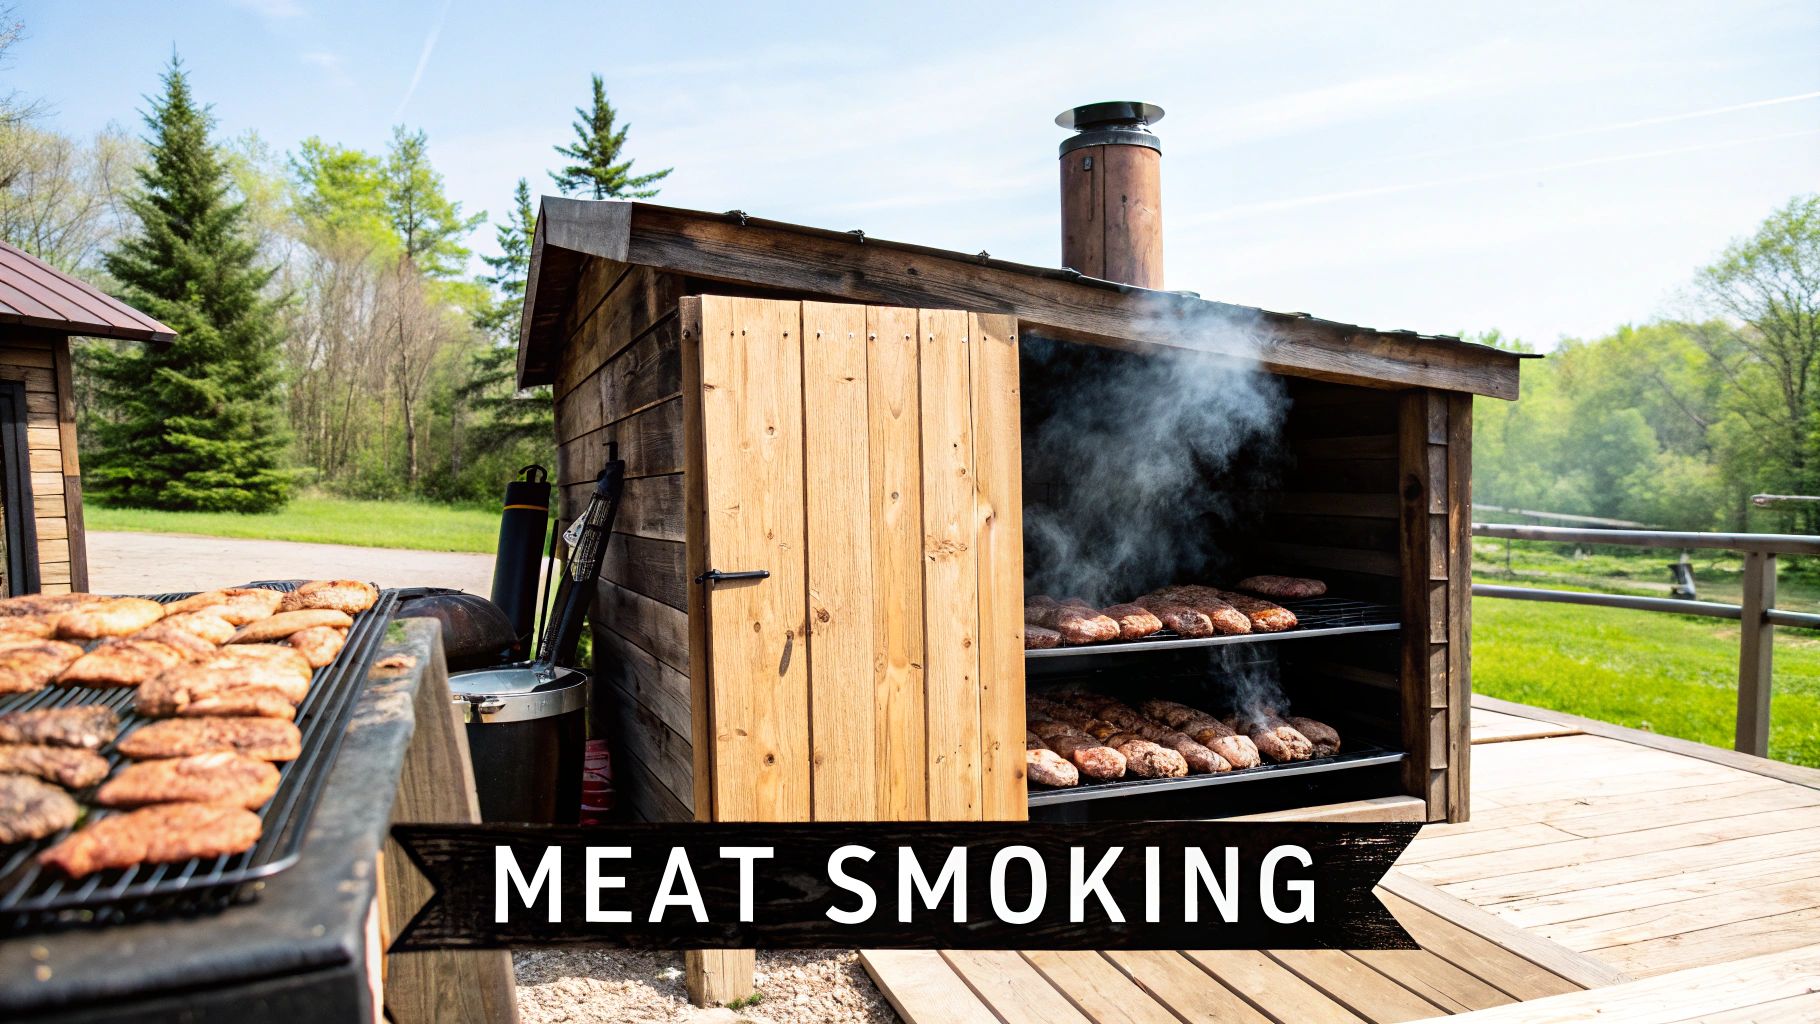
Smoking and Drying for Flavor and Preservation
Once you've got the curing process down, you're ready to move on to the real art of preservation: smoking and drying. These aren't just about making meat last longer; this is where you build the deep, complex flavors that make things like bacon, jerky, and country ham so incredible. These methods work hand-in-hand with the salt cure, pulling out even more moisture and creating a protective, flavorful barrier.
Smoking isn't a one-size-fits-all deal. It's really a tale of two different approaches, hot and cold, and the one you choose completely changes the final product.
Hot Smoking Versus Cold Smoking
Most people think of hot smoking when they hear the word. This is both a cooking and a flavoring process, done at temperatures between 165°F and 250°F. You're fully cooking the meat while bathing it in smoke. Think classic barbecue ribs, smoked brisket, or sausages that are ready to eat right off the smoker.
Cold smoking, however, is pure preservation. The temperatures here are much, much lower—always below 90°F. This is crucial: the meat must be fully cured before it ever sees a cold smoker. The idea isn't to cook it, but to gently infuse it with smoke over a long period. That smoke acts as an antimicrobial shield and adds that classic, deep flavor you find in shelf-stable foods like traditional bacon, lox, or prosciutto.
Getting that consistent, low temperature is the secret to great smoking. The key is mastering indirect heat, which keeps the meat away from the direct flame. You can find some fantastic advice on how to master indirect cooking on a grill that translates perfectly to any smoking setup.
Choosing Your Wood for Flavor
The wood you choose is like a painter's palette—it's where all the flavor comes from. The right wood can take a simple piece of cured meat and turn it into something unforgettable.
- Hickory: The all-American classic. It delivers a strong, slightly sweet flavor that just screams "bacon." It’s a bold choice, perfect for big cuts of pork and beef that can stand up to it.
- Mesquite: Even more intense than hickory, mesquite has a very distinct, earthy flavor. It's fantastic for quick grilling, but be careful on long smokes—it can easily overpower your meat. A little goes a long way.
- Applewood: If you're looking for something more subtle, applewood is your go-to. It gives off a mild, fruity, and slightly sweet smoke that is absolutely beautiful with poultry and pork.
- Oak: A great middle-of-the-road option. Oak provides a medium smoke that’s stronger than fruit woods but not as aggressive as hickory. It's incredibly versatile and works well with just about anything.
Dehydration for Shelf-Stable Jerky and Biltong
At its core, dehydration is the simplest preservation method: just remove the water. The trick is to do it fast enough that the meat doesn't spoil, but slow enough that you get that perfect chewy texture. This is how you create classics like jerky and biltong that can last for months without a fridge.
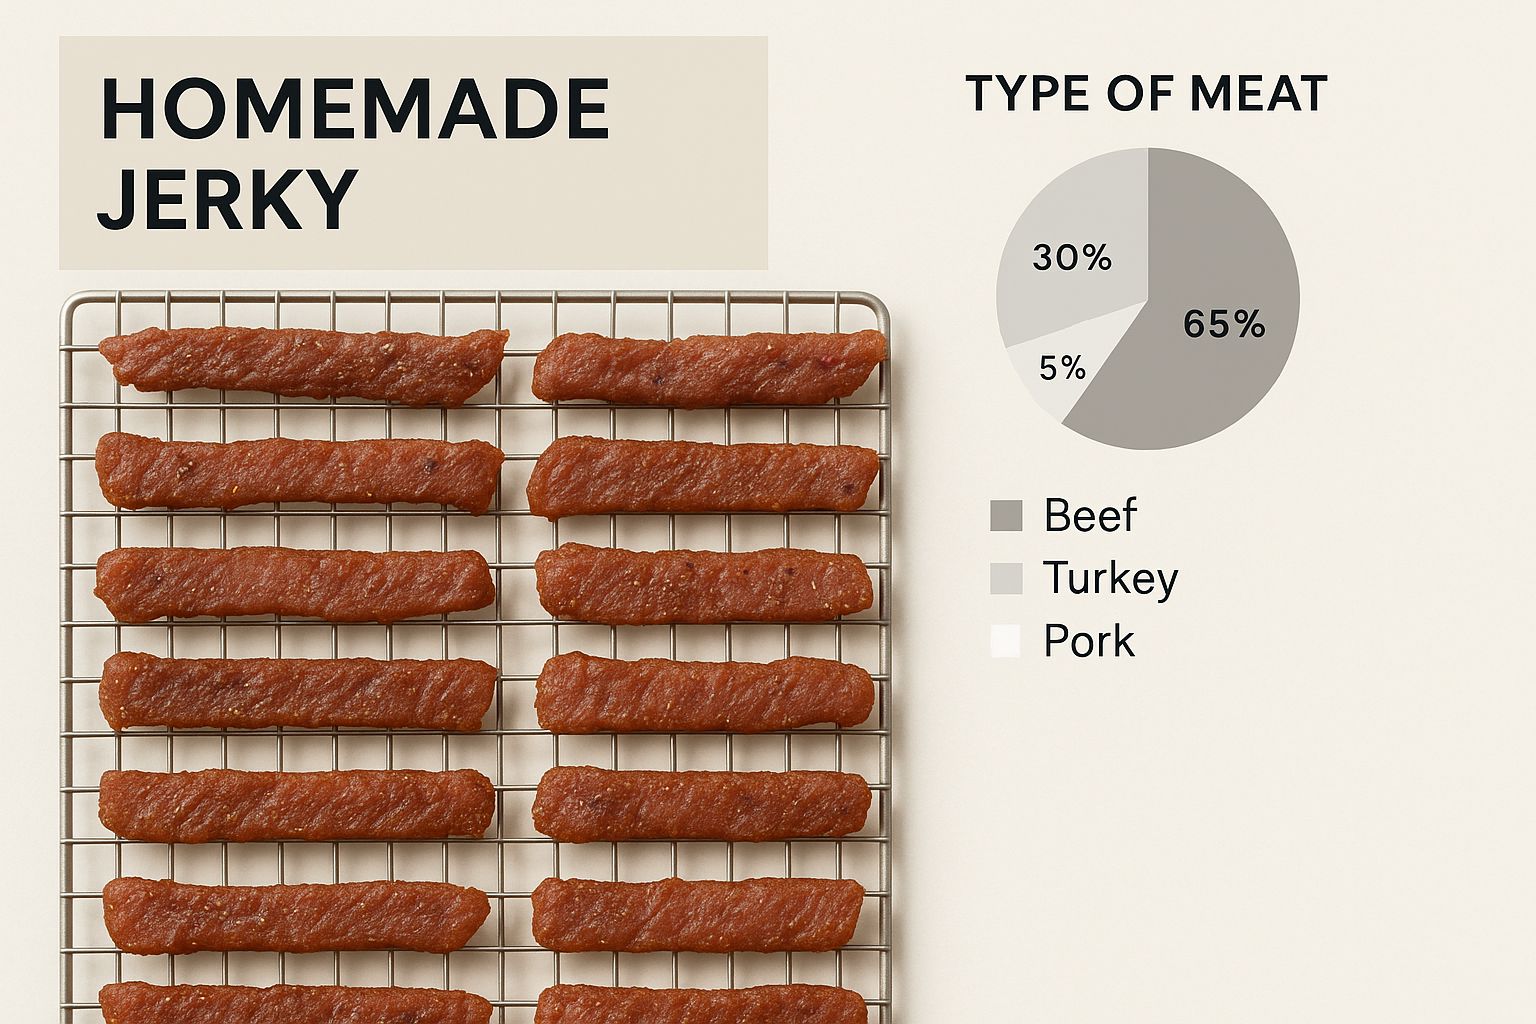
Jerky is what most of us are familiar with. It starts with lean meat, sliced thin, often marinated for flavor, and then dried with low, consistent heat. The single most important factor is airflow. Whether you use a fancy dehydrator, a smoker, or your oven on its lowest setting, you need air moving freely around every single piece.
Biltong, its South African cousin, is a little different. It's also cured but often with vinegar, which adds a unique tang. Instead of being laid flat, the whole muscle is hung to air-dry slowly without any added heat. This gives it a softer, more tender texture than jerky.
No matter which you're making, the goal is a finished product that is tough and dry to the touch but still bends without breaking. If it snaps, you’ve gone too far. Stored in an airtight container away from light, your homemade jerky or biltong will be good for months.
Smoking and Drying Methods Compared
To make things clearer, here’s a quick breakdown of how these different preservation techniques stack up against each other. Each one serves a different purpose, from cooking a meal to creating something that will last for a year.
| Method | Process Temperature | Best For | Primary Goal | Resulting Shelf Life |
|---|---|---|---|---|
| Hot Smoking | 165-250°F | Ribs, brisket, fish, sausages | Cooking and flavoring | Days to a few weeks (refrigerated) |
| Cold Smoking | Below 90°F | Bacon, lox, country ham, prosciutto | Preservation and deep flavor | Months to a year+ (pantry stable) |
| Dehydrating (Jerky) | 140-160°F | Lean beef, venison, turkey | Long-term preservation | 1-2 months (pantry stable) |
| Air-Drying (Biltong) | Room temperature | Whole muscle beef cuts | Long-term preservation | Several months (pantry stable) |
Understanding these differences is key. Hot smoking is for food you plan to eat soon, while cold smoking, dehydrating, and air-drying are the true tickets to long-term, refrigeration-free storage.
Pressure Canning for Long-Term Storage
While those ancient arts of curing, smoking, and drying are fantastic for creating flavorful meats that last, pressure canning is the undisputed champion of modern, long-term preservation. This is the ultimate method for anyone serious about food security. We're talking about storing meat safely without a lick of refrigeration for years, not just a few months.
How does it work? By using a potent combination of intense heat and pressure, you create a completely sterile, vacuum-sealed world inside a glass jar—an environment where spoilage organisms simply can't survive.
This isn't some newfangled idea; it's a refinement of a concept that goes way back. The real breakthrough in preserving meat without refrigeration came in the early 19th century. In 1809, a French inventor named Nicolas Appert figured out that heating food in airtight containers stopped it from going bad. This process, which we now just call canning, was a game-changer for feeding armies and navies during the Napoleonic Wars. You can get a deeper dive into these foundational discoveries in food preservation on Market.us.
Why a Pressure Canner Is Non-Negotiable
Let's get one critical point straight right out of the gate: you cannot safely can meat in a boiling water bath canner. It’s a dangerous shortcut. Meat is a low-acid food, which means it’s the perfect breeding ground for Clostridium botulinum—the nasty bacteria behind botulism. A water bath canner only hits 212°F (100°C), and that's just not hot enough to destroy those dangerous spores.
A pressure canner, on the other hand, is a specialized piece of equipment built to reach temperatures of 240°F (116°C) or even higher. It traps steam under pressure to create that intense heat, which is the only scientifically proven way to kill botulism spores in low-acid foods. For meat, poultry, fish, and most vegetables, it's the only safe choice. End of story.
Preparing Your Meat for Canning
Success starts with good prep. You can pressure can just about any meat, from beef and pork to venison and chicken. The golden rule is to begin with fresh, high-quality meat and handle it with care.
- Choose Lean Cuts: Fat is the enemy of a good seal and can turn rancid over time. Take a few extra minutes to trim away as much excess fat and gristle as you can.
- Cut Uniformly: Chop your meat into consistent one-inch cubes or strips. This isn't just for looks; it ensures every single piece gets heated evenly during processing.
- Pre-Cook Your Meat: You have two options here: raw-pack or hot-pack. I almost always recommend hot-packing, which means you lightly brown or pre-cook the meat before it goes into the jars. This shrinks the meat down, letting you pack more in, and it helps push out any extra air.
The Canning Process: A Step-by-Step Guide
Once your meat is ready, the canning process itself is very methodical. Always, always follow the specific instructions for your pressure canner model, but the general workflow is pretty consistent. This is where attention to detail really pays off.
- Prepare Jars and Lids: Your canning jars need to be spotless and free of any nicks or cracks that could compromise the seal. I like to keep them hot in simmering water to prevent thermal shock when the hot meat goes in. Wash new lids and bands in warm, soapy water.
- Pack the Jars: If you're hot-packing, fill the hot jars with your pre-cooked meat and its hot broth (or just boiling water), leaving one inch of headspace at the top. This empty space is absolutely crucial for creating that all-important vacuum seal.
- Remove Air Bubbles: Grab a non-metallic tool—a bubble popper or even a plastic chopstick works great—and slide it around the inside of the jar. You'll be surprised how many little air bubbles you release.
- Seal the Jars: Wipe the jar rims clean with a damp cloth. Any little bit of grease or food can prevent a perfect seal. Center the lid on the jar and screw the band on until it’s just fingertip-tight. Don't crank it down; air needs to escape during the processing stage.
- Process in the Canner: Place the jars on the rack inside your canner, which should already have a few inches of simmering water at the bottom. Lock the lid, and let the canner vent steam for a full 10 minutes before putting the weight on the vent pipe. Then, bring it up to the required pressure for your altitude.
A critical safety step people often forget is adjusting for altitude. Water boils at lower temperatures the higher you go, so you have to increase the canner pressure to compensate. As a rule of thumb, for every 1,000 feet above sea level, you'll need to adjust your pounds of pressure (psi). Check a reliable canning guide for the exact numbers.
Confirming a Successful Seal
After the processing time is up, kill the heat and just let the canner depressurize on its own. Don't rush this part. Once the gauge hits zero, you can safely open the lid. Let the jars cool on a towel, undisturbed, for 12 to 24 hours.
Now for the moment of truth. To check the seal, press down on the center of the lid. If it doesn't flex or make a "ping" sound, you've got a good seal. You can also take the screw band off and gently try to lift the jar by the lid's edge—a solid seal will hold tight.
Any jars that didn't seal need to be reprocessed right away or stuck in the fridge and eaten within a few days.
Essential Safety and Proper Storage Practices
Learning to preserve meat the old-fashioned way is an incredibly satisfying skill. But all that time and effort mean nothing if the final product isn’t safe to eat. Storing that meat without a fridge goes hand-in-hand with safety, which means you have to be vigilant from day one. You’re on the lookout for botulism, mold, and rancidity from the moment you start until that meat is ready to be sliced.
Your own senses—sight, smell, and touch—are your best inspection tools. Before you even dream of eating your preserved meats, give them a good, hard look. Spoilage bacteria will scream their presence with off-odors, a slimy feel, or weird discoloration. Always trust your gut; if something feels wrong, it probably is.
Identifying Signs of Spoilage
Knowing exactly what to look for is the most critical part of this entire process. A harmless bloom of white mold is one thing, but a spot of green fuzz is another entirely. A perfectly preserved piece of meat should look, feel, and smell clean and appetizing.
Here’s a practical rundown of what to check for on your cured, dried, or smoked meats:
- Unpleasant Odors: This is the most obvious red flag. Your meat should smell savory, smoky, or salty—never sour, rancid, or like something has died. A sharp, cheesy, or ammonia-like smell is a definite sign that things have gone bad.
- Visible Mold Growth: While some traditional charcuterie develops a beneficial white mold, any black, green, blue, or fuzzy mold means it's contaminated. Don't even think about just cutting it off. Mold sends root-like structures deep into the meat that you can't see.
- Strange Textures: Good cured and dried meats should be firm and dry. If the surface feels slimy, tacky, or weirdly moist, it’s a sign that spoilage bacteria are having a party.
- Discoloration: Keep an eye out for any gray, green, or brown patches that weren’t there when you put the meat away. A little oxidation might cause minor color changes, but dramatic or patchy spots are a huge warning.
"When in doubt, throw it out." This isn't just a catchy phrase; it's the golden rule of food preservation. The risk of getting seriously ill from bad meat is never worth it.
Best Practices for Long-Term Storage
Once you've done the hard work of preserving your meat, storing it correctly is what guarantees it’ll last. The ideal storage spot is cool, dark, and dry with good air circulation. This magic combination defeats the two biggest enemies of your preserved meat: moisture and fat going rancid.
This isn’t a new idea. Back in the 19th century, ice houses were a massive leap forward for storing meat without modern refrigeration. People would harvest huge blocks of ice in the winter and pack them in insulated buildings with sawdust, keeping meat near freezing for months. You can see how our ancestors tackled this challenge by checking out these historical food preservation methods from the 19th century.
For any restaurant kitchen, a clean storage environment is absolutely non-negotiable. A systematic approach is the only way to keep both preserved and fresh foods safe from cross-contamination. Following a detailed commercial kitchen cleaning checklist is just part of the job for any professional outfit.
Proper Labeling and Container Selection
Good organization is a cornerstone of food safety. Every single piece of preserved meat you make needs a clear label. Don't skip this step.
At a minimum, your label should include:
- Type of Meat and Cut (e.g., "Pork Belly - Bacon")
- Date of Preservation (e.g., "Cured on 11/15/2024")
- Method Used (e.g., "Dry Cured & Cold Smoked")
This simple habit eliminates any guesswork and helps you follow the "first in, first out" rule, making sure you use up the oldest stuff first.
When it comes to containers, breathability is often the name of the game for cured and dried meats. Vacuum-sealing is fantastic for stopping oxidation, but for many traditional methods, hanging the meat in a muslin bag or wrapping it in butcher paper in a cool cellar is better. It allows for that crucial airflow that prevents moisture from building up.
Rehydrating and Preparing Your Meats Safely
Before you can dig in, many preserved meats—especially the heavily salted or dried ones—need a little prep work. For things like salt pork or country ham, this usually means soaking the meat in cold water for several hours, or even overnight. You'll want to change the water a few times to pull out the excess salt.
If you're using jerky or other dried meats in a stew or soup, simmering them gently in broth or water will bring back moisture and tenderness. No matter what, always cook rehydrated meats to a safe internal temperature before you serve them. This final step kills any potential surface contaminants that might have shown up during storage.
Common Questions About Meat Preservation
Diving into traditional meat preservation is an amazing journey, but it naturally brings up a lot of questions. Getting good, practical answers is what builds the confidence you need to turn your hard work into safe, delicious food. Let's dig into some of the most common things people ask when they're learning to store meat without a fridge.
What Are the Best Cuts of Meat for Beginners to Preserve?
If you're just starting out, my advice is always the same: think small, lean, and uniform. You want to avoid cuts with big bones or weird shapes right now. Those can make getting an even cure or a consistent dry a real headache.
Pork belly is a fantastic place to start. Its high fat content is incredibly forgiving, which makes it perfect for your first batch of homemade bacon or salt pork. For jerky, you can't beat lean cuts like beef round or flank steak. They have very little intramuscular fat, which is what goes rancid and ruins your jerky during long-term storage.
How Long Does Properly Preserved Meat Actually Last?
This is the big question, and the honest answer is: it depends. The shelf life you can expect is a direct result of the preservation method you chose and your storage conditions. There's no single magic number, but here are some solid guidelines I've learned to trust over the years.
- Hard-Cured and Dried Meats: Things like jerky, biltong, or a properly made country ham can last for months. If you store them in a cool, dark, and dry spot with good airflow, you can sometimes get up to a year out of them.
- Pressure-Canned Meats: When it comes to long-term storage, this is the undisputed champion. Properly canned meat can stay safe and delicious for 2 to 5 years, as long as that vacuum seal stays perfectly intact.
No matter what method you use, always give your preserved food a thorough inspection for any signs of spoilage before you even think about eating it. Your eyes and nose are your best friends here.
Is Pink Curing Salt Absolutely Necessary?
Okay, let's get serious for a moment. For any preservation project that isn't going to be cooked and eaten right away—we're talking bacon, ham, salami, you name it—using a curing salt with sodium nitrite is a non-negotiable safety step. These salts, often called Prague Powder #1 or pink salt, are what prevent the growth of Clostridium botulinum. That's the nasty bacteria that causes botulism.
Sure, old-school methods sometimes relied on truly massive amounts of regular salt, but modern food safety science is crystal clear on this. Curing salts are the best way to eliminate this deadly risk. It’s a simple step that makes all the difference. This is just as critical as ensuring your food is cooked to a safe final temperature. For anyone firing up the grill, this burger temperature chart is a great resource to guarantee both safety and perfect results.
One critical mistake I see beginners make is confusing pink curing salt with Himalayan pink salt. They are completely different and not interchangeable. Using Himalayan salt for curing will not protect you from botulism.
Ultimately, mastering these techniques opens up a whole new world of flavor and self-sufficiency. You're connecting with a timeless culinary tradition and gaining a practical skill for modern-day life.
At Charbroilers, we understand that incredible flavor is built on a foundation of the right techniques and the best equipment. For restaurant owners looking to elevate their menu with authentic, flame-grilled taste, we offer a wide selection of commercial charbroilers to meet any kitchen's demands. Explore our range of high-performance infrared, gas, and electric char broilers to find the perfect solution for your business at https://charbroilers.com.