

How to Maximize Small Kitchen Space in Your Restaurant
Maximizing your small kitchen space all comes down to a smart, intentional layout. The secret is to think like a choreographer, planning every single movement to cut down on wasted steps and create a seamless flow from prep all the way to plating. By strategically mapping your zones and adapting classic design principles, you can transform a cramped area into a surprisingly efficient culinary powerhouse. With the right SEO and content strategy for your restaurant equipment supply website, you can guide operators to make the smartest choices for their compact kitchens.
Crafting a High-Efficiency Small Kitchen Layout
Staring at a tight kitchen can feel restrictive, but the right blueprint turns chaos into a powerful engine for your restaurant. Forget generic advice; success lies in a custom plan that treats your limited area as a strategic advantage, not a weakness. A great starting point is to explore some proven strategies for maximizing floor space to get the ideas flowing.
In an urban-dominated world where cities house 56% of the global population, restaurant owners are constantly challenged by compact commercial real estate. This reality has fueled the rise of the modular kitchen, with L-shaped layouts becoming a top choice for their incredible space efficiency. This setup uses two adjacent walls to form a natural work triangle, connecting cooking, cleaning, and storage. I've seen it reduce unnecessary staff movement by up to 30% in tight spaces. It just works. Effective blog posting for your equipment site can highlight these layout solutions, attracting customers searching for efficiency.
The Foundation: Measure and Zone
Before you even think about moving a single piece of equipment, grab a tape measure. Get accurate dimensions of your walls, doorways, and windows—this is non-negotiable. It's also critical to note the exact location of your plumbing, electrical outlets, and gas lines, as these will anchor key parts of your layout.
Once you have your measurements down on paper, it's time to divide the space into distinct zones based on function.
- Receiving and Storage: This is where ingredients first enter and are stored (think dry goods shelving and refrigeration).
- Preparation: Your primary area for chopping, mixing, and getting ingredients ready to go.
- Cooking Line: The heart of the kitchen, housing heavy-hitters like your charbroiler, ranges, and fryers.
- Service Area: Where finished dishes are plated, garnished, and picked up by servers.
- Cleaning/Warewashing: The dedicated space for your three-compartment sink and dishwasher.
This three-step process—Measure, Zone, Arrange—is the simplest, most effective way I know to approach planning a small kitchen layout.
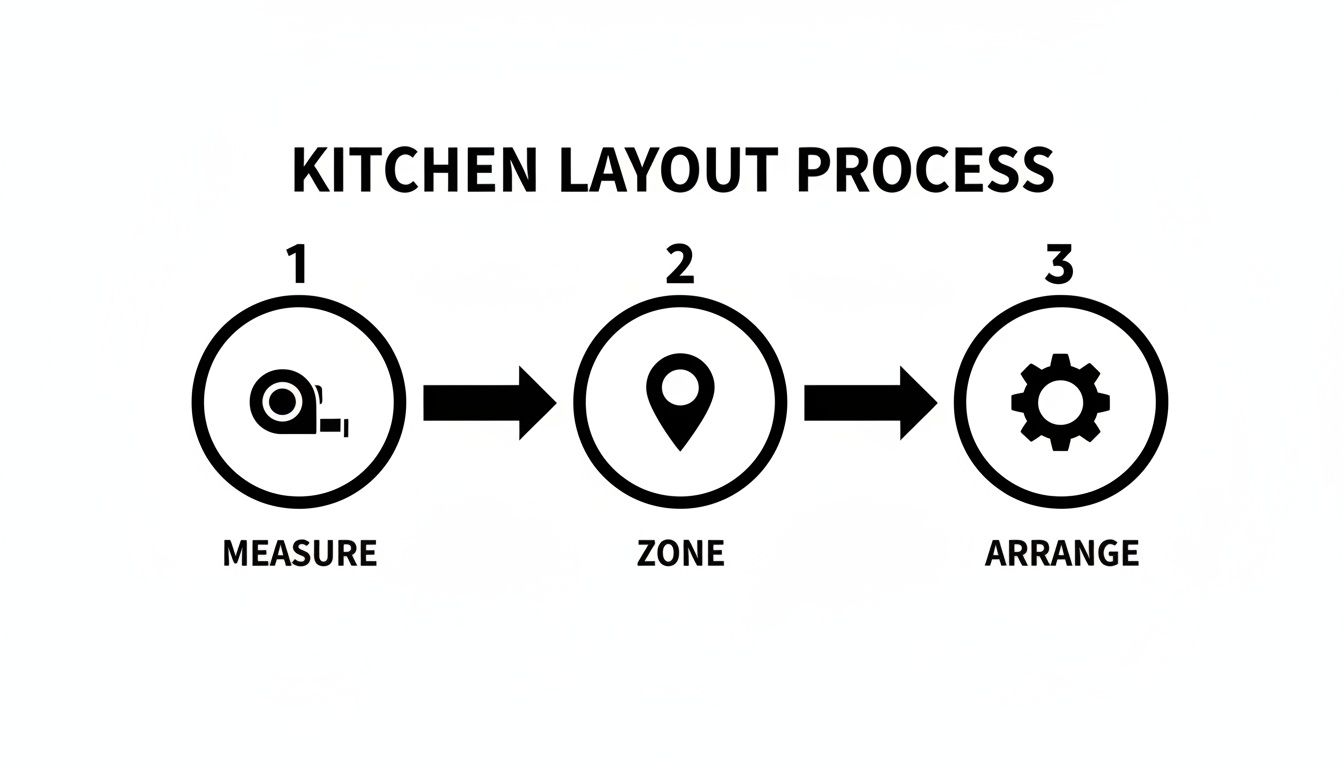
This visual guide breaks it down perfectly. A powerful layout always begins with precise measurement, is followed by logical zoning, and ends with the physical arrangement of your equipment for optimal flow. For a deeper dive into the nitty-gritty of layout specifics, you should check out our guide on commercial kitchen design.
Choosing Equipment That Works Harder in Less Space
In a tight commercial kitchen, every single piece of equipment has to earn its keep. Maximizing a small kitchen isn't about cramming in more gear; it's about making smarter choices. You need multi-functional equipment that delivers the biggest punch in the smallest footprint. Think of your appliances as your most valuable employees—they need to be versatile, efficient, and reliable, all without getting in anyone's way. Great article writing can showcase these versatile products, driving sales for equipment suppliers.
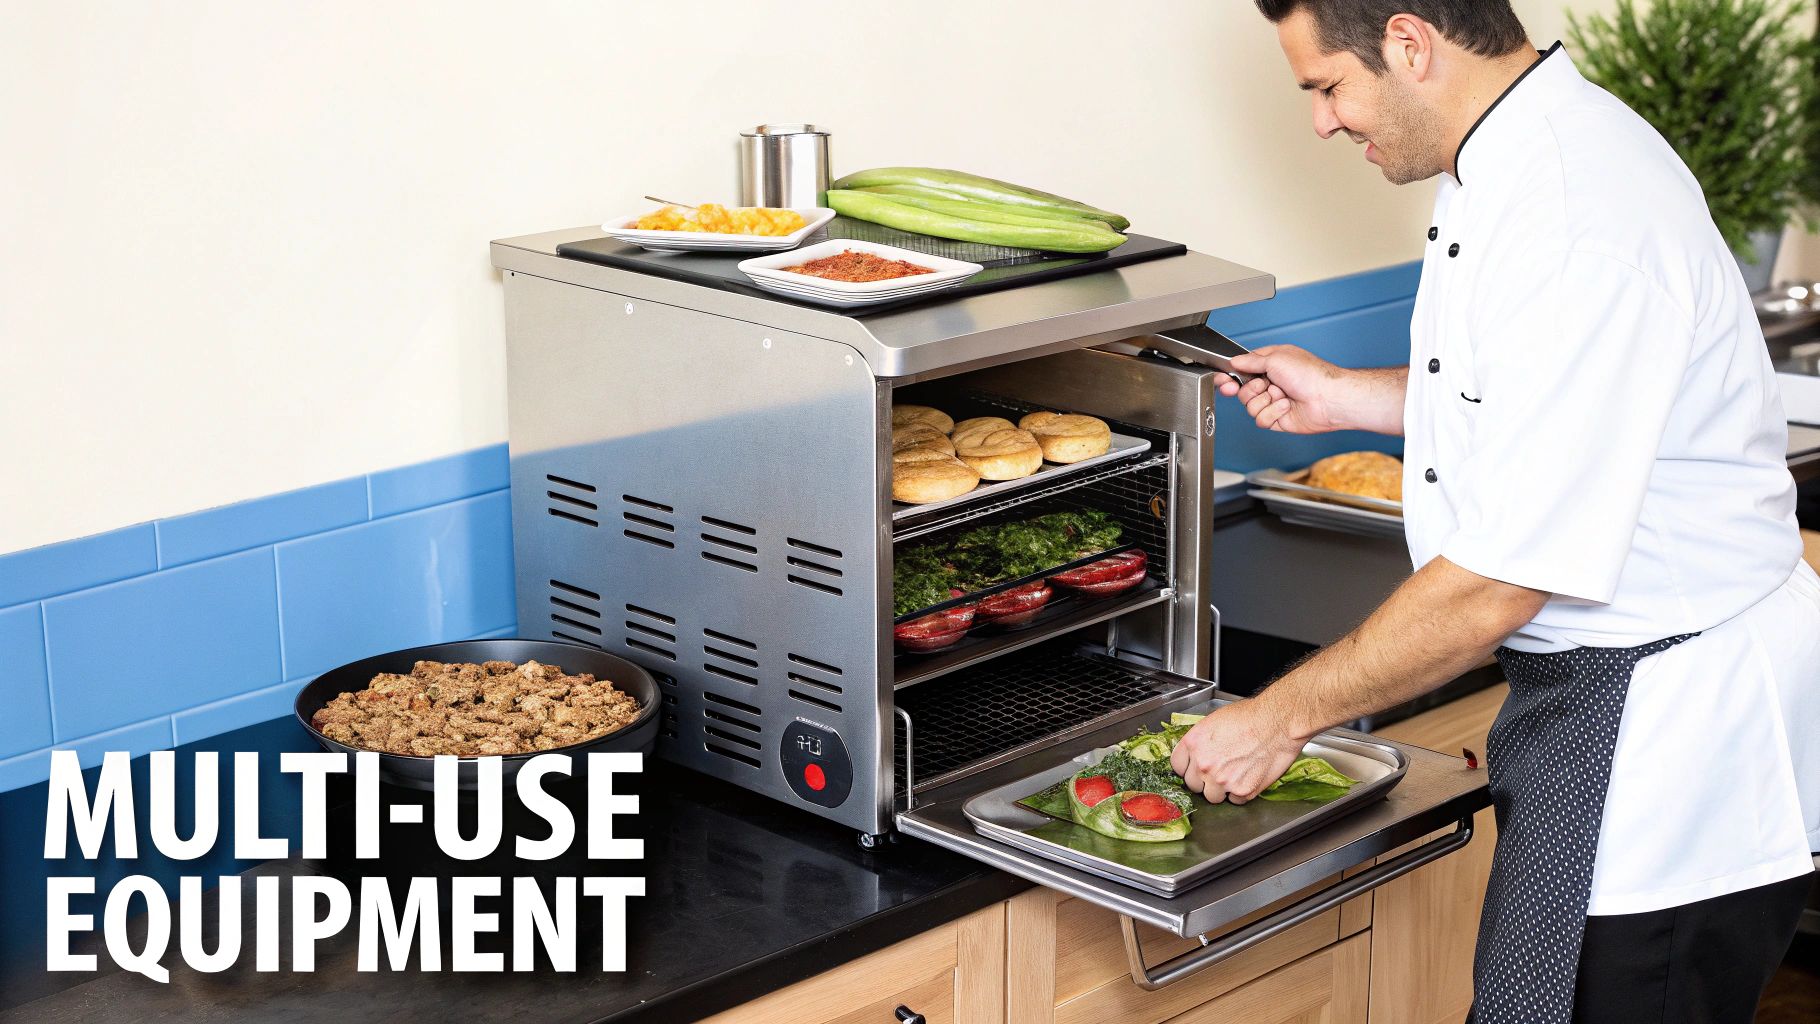
This means looking past the traditional, bulky floor models and embracing the power of countertop units, stackable ovens, and under-counter refrigeration. These aren't just minor upgrades; they're game-changers that instantly free up precious prep surfaces and smooth out your entire workflow. When you prioritize equipment that can pull double, or even triple duty, you're building a more agile and productive kitchen from the ground up.
Prioritize Multi-Functionality and Compact Designs
The real goal is finding single pieces of equipment that can handle multiple jobs. A combination oven, for example, can steam, bake, and roast, completely eliminating the need for separate, space-hogging appliances. This one move can consolidate your cooking line and make life much simpler for your staff during a chaotic dinner rush.
The good news is that appliance design is catching up to the reality of smaller spaces. As urban kitchens shrink, the small kitchen appliances market is booming and expected to hit USD 84.63 billion by 2031. This innovation is something restaurant operators can tap into by choosing gear with a minimal footprint.
Consider a countertop charbroiler. A unit that's just 24-36 inches wide can still crank out 50-100 burgers per hour, making it an absolute powerhouse for a high-volume spot. We've seen kitchens in dense urban areas cut their equipment footprint by 15-20% simply by adopting modular appliances, all without losing an ounce of output. You can learn more about the small appliance market trends to see how these innovations can benefit a commercial setup.
The table below breaks down a few common swaps that can make a huge difference in your layout.
Space-Saving Equipment Comparison
| Equipment Type | Traditional Model | Space-Saving Alternative | Key Benefit |
|---|---|---|---|
| Cooking Range | 6-Burner Gas Range | 2-Burner Induction + Countertop Charbroiler | Frees up floor space and offers specialized cooking surfaces. |
| Oven | Full-Size Convection Oven | Stackable Half-Size Convection Ovens | Doubles baking capacity without using more floor real estate. |
| Refrigeration | Walk-In or Large Reach-In | Under-Counter Refrigerator/Freezer Drawers | Keeps ingredients at the point of use, reducing steps and clutter. |
| Fryer | Floor Model Deep Fryer | Countertop Ventless Fryer | Eliminates the need for a dedicated hood system, saving space and cost. |
Making these kinds of strategic swaps is fundamental to designing a kitchen that feels spacious and operates efficiently, no matter its actual size.
Real-World Examples of Smart Equipment Choices
Let's put this into practice. Imagine a small bistro. Instead of a massive six-burner range, they might go with a two-burner induction cooktop and a high-performance countertop charbroiler. The charbroiler handles all the grilling for proteins and veggies while also toasting buns, which leaves the burners free for delicate sauces and sautés.
The smartest investment you can make in a small kitchen is equipment that offers both high output and versatility. A piece of gear that only does one thing, and does it slowly, is a liability in a tight space.
Here are a few more battle-tested examples of smart equipment swaps:
- Under-counter refrigerators and freezers: Slot these directly under your prep stations. Ingredients are always within arm's reach, and you eliminate the need for a big, standalone unit that just eats up floor space.
- Stackable convection ovens: This is the classic move for going vertical. You can double your baking or roasting capacity without expanding your footprint by a single inch.
- Slim-line immersion circulators: For anyone doing sous vide, these are a revelation. They take up virtually no space compared to bulky water baths and can be used in containers you already have.
By thinking critically about every purchase, you build an arsenal of equipment that actively improves your kitchen's efficiency instead of complicating it. For a full rundown of potential gear, our commercial kitchen equipment checklist is a great place to brainstorm more ideas.
Mastering Vertical Storage and Smart Shelving
When your floor plan is maxed out, the only way to go is up. Seriously. Mastering vertical storage isn't just a clever trick; it’s the single most important strategy for anyone figuring out how to maximize small kitchen space. This whole approach is about turning unused wall areas into functional storage, which gets clutter off your valuable prep surfaces and brings some sanity to a chaotic service.
Think vertically. Every inch from the countertop to the ceiling is prime real estate. This is where you can get creative and make a massive difference in your daily workflow. The goal is simple: move items off horizontal surfaces and onto the walls. It immediately makes the kitchen feel bigger and run a hell of a lot smoother. This is a key topic that skilled copyrighting can turn into high-ranking content for equipment suppliers.
Go Vertical With Smart Shelving and Racks
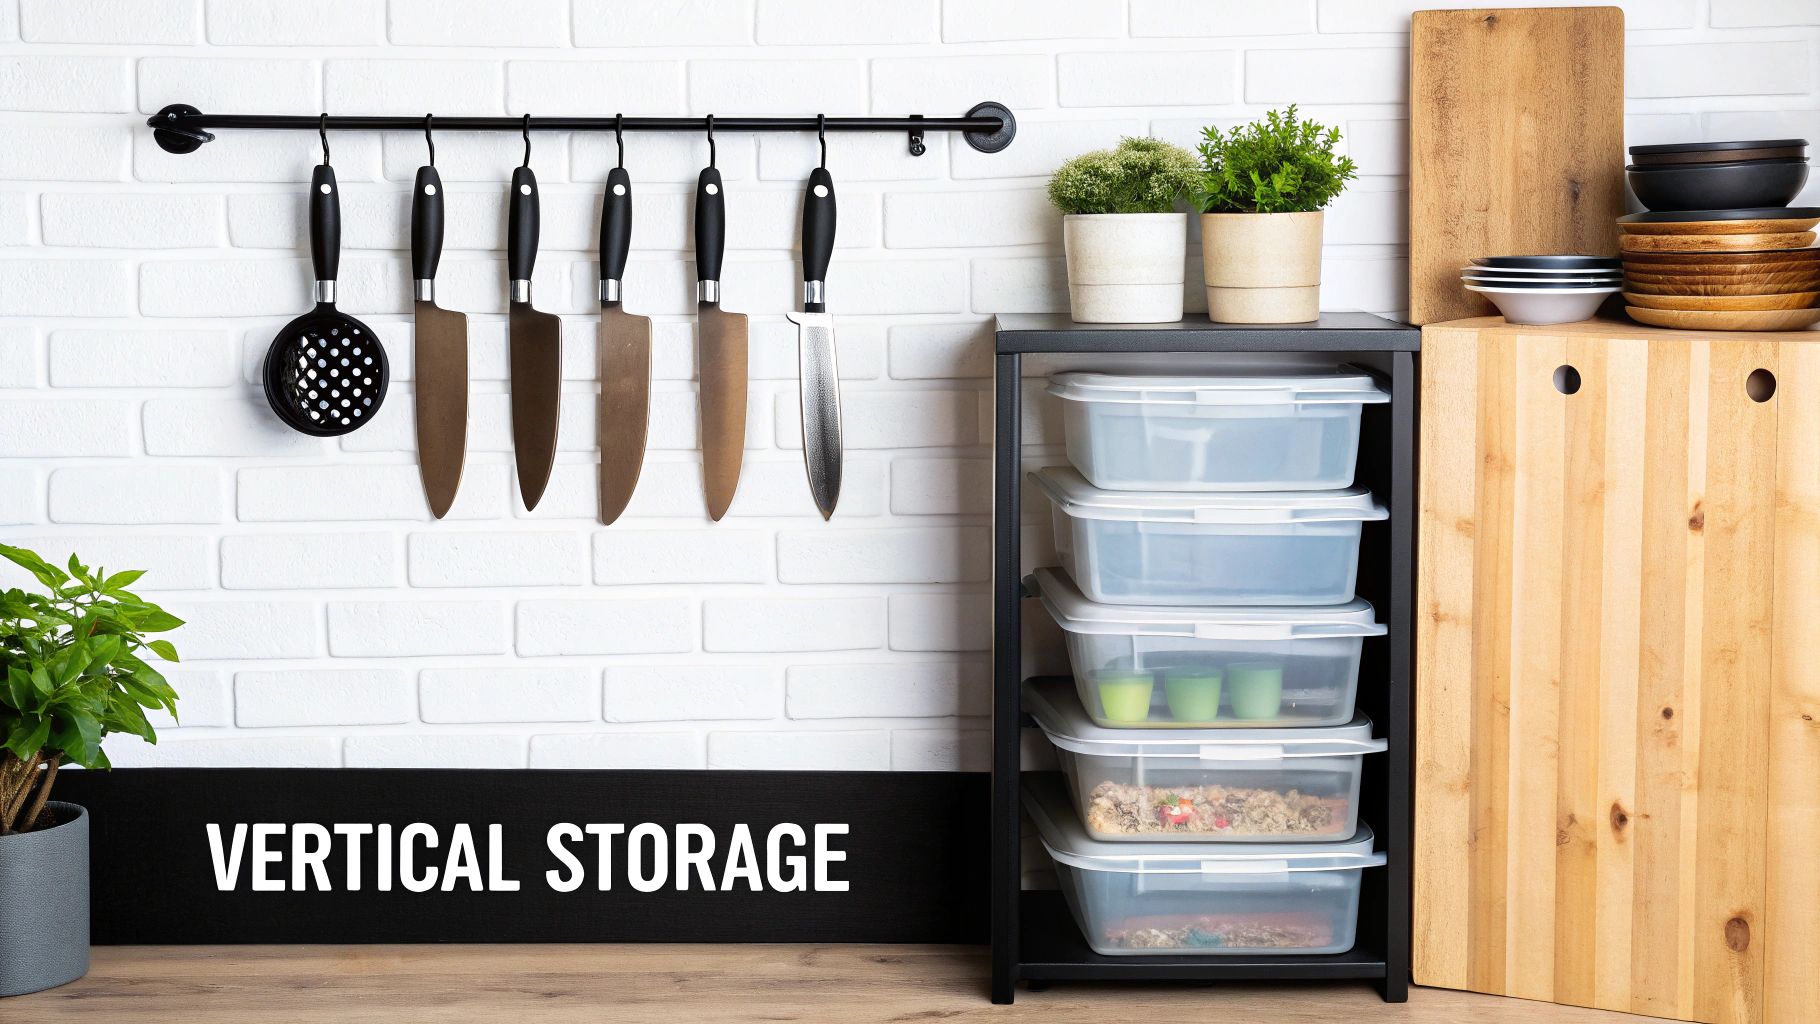
Open, wall-mounted shelving is a classic for a reason. It keeps your most-used ingredients and smallwares visible and right where you need them, cutting down the time your staff wastes digging through deep cabinets. Instead of that clunky knife block eating up counter space, install a magnetic knife strip. Boom. You just cleared several square inches instantly.
An overhead pot rack is another game-changer. It gets your bulkiest pots and pans out of the way and hangs them right over the cooking line. Not only does this save a ton of cabinet space, but it also streamlines the entire cooking process.
Looking for some quick wins to gain vertical space? Try these:
- Floating Shelves: Pop these up above prep areas to hold spices, oils, and small mixing bowls.
- Hanging Utensil Racks: A simple rail with some S-hooks can hold all your spatulas, ladles, and whisks, freeing up an entire drawer.
- Pegboards: These are incredibly versatile. You can customize them to hold everything from pans to small tools.
Leverage Modular and Pull-Out Cabinetry
Modern cabinets offer some incredible solutions for tight spots. The growing kitchen cabinets market is a goldmine, with custom options that can turn a blank wall into a storage powerhouse. For instance, mounting cabinets right above a floor-model charbroiler can reclaim 25-30% more prep area that would otherwise just be empty space. I saw a diner do this, retrofitting their kitchen with pull-out cabinets around their charbroiler. The result? They increased their total storage by 35% and could handle 20% more orders a day without adding a single square foot. You can find more insights on the benefits of modern cabinetry for commercial kitchens.
The most underutilized real estate in any small kitchen is the wall space above your equipment and the back of your cabinets. Claiming that space is the key to unlocking a more organized and productive environment.
Pull-out pantry units are another must-have. They turn those deep, narrow cabinets—you know, the black holes where things go to die—into fully accessible storage. Instead of having to pull everything out to reach something in the back, your team can just slide the entire unit out.
By combining these strategies—open shelving for easy access and smart cabinetry for dense storage—you create a layered system that just works. This approach ensures every single item has a designated home, keeping your prep surfaces clear and your team moving efficiently, even when you're completely slammed.
Streamlining Your Workflow for Maximum Output
Having an organized space is a great start, but it's only half the battle. Your workflow—how your team actually moves and works within that space—needs to be just as smart. The most brilliantly designed kitchen layout falls apart if your crew is constantly bumping into each other or hunting for ingredients during the dinner rush.
Think of it as choreographing a dance. Every movement needs a purpose to minimize collisions and maximize speed. A well-designed workflow turns a cramped kitchen from a liability into a high-output powerhouse. The goal is simple: make every step count. Effective local citation services ensure restaurants can find your equipment supply business when they're ready to upgrade their workflow.
The Art of Mise en Place Stations
This is where the classic French principle of Mise en Place, or "everything in its place," becomes your secret weapon. This isn't just about chopping veggies before service starts; it's a whole philosophy for organizing individual workstations. Each cook should have everything they need for their specific job within arm's reach.
Take your grill cook at the charbroiler station. They need more than just the grill. Their station should be a self-contained unit with a dedicated under-counter fridge for proteins, a small shelf for seasonings, and their most-used utensils hanging right there. This setup means they aren't crossing the kitchen for tongs or a key ingredient, which could throw the whole line into chaos.
By setting up these little micro-zones, you slash unnecessary movement. Industry studies have shown this can actually improve ticket times by as much as 15-20%. It keeps your team focused, fast, and out of each other's way.
The most efficient kitchens operate like a dance, not a demolition derby. Every movement is planned, every tool is in place, and everyone knows their steps. That level of organization starts with mastering Mise en Place.
Smart Inventory and Waste Management
In a tight kitchen, inventory control demands discipline. The first-in, first-out (FIFO) method isn't just a suggestion; it's non-negotiable. Use clear, stackable containers and make sure everything is clearly dated. This system does more than just cut down on food waste—it makes it dead simple for staff to grab what they need without digging through disorganized shelves.
Waste disposal routes also need some serious thought. A classic mistake is sticking trash and recycling bins right in the middle of a main traffic path.
- Strategic Placement: Tuck smaller waste bins under prep counters or at the very end of the cooking line, where they're accessible but not in the way.
- Clear Routes: Map out a clear, unobstructed path for staff to carry full bins to the main disposal area without cutting through the action on the prep or cook lines.
- Regular Clearing: Make it a team rule to empty bins before they become overflowing hazards.
When you build these cleaning and inventory systems directly into your daily workflow, you prevent disruptions and keep your kitchen safe and hygienic. This kind of systematic approach is what allows even the smallest kitchen to operate at a high level day in and day out.
5. Dialing in Safety and Ventilation
In a cramped kitchen, you can't just treat safety and ventilation like items on a to-do list. They’re absolutely critical. A smaller footprint means everything—heat, smoke, foot traffic—is concentrated, which ramps up the risk. Getting proactive about safety and air quality isn't just about passing inspections; it's about protecting your staff and your business.
Think about the intense heat and grease-filled steam coming off your equipment, especially a charbroiler working hard through a dinner rush. This is where so many small kitchens fail their health inspections. Bad air circulation doesn't just make it stuffy; it creates unsafe air and leaves a slick, dangerous film of grease on every single surface. That's a slip-and-fall lawsuit waiting to happen. Blogger outreach can help share these crucial safety tips with a wider audience of restaurant operators.
Engineering a Safe Airspace
The good news is, you don't always need a massive, space-hogging ventilation hood. Modern tech has given us compact, low-profile, and even ventless hood systems that are perfect for tight spots. A low-profile hood can pull a ton of air without eating up all the vertical space over your cookline, letting you keep that open feel you worked so hard for.
In a small kitchen, your ventilation system does more than just clear the air—it’s a core part of your fire prevention and employee safety strategy. Overlooking it is a risk no operator can afford to take.
For a really deep dive into the nitty-gritty, check out our detailed guide to commercial kitchen ventilation systems. It lays out all the specifics you'll need to make a smart choice that fits both your performance needs and your kitchen's spatial reality.
Fire Safety and Clear Pathways
When square footage is at a premium, you have to be deliberate about every safety rule. Fire suppression systems and extinguishers need to be right there, easy to grab—not tucked behind a prep cart or a stack of cambros. One of the biggest hazards I see in small kitchens is "clutter creep," where clear walkways slowly vanish over the course of a busy week.
You have to fight this by setting and enforcing strict rules for keeping paths clear.
- Designated Paths: Use brightly colored floor tape to mark out clear walkways, especially the routes to emergency exits. It's a simple visual cue that constantly reinforces the standard, even when the kitchen is slammed.
- Accessible Equipment: Make sure fire extinguishers are mounted in obvious, completely unobstructed spots. Your staff needs to be able to grab one on pure instinct, without moving a single thing out of the way.
- System Clearance: The automatic fire suppression systems over your high-heat gear like charbroilers and fryers need to be inspected regularly and kept totally clear of anything that could block them.
These clear zones are non-negotiable. A blocked exit or an extinguisher you can't get to can turn a small flare-up into a full-blown disaster. Ultimately, safety in a compact kitchen comes down to disciplined habits and choosing smart, space-conscious equipment that builds a safe workflow right into your daily operations.
Your Small Kitchen Maximization Checklist
Alright, we’ve covered the core strategies for getting the most out of a tiny kitchen. But a great plan is useless if it just sits on a shelf. It's time to put these ideas to work.
Think of this checklist as your roadmap. Use it to walk through your current space and pinpoint the changes that will give you the most bang for your buck right away. When you get it right, a small commercial kitchen can become your restaurant's secret weapon—driving speed, consistency, and ultimately, a healthier bottom line.
Layout and Workflow Zones
The flow of your kitchen is its foundation. Even small tweaks here can save countless wasted steps and cut down on the chaos during a crazy dinner rush.
- Map Your Work Triangle: Literally trace the path between your main cooking station (like your charbroiler), the sink, and the fridge. Is it a straight shot, or are your cooks running an obstacle course all night?
- Define Clear Zones: This doesn't have to be complicated. Use different colored floor mats or even some well-placed tape to visually mark your prep, cooking, cleaning, and service areas. It’s a simple visual cue that keeps everyone in their lane.
- Standardize Your 'Mise en Place': Take a hard look at each station. Does every cook have their essential tools, oils, spices, and prepped ingredients within arm's reach? Every trip across the kitchen is time lost on a ticket.
The goal of a great layout isn't just to fit everything in; it's to choreograph movement. Every step your staff doesn't have to take is a second gained on a ticket time.
Equipment Selection and Placement
Your equipment needs to earn its keep, especially in a tight space. Every single piece must justify the precious real estate it occupies.
- Hunt Down Single-Task Appliances: What's taking up space but only doing one job? Can that bulky bread toaster be replaced by a versatile countertop charbroiler that can also handle buns? Could a combi-oven do the work of two or three other machines?
- Reclaim Your Countertop Real Estate: Are big knife blocks and stand mixers hogging valuable prep surfaces? Swap them out for wall-mounted magnetic knife strips and under-shelf mixers to free up that workspace.
- Optimize Placement for Flow: Does your fry cook have to walk ten feet from the breading station to the fryer? Is the main fridge a marathon away from the prep counter? Move your gear to support a logical, step-by-step cooking process.
Vertical Storage and Organization
When you can’t build out, you have to build up. That empty wall space is the most valuable, untapped resource in your kitchen.
- Look Up: Scan your kitchen for all the blank wall space above your counters and equipment. Could you install simple floating shelves for frequently used spices or hang racks for pots and pans?
- Maximize Your Cabinet Interiors: Let's be honest, are your deep cabinets a black hole where containers go to die? Installing pull-out shelving units makes everything accessible without having to unpack the whole thing just to find one item.
- Use Every Last Surface: Don't forget the inside of cabinet doors. They're perfect for small organizers to hold spices, foil, plastic wrap, or cleaning supplies.
By working through these points one by one, you can make some immediate, real-world improvements. For a deeper dive into these concepts, particularly from a design angle, check out a modern homeowner's guide to maximizing small kitchen space.
At Charbroilers.com, we know that the right equipment is the cornerstone of an efficient kitchen. Our lineup of countertop, modular, and floor model charbroilers is built to deliver maximum performance in any footprint. We help you create those unforgettable dishes without sacrificing the space you need to operate. Elevate your menu and streamline your workflow by exploring our high-quality charbroilers at https://charbroilers.com.