

How to Do a 301 Redirect to Protect Your SEO
Think of a 301 redirect as a permanent change-of-address form for your website. It's a simple command that tells browsers and search engines, "Hey, this page isn't here anymore—it's moved over here for good." Getting this right is one of the most fundamental skills for protecting your website's search rankings whenever you make changes.
Why a 301 Redirect Is Your SEO Safety Net

Let’s say your restaurant equipment supply site has a killer blog post about choosing the right commercial charbroiler. It ranks well, brings in consistent traffic, and has been linked to by a handful of industry blogs. One day, you decide to refresh the content and move it to a cleaner, more descriptive URL.
If you just delete the old page and publish the new one, all that hard-earned SEO authority vanishes. Poof. Gone.
Search engines will see the old URL as a broken link (a 404 error), and anyone who clicks on it from an old link will hit a dead end. This isn't just frustrating for users; it’s a big red flag to Google that your site might be poorly maintained, which can drag down your overall rankings.
Preserve Your Hard-Earned Authority
The real magic of a 301 redirect is that it preserves your SEO value. It’s an instruction that tells search engines, "This page has moved permanently, and all of its authority—its 'link juice'—now belongs to this new URL." This is how you pass along what's known as link equity.
Every backlink pointing to your old page is like a vote of confidence. A 301 redirect makes sure those votes are transferred to the new page, helping it maintain its position in the search results. As experts in SEO and blogger outreach for restaurant equipment sites, we've seen firsthand how crucial this is.
Here’s a quick look at the most common times a 301 redirect is an absolute must-have.
Common Scenarios Requiring a 301 Redirect
| Scenario | Reason for Redirect | SEO Impact If Not Implemented |
|---|---|---|
| Website Redesign | URLs are often restructured or changed to improve site architecture. | Catastrophic loss of rankings and traffic as old, authoritative pages become 404 errors. |
| Switching to HTTPS | Moving from http:// to the secure https:// protocol creates a new version of every single page. |
Duplicate content issues, split link equity, and potential security warnings for users. |
| Changing Domain Names | Rebranding or acquiring a new domain name for your business. | Complete loss of all existing domain authority and backlinks without proper site-wide redirects. |
| Merging Content | Combining two similar posts into one comprehensive guide to avoid keyword cannibalization. | One page loses all its SEO value, and users trying to access it find a dead end. |
| Deleting Old Pages | Removing outdated product pages or irrelevant blog posts. | Users and search engines encounter 404 errors, creating a poor user experience and wasting link equity. |
These are just a few examples, but they highlight how critical this simple tool is for maintaining a healthy, high-performing website.
The Technical Side of a 301
At its core, a 301 redirect is just an HTTP status code. It’s a message sent from your server to a browser or search engine bot that says the requested page has moved for good. This permanent nature is what tells search engines to transfer nearly all of the old URL's link equity to the new one.
Thankfully, Google updated its algorithms back in 2016 to ensure that PageRank isn't lost through 301s. Before that, you'd lose a small fraction of your ranking power in the process, but now the transfer is nearly seamless.
Key Takeaway: Forgetting to implement a 301 redirect during a site migration or redesign is one of the most common and damaging SEO mistakes. It's like telling search engines to throw away years of your hard work.
To really nail your redirect strategy, it's also worth understanding the crucial differences between 301 and 302 redirects and their SEO impact. While a 301 is permanent, a 302 is temporary—and choosing the wrong one can accidentally sabotage your efforts.
Building Your Redirect Map Before You Start
Jumping into the technical side of redirects without a solid plan is asking for trouble. Before you even think about touching a line of code or logging into a plugin, your first and most critical move is to build a redirect map.
Think of it as a blueprint for your project. It's usually a simple spreadsheet that meticulously pairs every single old URL with its new, permanent home. You wouldn't move houses by just throwing things in random boxes, right? You'd label them. A redirect map does the same for your website's pages, ensuring nothing valuable gets lost in the transition.
Honestly, this is where most website updates either succeed or fail miserably. Forgetting this step is a surefire way to create broken links, tank your user experience, and leave precious SEO authority on the table. In fact, a huge number of traffic drops after a migration—some studies say 70% or more—can be traced directly back to botched or missing 301 redirects. A good map prevents all that. You can see more on the risks of site migration SEO over at StudioUbique.com.
Crawling Your Site to Find Every URL
First things first: you need a complete list of every URL on your current website. Even a small site for a restaurant equipment supplier can have hundreds of pages you’ve completely forgotten about—old blog posts, discontinued product pages, or weird landing pages from a campaign you ran years ago. Finding them all by hand is next to impossible.
This is where a site crawler is your best friend. A tool like Screaming Frog (which has a very generous free version) can spider your entire site and spit out a clean list of every URL. This export is the foundation of your redirect map.
Once you have that list, open up a spreadsheet with at least two columns:
- Column A (Old URL): Paste the full list of URLs you just crawled from your existing site here.
- Column B (New URL): This is where you'll manually map each old URL to its new destination.
The Golden Rule of One-to-One Mapping
As you start filling out your map, your mantra should be one-to-one mapping. This means every old page should be pointed to the most relevant, equivalent new page. For example, your old page yourstore.com/products/gas-charbroilers should redirect to the new, equivalent page like yourstore.com/commercial-grills/gas-grills—not just the homepage.
A massive mistake people make is redirecting all their old pages to the homepage. This is lazy. It tells Google the old content is gone, effectively deleting its ranking value and creating a confusing, dead-end experience for users who click an old link.
If an old page genuinely has no direct replacement, your next best option is to point it to the most relevant category page. Just never take the easy way out and send everything to your main domain.
Prioritize Your Most Valuable Assets
Let's be real: not all pages are created equal. Some of your URLs are SEO powerhouses, holding valuable backlinks and driving a ton of organic traffic. You absolutely have to identify these pages and make sure their authority is transferred perfectly.
Use a tool like Ahrefs or Semrush to find the pages with the most backlinks and the highest organic traffic. For a deeper look at this process, check out our guide on how to find backlinks in Google.
Once you've identified these heavy hitters, mark them on your redirect map. Color-code them, bold them—whatever it takes. This ensures you'll double- and triple-check them first when it's time to test your implementation. This simple step is your insurance policy for protecting your most important rankings.
Alright, you’ve got your redirect map, and now it's time to bring it to life. This is where the rubber meets the road. Implementing a 301 redirect might sound a bit intimidating, but the truth is, it can range from highly technical to surprisingly simple depending on what platform your website is built on.
Whether you're comfortable getting your hands dirty in server files or you'd much rather click a few buttons in a user-friendly interface, there's a path forward for you. We’ll cover the most common methods, imagining we're working on a restaurant equipment supply website, so you can see how this blueprint protects all the hard work you’ve put into your SEO.
This workflow visualizes the process we've been talking about—moving from crawling your site to mapping and prioritizing your URLs.
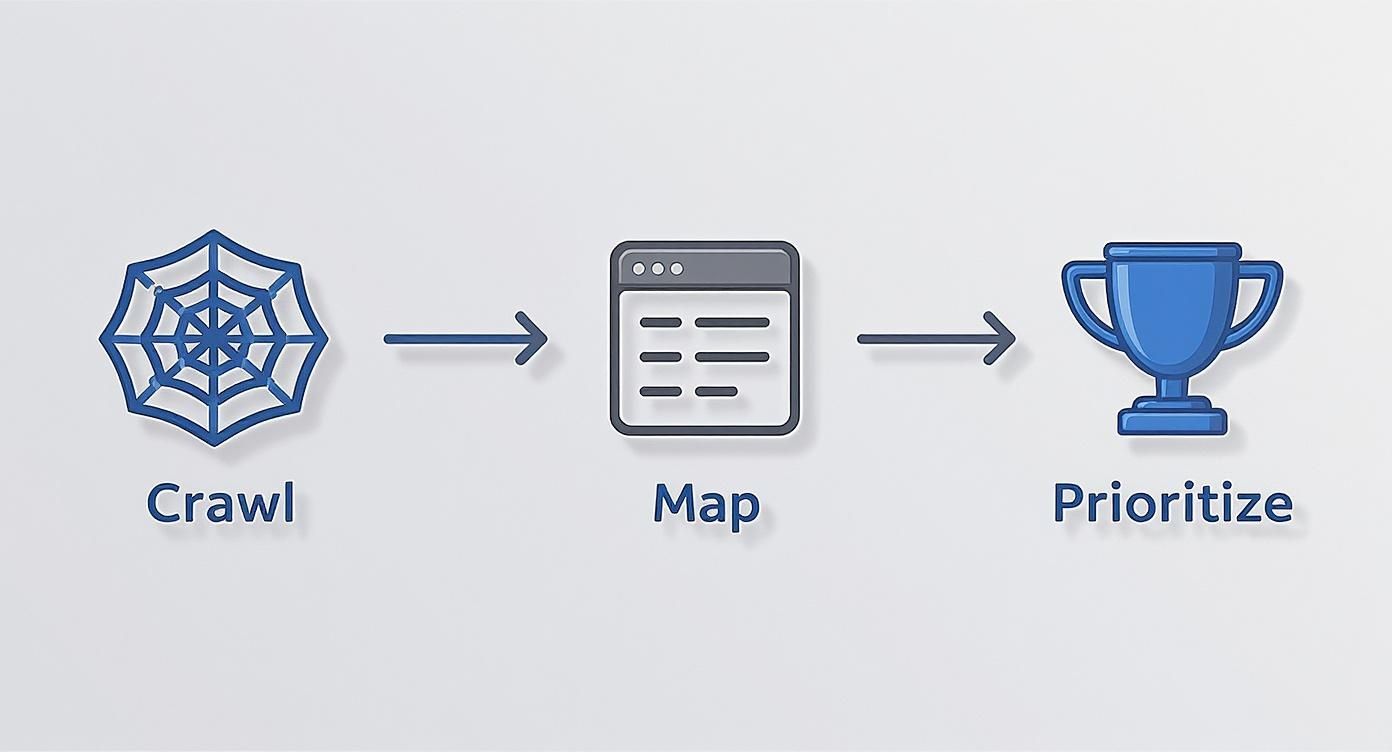
It’s a great reminder that a successful implementation starts long before you touch a single line of code. It all begins with a solid, meticulous plan.
Going Straight to the Source: Editing Server Files
For anyone with direct server access, editing the configuration files is the most powerful and efficient way to handle redirects. This is the go-to method for developers and technically-savvy site owners because it’s lightning-fast and doesn't add the bloat of third-party plugins that can slow your site down.
You'll typically run into one of two main server types: Apache or Nginx. First, you'll need to figure out which one your hosting provider uses.
Implementing Redirects on Apache via .htaccess
If your website runs on an Apache server, your best friend is the .htaccess file. This is a simple configuration file that lives in your website’s root directory and gives you powerful control over how the server behaves. You can get to it with an FTP client or right through your hosting provider's file manager.
Here are a few common redirect rules you can copy and paste directly into your .htaccess file. A quick pro-tip: always add new rules at the very top of the file to make sure they get processed first.
-
Redirecting a Single Page Perfect for when one page moves to a new home. For instance, if you're redirecting an old charbroiler model's page to its shiny new replacement.
Redirect 301 /old-product-page.html https://www.yourdomain.com/new-product-page.html -
Redirecting a Whole Directory This is a lifesaver if you’ve restructured an entire category, like moving all your "grills" into a new "commercial-cooking" section of the site.
RedirectMatch 301 ^/grills/(.*)$ https://www.yourdomain.com/commercial-cooking/$1 -
Redirecting an Entire Domain Absolutely essential when you’re moving your entire website to a new domain name. This ensures all traffic and link equity follow you.
RewriteEngine onRewriteCond %{HTTP_HOST} ^olddomain.com [NC,OR]RewriteCond %{HTTP_HOST} ^www.olddomain.com [NC]RewriteRule ^(.*)$ https://newdomain.com/$1 [L,R=301,NC]
A Quick Word of Caution: The .htaccess file is incredibly powerful. A single typo or a misplaced character can take your entire website offline. Always, always back up the original file before you make a single change.
Configuring Redirects on Nginx Servers
For sites running on the increasingly popular Nginx servers, you won't find a .htaccess file. Instead, you'll be editing the nginx.conf file, which is usually located in /etc/nginx/. The syntax is a bit different, but it’s just as effective.
-
Redirecting a Single Page
location = /old-page { return 301 https://yourdomain.com/new-page; } -
Redirecting an Entire Domain
server {server_name www.olddomain.com olddomain.com;return 301 $scheme://newdomain.com$request_uri;}
Editing server files directly results in clean, efficient redirects that are processed before anything else on your site loads, making it a fantastic choice for performance.
User-Friendly Ways to Manage Redirects
If editing code feels a bit out of your comfort zone, don't sweat it. Many platforms and hosting control panels offer intuitive tools that do all the heavy lifting for you.
Using a WordPress Plugin
For the millions of websites built on WordPress, a dedicated plugin is by far the easiest way to manage 301 redirects. One of the most popular and trusted options out there is the Redirection plugin, which boasts over 2 million active installations.
The beauty of this plugin is its simplicity. You just copy the old URL and the new URL from your redirect map into the right fields, and the plugin takes care of the rest. It even tracks 404 "not found" errors, which is great for catching broken links you might have missed.
Here’s how you do it:
- Install and activate the Redirection plugin from your WordPress dashboard.
- Head over to Tools > Redirection.
- In the "Add new redirection" area, paste the old URL into the "Source URL" field.
- Paste the new URL into the "Target URL" field.
- Click "Add Redirect."
You'll repeat this for every URL pair on your map. It’s definitely more manual than server rules, but it's pretty much risk-free.
Using cPanel's Redirect Manager
Many hosting providers use cPanel as a control panel, and it comes with a handy built-in redirect manager. This tool actually writes the correct rules to your .htaccess file for you, giving you a nice middle ground between editing the file by hand and using a WordPress plugin.
Just log into your cPanel and find the "Redirects" icon, usually under the "Domains" section. From there, the interface is incredibly straightforward:
- Choose the redirect type (Permanent 301).
- Select the domain you're redirecting from.
- Enter the old URL's path (like
/old-blog-post). - Enter the full new URL you want to send people to.
- Click "Add."
This is a fantastic option if you want the reliability of a server-side redirect without the risk of accidentally breaking your website.
Platform-Specific Redirects Like Shopify
E-commerce platforms like Shopify know how often product pages and categories change, so they have their own redirect tools built right in. On Shopify, the process couldn't be simpler.
From your Shopify admin dashboard, just go to Online Store > Navigation. You'll see an option for "URL Redirects." From there, you can create a redirect by entering the old path and the new one. It's designed from the ground up to be easy for store owners who aren't developers.
No matter which platform you're on, the core idea is the same. Your redirect map is your single source of truth, and the goal is to implement every redirect accurately to protect your SEO and give your visitors a seamless experience.
Advanced Redirect Tactics That Pros Use
Once you get the hang of basic one-to-one redirects, it's time to start thinking like a pro. The real difference between a good redirect strategy and a great one comes down to how you handle complex, large-scale situations. It’s about efficiency and foresight.
Moving past simple page-by-page fixes is how you manage massive site migrations, solve tricky SEO puzzles, and keep your technical foundation solid. These aren't just time-saving tricks; they're essential for protecting every bit of your hard-earned authority and giving both users and search engines a smooth experience.
Harnessing the Power of Regular Expressions
Let’s say you’re overhauling your entire blog structure. Maybe your old restaurant equipment URLs were something clunky like domain.com/blog/2023/10/post-title, and you want to clean them up to domain.com/blog/post-title. Redirecting hundreds of these one by one would be an absolute nightmare—and you're almost guaranteed to make mistakes.
This is where Regular Expressions (RegEx) become your best friend. RegEx is a special syntax for finding and matching text patterns. With a bit of RegEx in your .htaccess file, you can write a single rule to handle every single blog post redirect in one shot.
For instance, a single line of code could do all the heavy lifting:
RewriteRule ^blog/([0-9]{4})/([0-9]{2})/(.*)$ /blog/$3 [R=301,L]
This one line is a game-changer. It finds any URL matching the old year/month pattern, grabs the post title at the end, and sends it to the new, cleaner structure. Learning even basic RegEx will save you an incredible amount of time and headaches during any big site change.
The Dangers of Redirect Chains
One of the sneakiest and most damaging SEO mistakes is the redirect chain. This happens when a URL takes multiple hops to get to its final destination.
- Here's how it looks: Page A redirects to Page B, which then redirects to Page C.
This is bad news for a couple of reasons. First, every extra hop slows things down for your visitors. More importantly for SEO, it chews up your crawl budget. Search engine bots only have so much time to spend on your site, and making them follow a convoluted path means they might give up before they even find your most important pages.
While Google says link equity generally passes through a chain, the best practice is always to go for a direct shot.
Pro Tip: Make a habit of running a site crawl with a tool like Screaming Frog. Its "Redirect Chains" report will instantly flag any of these multi-hop issues. You can then fix the problem at the source by updating Page A to point directly to Page C.
International SEO and Hreflang Considerations
If your equipment business sells to customers in different countries, you’re probably using hreflang tags to show Google which page version is for which language or region. When you redirect a page that uses hreflang, you have to be extra careful.
Just redirecting your US page (/en-us/products) to a new location isn't enough. You have to go back and update the hreflang tags on all the other international versions of that page (like the Canadian /en-ca/ or Mexican /es-mx/ pages) so they point to the new US URL. If you skip this, you’ll be sending conflicting signals to Google, which can seriously mess with your international rankings.
Aligning Your XML Sitemap and Canonical Tags
Getting the 301 redirect live is a huge part of the process, but the job isn't done. To give search engines a clear and consistent message, you need to update all your other technical signals to match the change.
Here’s your final post-redirect checklist:
- Update Your XML Sitemap: Your sitemap should be a clean list of final, live URLs (pages that return a 200 OK status code). Get rid of the old URLs and add the new ones. A sitemap full of redirected links just tells Google your site isn't well-maintained.
- Check Canonical Tags: Make sure the canonical tag on the new page points to itself. This is the final confirmation to Google that this new page is the one true version.
- Update Internal Links: Sure, the redirect will catch any old internal links you missed, but it's much better to update them directly. This takes a little load off your server and helps search bots find your new URLs faster. This whole process is a key piece of your SEO strategy, just like the off-page tactics we cover in our guide on how to build domain authority for your website.
Mastering these advanced moves means you can handle pretty much any redirect scenario with confidence, keeping your site's SEO health intact through even the biggest projects.
How to Test and Troubleshoot Your Redirects
You’ve built your map and pushed your redirects live—now comes the moment of truth. Just crossing your fingers and hoping for the best isn't a strategy. You have to actively verify that every single redirect works exactly as intended, protecting both your user experience and your hard-won SEO rankings.
Failing to test is like a chef sending out a dish without tasting it first. It leaves you exposed to silent but serious problems that can cost you traffic and revenue. This toolkit will walk you through confirming your redirects are firing correctly and fixing common issues before they cause any real damage.
First-Line Defense: Browser and Online Checkers
Your first and fastest check can be done right from your own browser. Modern browsers come packed with powerful built-in developer tools that give you an instant verdict on whether your redirect is working and, more importantly, if it's the right kind.
Here's how to do a quick spot-check:
- Open a new browser tab in Chrome or Firefox.
- Open the Developer Tools (usually by pressing F12 or Ctrl+Shift+I).
- Click on the "Network" tab within the tools.
- Paste in one of your old URLs and hit Enter.
The network log should immediately populate. Look at the very first entry for your old URL—it should show a status code of 301. This is your proof that a permanent redirect is in place. If you see a 302 (temporary) or a 404 (not found), you know you’ve got a problem to fix.
For a less technical approach, there are tons of free online redirect checkers. These tools let you paste in a URL and will show you the full redirect path and the status code for each step. They are perfect for spotting nasty redirect chains.
Digging Deeper with Google Search Console
Once your initial checks look good, your next stop should always be Google Search Console. This is Google's direct line of communication with you, and it's invaluable for spotting issues that pop up after you've implemented your changes.
Inside Search Console, pay close attention to the Coverage report (found under "Indexing"). After a migration, it's totally normal to see a rise in "Redirected" pages—that's a good sign! What you need to watch out for is an unexpected spike in "Not found (404)" errors. This is a red flag that some of your old URLs weren't correctly redirected and are now leading to dead ends.
This data is a goldmine. By exporting the list of 404s, you can quickly identify which pages slipped through the cracks, update your redirect map, and get them fixed before they hurt your rankings. Regularly checking this report is a fundamental part of a healthy technical SEO routine, similar to what's outlined in our comprehensive guide on how to perform a website audit.
Solving Common Redirect Problems
Even with a perfect map, things can go wrong. Here are some of the most common culprits I've seen over the years and how to fix them fast.
-
Syntax Errors: A single misplaced character in your
.htaccessfile can break all your redirects or even take down your entire site. Meticulously double-check your code for typos, extra spaces, or missing symbols. - Caching Delays: Often, the redirect is working perfectly, but your browser or server cache is stubbornly serving an old version of the page. Clear your browser cache and any server-side caching (from a CDN or a WordPress plugin) before you re-test.
- Redirect Loops: This is when Page A redirects to Page B, which then redirects right back to Page A, trapping users and search bots in an endless loop. This usually happens because of a conflicting rule. Systematically disable your redirect rules one by one until you find the one causing the conflict.
- DNS Propagation: If you've recently changed domains, sometimes redirect issues aren't about your code at all. When debugging, don't forget that DNS propagation can play a crucial role, so it's essential to have a solid understanding DNS propagation. It can take anywhere from a few hours to a couple of days for these changes to update across the internet.
Redirect Testing Tools and Methods
Picking the right tool for the job makes testing much more efficient. Whether you're doing a quick check or a full-scale audit, different methods have their own strengths.
| Tool/Method | What It Checks | Best For | Cost |
|---|---|---|---|
| Browser Developer Tools | HTTP Status Codes (301, 404, etc.) | Quick, single-URL spot checks | Free |
| Online Redirect Checkers | Full redirect chains and status codes | Diagnosing redirect loops and multiple hops | Free |
| Google Search Console | Crawl errors (404s), redirected pages | Post-migration monitoring and finding misses | Free |
| Screaming Frog SEO Spider | Bulk checks of thousands of URLs from a list | Large-scale site migrations and audits | Freemium |
Each of these tools offers a different lens to view your redirects. Using a combination of them gives you the most complete picture and ensures nothing critical gets missed.
Common Questions About 301 Redirects
Even with a solid plan, specific questions always pop up when you're in the middle of a 301 redirect project. Getting these details right is the difference between a smooth transition and a long-term SEO headache. Let's tackle the questions that come up most often when you're in the trenches.
Think of these as the practical details that separate a smooth site migration from a frustrating one. Knowing the answers ahead of time gives you the confidence that your redirects are actually protecting your website's authority.
How Long Should I Keep a 301 Redirect in Place?
For SEO, a 301 redirect is permanent. The standard advice is to keep it active for at least one year, but honestly, the safest and smartest strategy is to leave it in place indefinitely.
It can take search engines a surprisingly long time to find, crawl, and fully de-index every single old URL. More importantly, you never know when an old backlink from an industry blog or a forgotten bookmark will send a potential customer your way. If you remove that redirect, the link breaks, creating a dead end for the user and wasting any link equity it was passing.
What Is the Difference Between a 301 and a 302 Redirect?
This is one of the most critical distinctions in technical SEO. A 301 redirect signals a permanent move. You're telling search engines in no uncertain terms to transfer all ranking power to the new URL and update their index for good.
A 302 redirect, on the other hand, signals a temporary move. It’s meant for short-term situations where the original page will eventually return. You might use a 302 for things like:
- A/B testing a new product page design.
- Running a seasonal promotion that will revert to the original URL later.
- Sending users to a location-specific page while the main one is being updated.
Using a 302 by accident when you mean 301 is a classic SEO blunder. It tells Google not to pass on the link equity, essentially putting the SEO value of your old page on pause instead of transferring it.
Key Takeaway: Always use a 301 for permanent changes like updating a URL, migrating your site, or merging content. Only use 302s for genuinely temporary situations.
Can Too Many 301 Redirects Hurt My Website?
The number of 301 redirects on your site isn't the problem. It’s a natural part of managing a website as it evolves. A large, established restaurant equipment site will inevitably build up hundreds, or even thousands, of them over the years from discontinued products and content updates.
The real danger isn't the quantity of redirects but their structure. The two main issues you have to watch out for are:
- Redirect Chains: This happens when Page A redirects to Page B, which then redirects to Page C.
- Redirect Loops: This is when Page A redirects to Page B, which then redirects right back to Page A.
Both of these problems slow down your site for real users and burn through your crawl budget with search engines. Bots will often give up before they even reach the final page. Your goal should always be a single, direct redirect from the old URL to its final destination.
At Charbroilers.com, we understand that having the right equipment is just as important as having a great website. A high-quality commercial charbroiler can transform your menu by delivering the smoky flavor and perfect grill marks that customers love. Whether you need a countertop model for a small bistro or a powerful floor model for a busy diner, find the perfect charbroiler to elevate your culinary creations at https://charbroilers.com.