

Grinding Meat for Hamburgers: A Complete Guide for Restaurant Success
To make a truly exceptional burger that sets your restaurant apart, grinding the meat yourself is the single most important thing you can do. This isn't just a chef's technique; it's a fundamental step that gives you total control over the texture, fat content, and flavor of every patty. It’s what turns a simple menu item into a genuine gourmet experience and a key reason why content marketing and blog posting are crucial for sharing your culinary secrets with customers.
Why Grinding Your Own Meat Is a Game-Changer for Your Business
Let's be honest, pre-packaged ground beef is a mystery. It’s convenient, sure, but you have no idea which cuts were used, how long it's been sitting there, or how compacted it's become. All that time and processing robs the beef of its freshness and flavor, which can negatively impact your restaurant's reputation.
When you take on the task of grinding meat for hamburgers, you're tapping into a classic butcher's craft. You're no longer settling for a generic product; you're transforming your kitchen into a custom burger lab. You decide exactly what goes into the blend, guaranteeing every patty is fresher, juicier, and packed with more real beef flavor than anything you can buy from a supplier. Highlighting this commitment through targeted article writing can significantly boost your brand's image.
The Real Benefits of a Fresh Grind
Making that little bit of extra effort pays off in huge ways that pre-ground options just can't touch.
- Unbeatable Flavor: When you grind whole muscle cuts right before service, you preserve all those rich, beefy flavors that start to fade the second the meat is processed and packaged.
- Perfect Texture: You get to choose the coarseness of the grind. This means you can create a looser, more tender patty that completely avoids the dense, rubbery texture found in mass-produced ground beef.
- Custom Fat Ratios: Nailing that perfect 80/20 lean-to-fat ratio is simple. Or maybe a 75/25 blend suits your signature burger. You're in control, and that control guarantees a juicy, succulent burger every single time.
Grinding meat for burgers isn't a new idea. It actually took off after German immigrants brought minced beef patties to the U.S. in the late 1800s. But it was the mechanization of meat grinders in the early 20th century that really shaped the modern hamburger, allowing for consistent production on a massive scale. You can learn more about the evolution of the hamburger market and its history.
At the end of the day, grinding your own beef is less about just following a recipe and more about embracing a technique. It’s a skill that will completely change how you prepare one of America's most iconic foods. This unique selling proposition is a perfect topic for blogger outreach, letting food influencers spread the word about your quality.
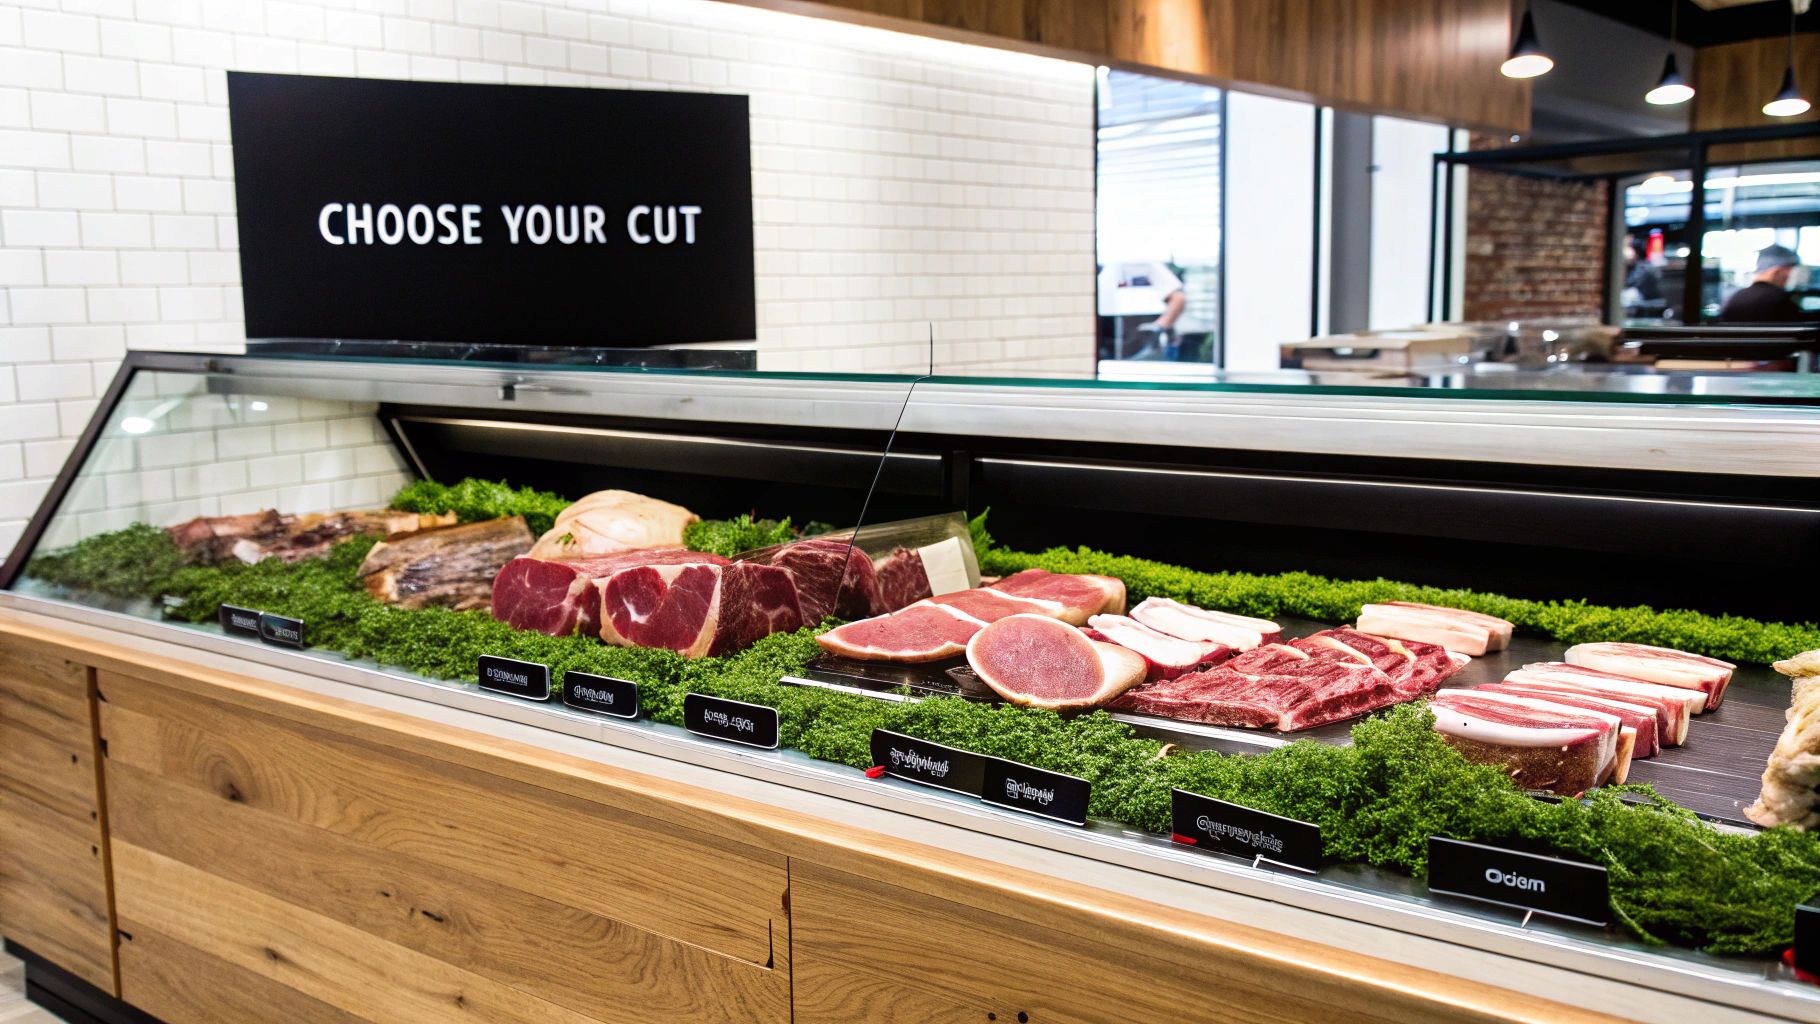
Choosing the Best Beef Cuts for Your Burger Blend
The secret to an incredible, steakhouse-quality burger starts long before the patty ever hits the grill. It begins with the specific cuts of beef you choose to grind. When you select whole-muscle cuts yourself, you get complete control over the final flavor and texture. This dedication to quality is a powerful marketing tool, making professional copywriting essential to convey your message effectively.
Different cuts bring their own unique character to the party. Some deliver that deep, beefy flavor, while others provide the essential fat needed for a moist patty. A few even add a satisfying textural chew. Getting a handle on these differences is the first step to crafting your own signature burger blend.
The Holy Trinity of Burger Cuts
While you should experiment, a few classic cuts form the foundation of most exceptional burger blends. Think of them as your primary building blocks for that perfect balance of flavor and fat.
- Chuck: Sourced from the shoulder, chuck is the undisputed king of burger meat. It naturally has a fantastic balance, typically around 20% fat, and provides that rich, beefy flavor that’s the soul of a classic burger.
- Brisket: Known for its seriously robust flavor, brisket comes from the cow's lower chest. It brings more fat to the table, often 20-30%, which renders down during cooking to create an intensely juicy and succulent burger.
- Sirloin: Coming from the rear of the animal, sirloin is much leaner but punches way above its weight in pure, steak-forward flavor. It's best used as a supporting actor, blended with a fattier cut.
To give you a clearer picture, here’s a quick comparison of how these cuts and a few others can contribute to your custom blend.
Beef Cut Comparison for Custom Burger Blends
This table breaks down some of the most popular beef cuts used for grinding, highlighting what each one brings to the table in terms of flavor, fat, and its role in a perfect hamburger.
| Beef Cut | Flavor Profile | Approximate Fat % | Best Contribution to Blend |
|---|---|---|---|
| Chuck | Rich, classic beefy | 18-22% | The perfect all-around base |
| Brisket | Deep, robust, beefy | 20-30% | Adds incredible juiciness and flavor |
| Sirloin | Steak-forward, pronounced | 8-12% | Boosts beef flavor without adding much fat |
| Short Rib | Very rich, buttery | 25-35% | Creates a decadent, melt-in-your-mouth texture |
| Round | Mild, very lean | 5-10% | Adds lean meat mass; needs fat from other cuts |
As you can see, the art is in the mix. A blend of chuck, brisket, and a bit of sirloin can produce something truly special.
"I think it's more important that you're using muscles that get a lot of work and so have more flavor. And then it's about getting the fat content right." - Andrew Sutton, Head Butcher at Gwen Butcher Shop & Restaurant.
This insight from a pro gets to the heart of it. Making a great burger isn't about grinding up expensive ribeyes. It’s about intelligently blending flavorful, hard-working muscles with the perfect amount of fat. A smart combination of cuts will beat a pricey steak grind every time.
Achieving the Perfect Fat Ratio
The fat-to-lean meat ratio is probably the single most important factor for a juicy burger. This is where creating your own blend lets you shine, because you can dial in the exact percentage to suit your menu.
The gold standard for most restaurants is an 80/20 blend—that’s 80% lean meat to 20% fat. This ratio provides plenty of fat to keep the burger moist without feeling greasy. For an even richer experience, a 75/25 blend is fantastic, especially if you're grilling over high heat where a lot of that fat will render out.
If you find that the cuts you’ve chosen are a bit too lean, don't be afraid to ask your butcher for extra beef fat trimmings. A little bit of simple math is all it takes to add just enough to hit that magic ratio, ensuring your freshly ground hamburgers are never dry or disappointing.
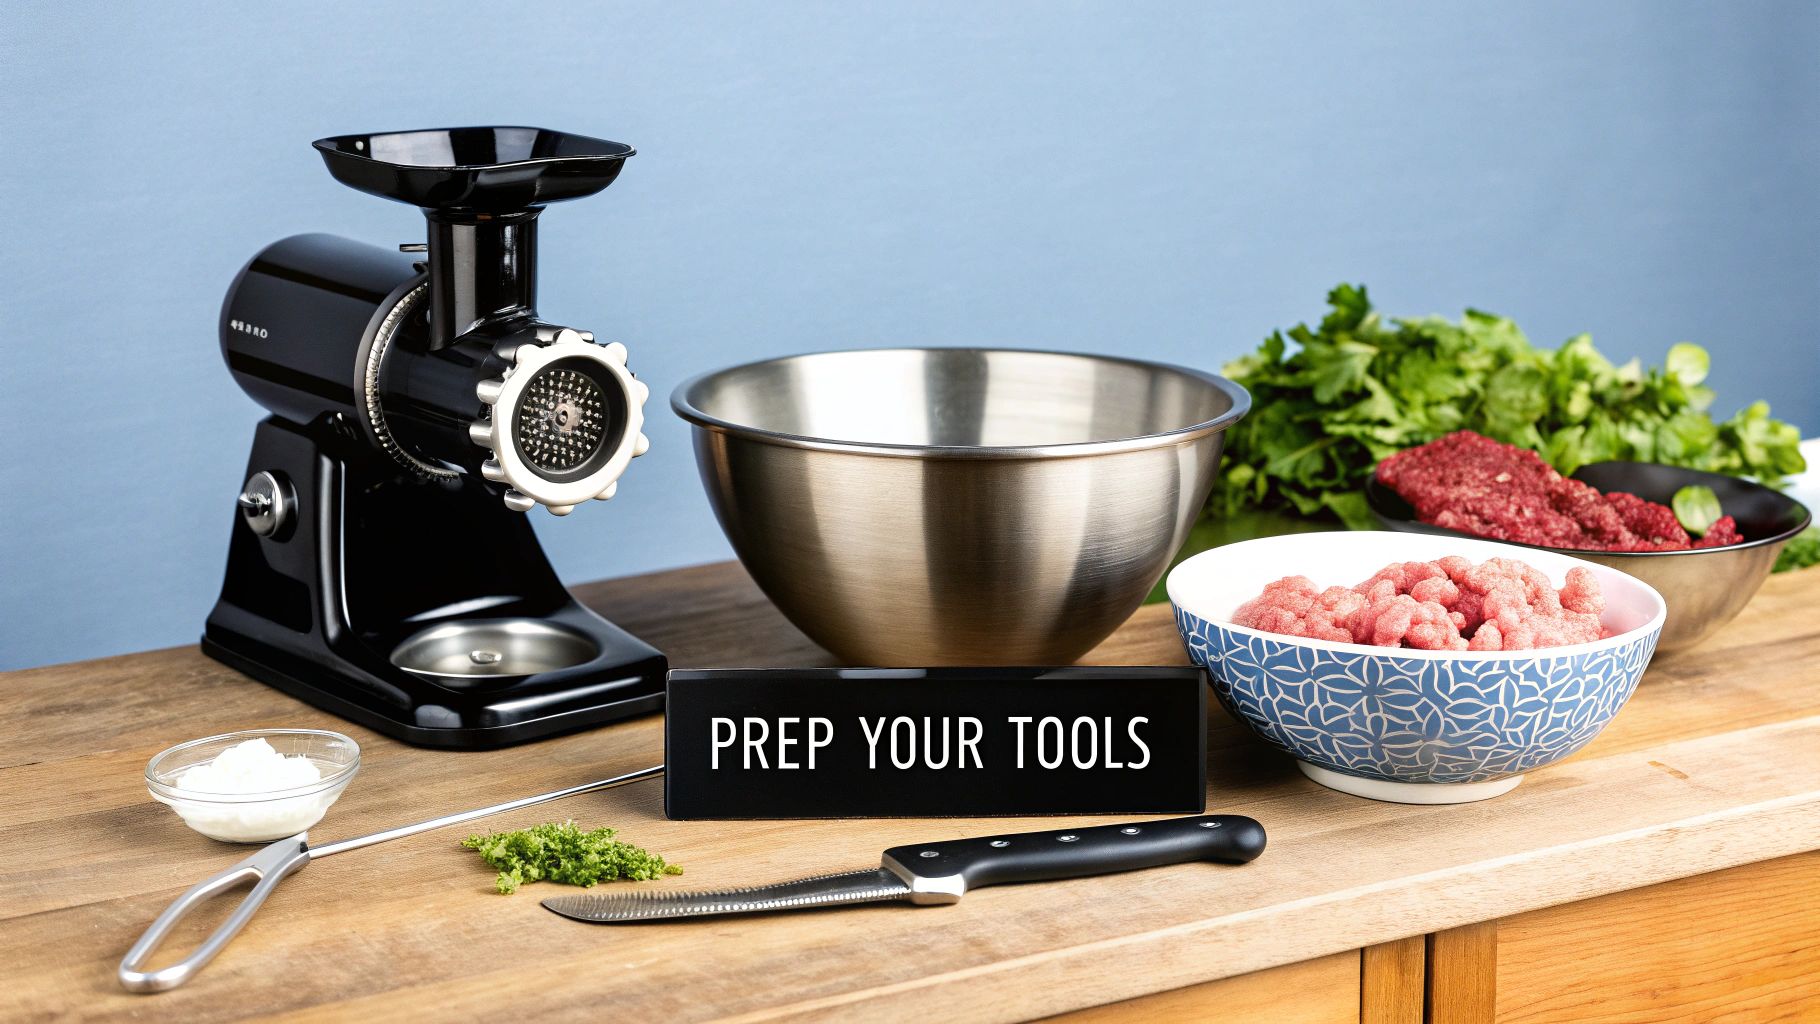
Getting Your Grinding Equipment Ready
Before you can dream of that perfect custom blend, you need the right gear. Making incredible ground beef isn't about having the fanciest setup; it’s about knowing how to use it correctly and ensuring your restaurant is visible to local customers through services like local citation building.
You’ve got two main paths: a stand mixer attachment or a dedicated meat grinder. A grinding attachment is a fantastic starting point for smaller operations. It's easy on the wallet, doesn't hog precious kitchen space, and is perfect for grinding smaller batches.
Now, if you see yourself grinding meat often or in bigger batches, a dedicated, standalone meat grinder is the way to go. These machines pack more punch and are built to last. For restaurant pros looking to level up their kitchen, checking out professional-grade Los Angeles restaurant equipment can open your eyes to what the big guns use.
The Absolute Golden Rule: Keep Everything Cold
No matter what grinder you're using, one rule towers above all others: everything must be ice-cold. I can't stress this enough. This isn't just a friendly tip; it's the single most important factor for getting that light, tender texture.
The whole point is to cut the fat cleanly, not to smear it.
When fat gets warm, it gets soft and gummy. Instead of getting chopped into nice little pieces, it smears all over the place. This “fat smear” is the mortal enemy of a good burger, leading to a dense, pasty, and tough patty. Chilling your equipment stops this tragedy before it can even start.
The science is simple: Cold, firm fat holds its shape and allows the grinder's blade to chop it cleanly into the meat. Warm, soft fat turns into a greasy paste that clogs the grinder plate and ruins the texture of your final product.
So, before a single piece of meat touches your grinder, this is your new non-negotiable ritual:
- Break Down the Grinder: Take apart the business end of your grinder—the auger (that corkscrew-looking thing), the blade, and the grinding plate.
- Freeze It All: Lay all these metal parts on a small tray and stick them in the freezer for at least 30-60 minutes. You want them frosty and cold to the touch.
- Chill the Meat: While the parts are freezing, cut your beef into roughly one-inch cubes. Spread them out on a baking sheet and pop them in the freezer for about 15-20 minutes. You're aiming for firm edges, but not frozen solid.
- Don't Forget the Bowl: The bowl that will catch your freshly ground meat needs to be cold, too. Put it in the freezer or, even better, nest it inside a larger bowl filled with ice.
This chilling process ensures that from the moment your beef hits the grinder to the second it comes out, that precious fat stays solid and distinct. This one step is what separates a steakhouse-quality burger from a disappointing puck of meat. Master this, and you've nailed the technical foundation for consistently amazing burgers.
Mastering the Grinding and Blending Process
With your equipment frosty and your beef chilled, you're at the most satisfying part. This is where distinct cuts of meat become something special. The process itself isn't complicated, but your technique makes all the difference. An effective SEO strategy ensures that when customers search for "best burgers near me," your establishment's commitment to quality appears at the top.
First, make sure your beef cubes are ready. After chilling, they should feel firm. That firmness is exactly what you want—it helps the auger grab each piece and feed it cleanly toward the blade without getting mushy.
The Critical First Grind
For your initial pass, always use a coarse grinding plate (a 10-12 mm plate). This is the key to getting that ideal burger texture. A coarse grind keeps the particles of meat and fat larger, which translates to a lighter, airier final product.
Think of it this way: you're creating little pockets of fat nestled right next to the meat. When that patty hits the heat, the fat melts and bastes the meat from the inside out. If you were to start with a fine grind, you’d end up with a dense, sausage-like texture, not the tender burger you're aiming for.
Gently feed the chilled beef cubes into the grinder's hopper, using the plunger to guide them down. Don't try to force them. A steady pace is all you need for an even grind. You’ll see beautiful, distinct strands of ground meat tumbling into that ice-cold bowl below.
To Grind Once or Twice
After that first coarse grind, you have a choice. For a rustic, steakhouse-style burger with a looser bite, a single coarse grind is often perfect. This approach is fantastic for thick patties destined for a hot grill.
On the other hand, a second grind can be a game-changer for smash burgers or when you're blending cuts with very different fat contents. For this second pass, switch to a medium plate (around 6-8 mm). This helps distribute the fat more evenly and creates a more uniform consistency. Just be gentle when handling the meat between grinds to keep it cold.
Some of the most iconic burger joints have built their entire reputation on secret blends. Think of masters like New York's Pat LaFrieda Meat Purveyors, who famously combine three or more cuts to nail a signature flavor and texture. This is your chance to experiment and find your own perfect mix.
Creative Blending Techniques
Now it's time to make the burger your own. Once all your meat is ground, it’s time to gently blend it. Use your hands and work quickly to combine the different ground cuts. The goal is to mix, not knead. Overworking the meat now will give you a tough patty.
Here’s a little insider trick for leaner blends:
- Add Frozen Butter: If you're working with a leaner mix, maybe an 85/15 ratio, try this. Grate about a tablespoon of frozen butter directly into your ground meat for every pound. As the burger cooks, that butter will melt and create unbelievable flavor and moisture.
This handy visual breaks down the final, crucial steps right before you start forming your patties.
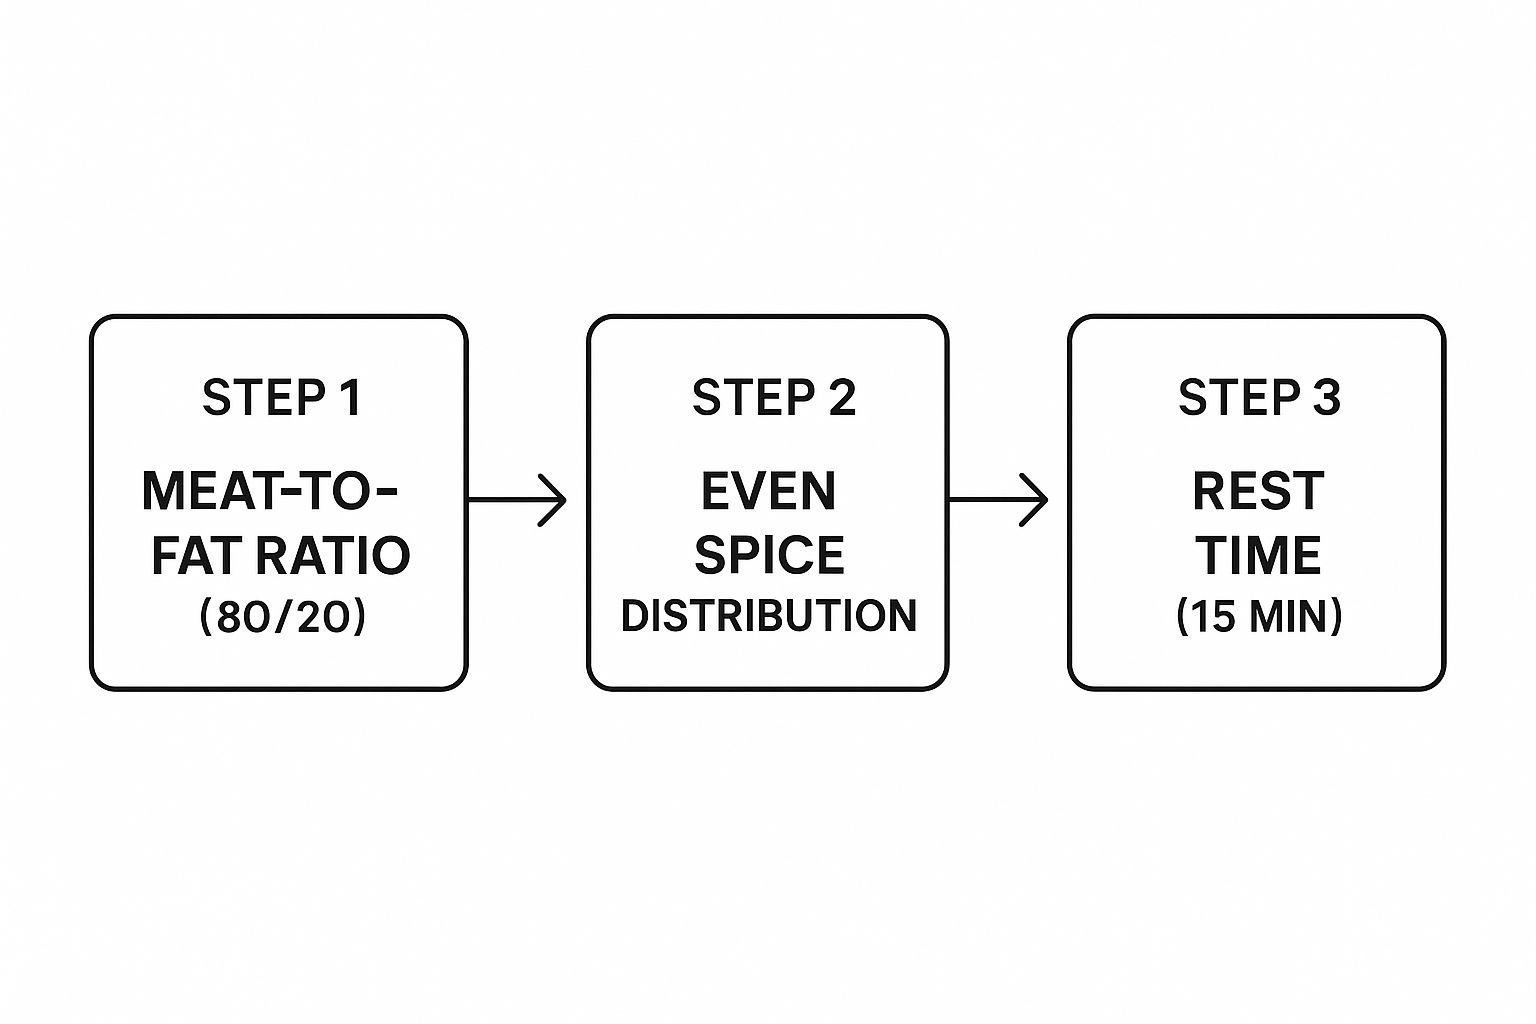
As you can see, nailing the fat ratio and giving the meat a brief rest are the final touches before it hits the heat.
One last rule: do not season the meat until moments before you form the patties. Salt starts drawing out moisture immediately. Add it too early, and you'll change the texture from tender to rubbery.
For professional chefs, having the right setup makes this whole process a breeze. In a commercial setting, sourcing quality Houston restaurant equipment can be the difference between good and great. Remember, grinding, blending, and seasoning are three separate, deliberate steps for a reason.
How to Form the Perfect Hamburger Patty
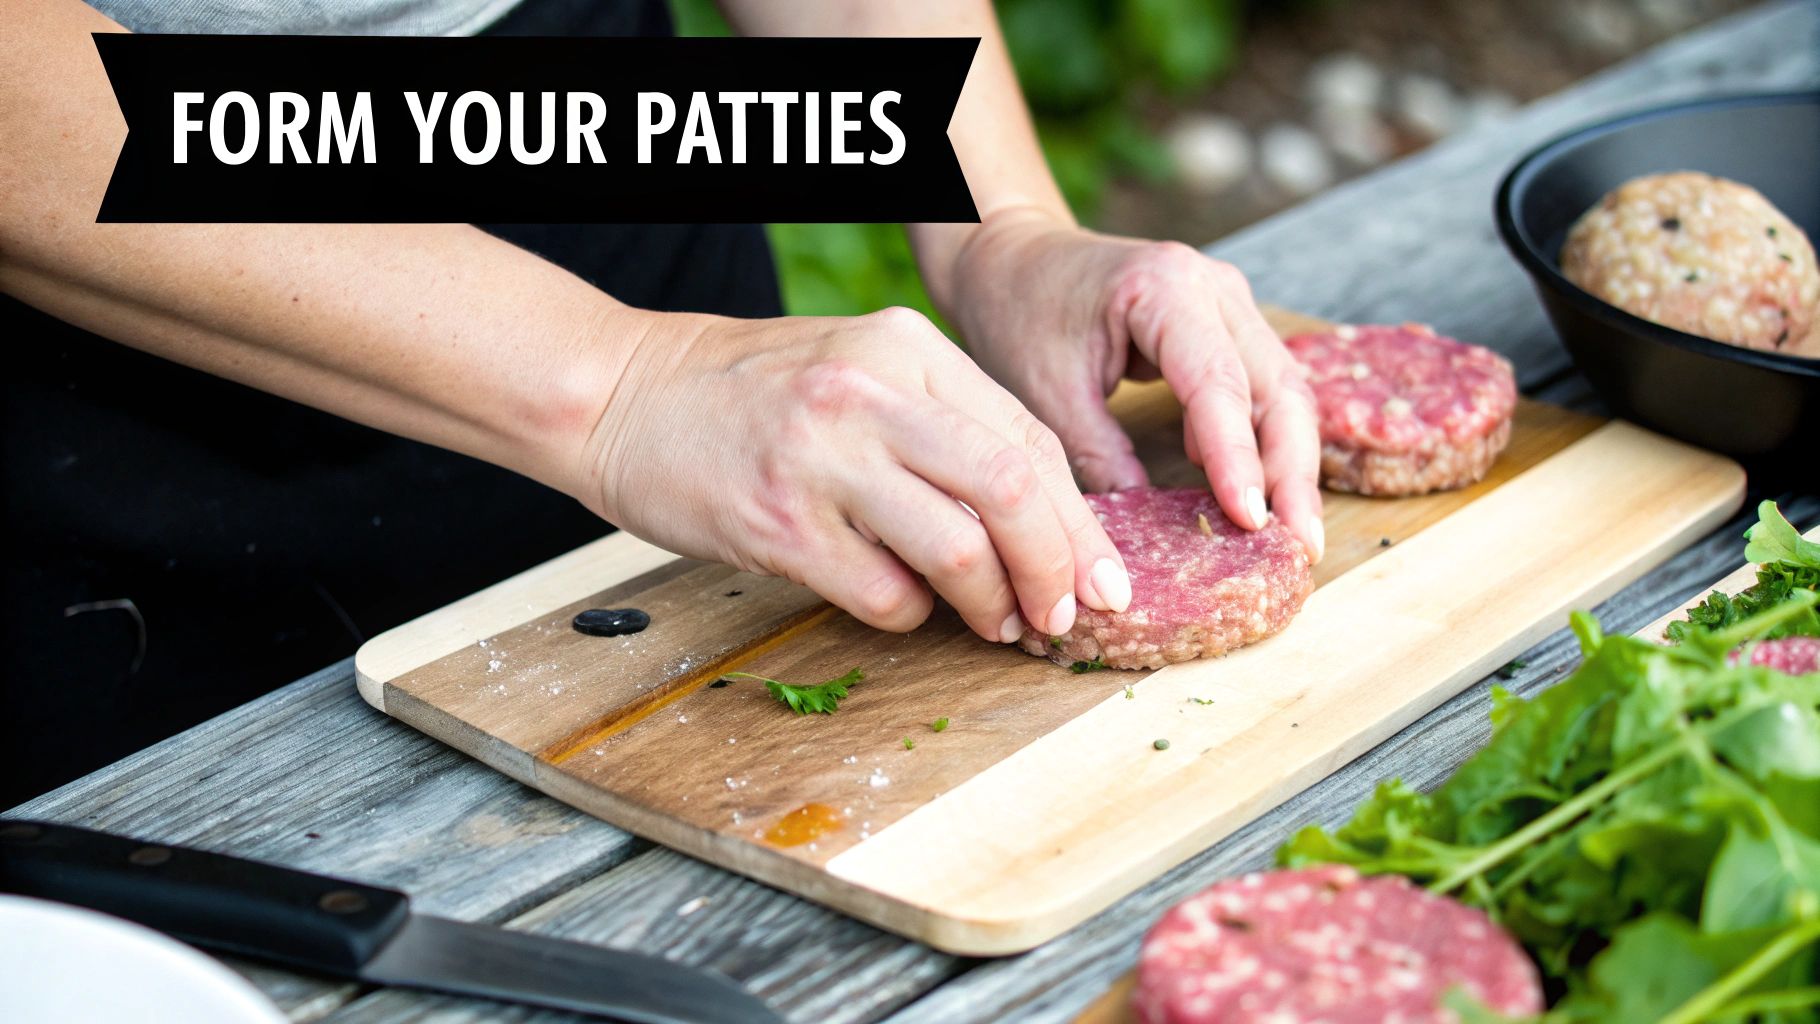
You’ve got your custom blend of freshly ground beef, but the job isn't quite done. How you handle and shape the meat from here is the final, crucial step that separates a pretty good burger from a truly great one. The goal is to form a patty that holds together on the grill but doesn't turn into a dense, tough puck.
The single most important rule? Handle the meat as little as possible. After all that effort you put into grinding your own beef for a light, airy texture, the last thing you want to do is compress it all back together. Overworking the meat develops the proteins, which will give your burger a chewy, springy consistency.
Gentle Shaping for a Tender Bite
Start by gently dividing your ground meat into equal portions. For a classic restaurant burger, a six-ounce portion is a fantastic starting point.
Cup the meat in your hands and gently toss it from one hand to the other, just enough to form a loose ball. From there, lightly flatten it into a patty that’s a little wider than your bun—it's going to shrink as it cooks. Resist the urge to press down hard. Your touch should be light and quick to preserve that delicate texture.
One of the most common mistakes is overworking the meat while forming patties, which can completely ruin the texture. You're aiming for a patty that just barely holds together; that's the secret to keeping it tender and juicy.
The Dimple Trick and Seasoning Timing
To avoid the dreaded "burger bulge"—where the patty puffs up into a meatball on the grill—use the classic dimple trick. Once your patty is formed, just press a small, shallow indentation into the center with your thumb. It’s a dead-simple technique that helps the patty cook flat and evenly every single time.
Another critical piece of the puzzle is when you season. Salt is a master at drawing moisture out of meat. If you mix it into your ground blend too early, it will start to cure the proteins and give you a firm, rubbery texture.
For the absolute best results, here's what you do:
- Wait to Salt: Only season the outside of your patties with salt and pepper right before they hit the heat.
- Create a Crust: This method lets the salt do its magic on the surface, creating a delicious, savory crust without messing with the tender interior.
Patty Thickness for Different Cooking Methods
The perfect thickness for your patty really depends on how you plan to cook it. These guidelines are a great place to start.
| Cooking Method | Ideal Thickness | Why It Works |
|---|---|---|
| Grilling | ¾ to 1 inch thick | A thicker patty can stand up to the intense heat of the grill, letting you get a great char on the outside while keeping the inside nice and juicy. |
| Pan-Searing | ½ to ¾ inch thick | This thickness cooks through evenly in a skillet, so you don't burn the outside before the center is done. |
| Smash Burgers | Very thin (¼ inch) | For this style, you’ll form a loose ball and smash it right on a hot, oiled griddle. This creates maximum surface contact for an unbeatable crispy crust. |
Matching your patty’s thickness to your cooking surface, whether it's a simple skillet or a commercial charbroiler, is key to getting consistent results. Once you master these simple forming techniques, you'll ensure every burger you make is perfectly shaped for maximum flavor and texture.
Common Questions About Grinding Your Own Meat
Even after you've got the basics down, questions are bound to pop up. Grinding your own meat for burgers introduces a few new variables, but once you get a feel for the core principles, troubleshooting is usually a piece of cake. Let's tackle some of the most common challenges.
From dealing with a mushy mess to wondering about frozen meat, I've got practical answers to help you grind with confidence every single time.
Can I Use Frozen Meat for Grinding?
Yes, but with a big caveat: you should only ever use partially frozen meat. I can't stress this enough. Cubing your beef and tossing it in the freezer for about 15-20 minutes is a game-changing step. This gets the meat just firm enough for the grinder to make clean, distinct cuts instead of smearing everything together.
But whatever you do, never try to grind meat that's frozen solid. Forcing a rock-hard block of beef through your machine is a surefire way to destroy the motor or shatter one of the internal parts. Trust me, it's not a mistake you want to make.
Why Does My Ground Meat Look Mushy?
That dreaded mushy, pasty texture is almost always caused by one single culprit: heat. We call this "fat smear" in the business. It happens when the fat in your meat warms up, melts, and smears into the lean protein instead of staying in distinct little pockets. This completely ruins the texture, giving you a dense, tough, and frankly disappointing burger.
To avoid this, just remember the golden rule of grinding: keep everything ice-cold.
- Your meat should be firm and almost crunchy from its time in the freezer.
- Your grinder head, auger, blade, and plate need to be chilled in the freezer right alongside the meat.
- Even the bowl you're grinding into should be chilled.
What Is the Ideal Fat Percentage for Burgers?
For a perfectly juicy, flavorful burger, the gold standard is an 80/20 lean-to-fat ratio. This gives you plenty of fat to keep the patty moist and tasty as it cooks, but not so much that it becomes a greasy mess.
A 75/25 blend is even richer and works beautifully for high-heat grilling where you expect more of that fat to render out. On the flip side, an 85/15 blend still makes a fantastic burger. Anything leaner than 90/10, though, and you're venturing into dry, crumbly territory.
It's pretty amazing to think about the scale of it all. The hamburger meat grinding business is a massive slice of the global food industry. The worldwide hamburger market is valued at roughly USD 647 billion, and ground beef makes up a whopping 70-80% of all patties produced. You can find more detailed insights into the hamburger industry if you're curious.
How Do I Properly Clean My Grinder?
When you're working with raw meat, proper sanitation is completely non-negotiable. As soon as you finish grinding, take your grinder apart completely. Wash all the removable components in hot, soapy water. A bottle brush is your best friend here—use it to scrub out the inside of the grinder head and get into all the little holes on the plate.
Make sure every single piece is bone dry before you put it away to prevent any rust. To keep your kitchen hygiene top-notch, especially after a project like this, it can be helpful to check out an ultimate guide to a sparkling kitchen deep clean. Taking good care of your gear not only ensures food safety but also makes your equipment last a whole lot longer. For any other questions about professional kitchen setups, feel free to get in touch with our experts.
At Charbroilers.com, we know that the right equipment is the secret to culinary greatness. A high-quality charbroiler is the perfect way to finish those burgers you just ground, giving them that irresistible smoky flavor and killer grill marks that keep customers coming back. Check out our huge collection of commercial charbroilers at https://charbroilers.com to find the perfect one for your restaurant.