

Gas Grill Maintenance Guide for Restaurants
Keeping your gas grill maintenance on a consistent schedule isn't just another task on the list—it's a core part of a smart business strategy. It’s what protects your gear, keeps your food quality top-notch, and ensures your kitchen is a safe place to work. Putting in the effort here will dramatically extend the life of your commercial grill and help you dodge the kind of expensive downtime that no restaurant can afford.
Why Proactive Grill Maintenance is a Smart Investment
Think of your commercial charbroiler as the heart of your kitchen. It’s the workhorse cranking out the perfectly seared steaks, burgers, and veggies that your customers keep coming back for. But if you let it go, that same essential asset can turn into a major headache, fast. A solid gas grill maintenance routine is about more than just a quick wipe-down; it’s about protecting your profits, running an efficient line, and holding up the culinary standards you've set.
Picture this: It's a packed Friday night. All of a sudden, one half of your grill is barely cooking, while the other side is incinerating everything it touches. That kind of inconsistency, usually from something as simple as clogged burner ports, throws a wrench in your whole service. It kills food quality and blows up your ticket times. A quick weekly check could have caught that, saving you from wasted food and frustrated diners.
The True Cost of Neglect
When you skip routine maintenance, you kick off a domino effect of problems. Grease buildup, for instance, isn't just ugly—it's the number one cause of dangerous flare-ups that can put your staff at risk and wreck your equipment. These aren't just random accidents; they're the direct result of putting off the small, essential tasks.
A well-maintained grill isn't just about being clean—it's about consistency. When every burner fires up perfectly and the grates heat evenly across the board, your chefs can cook with absolute confidence. They know every dish will come out exactly as intended, giving every customer the amazing meal they came for.
This flow diagram breaks down how scheduled maintenance pays off in real operational wins.
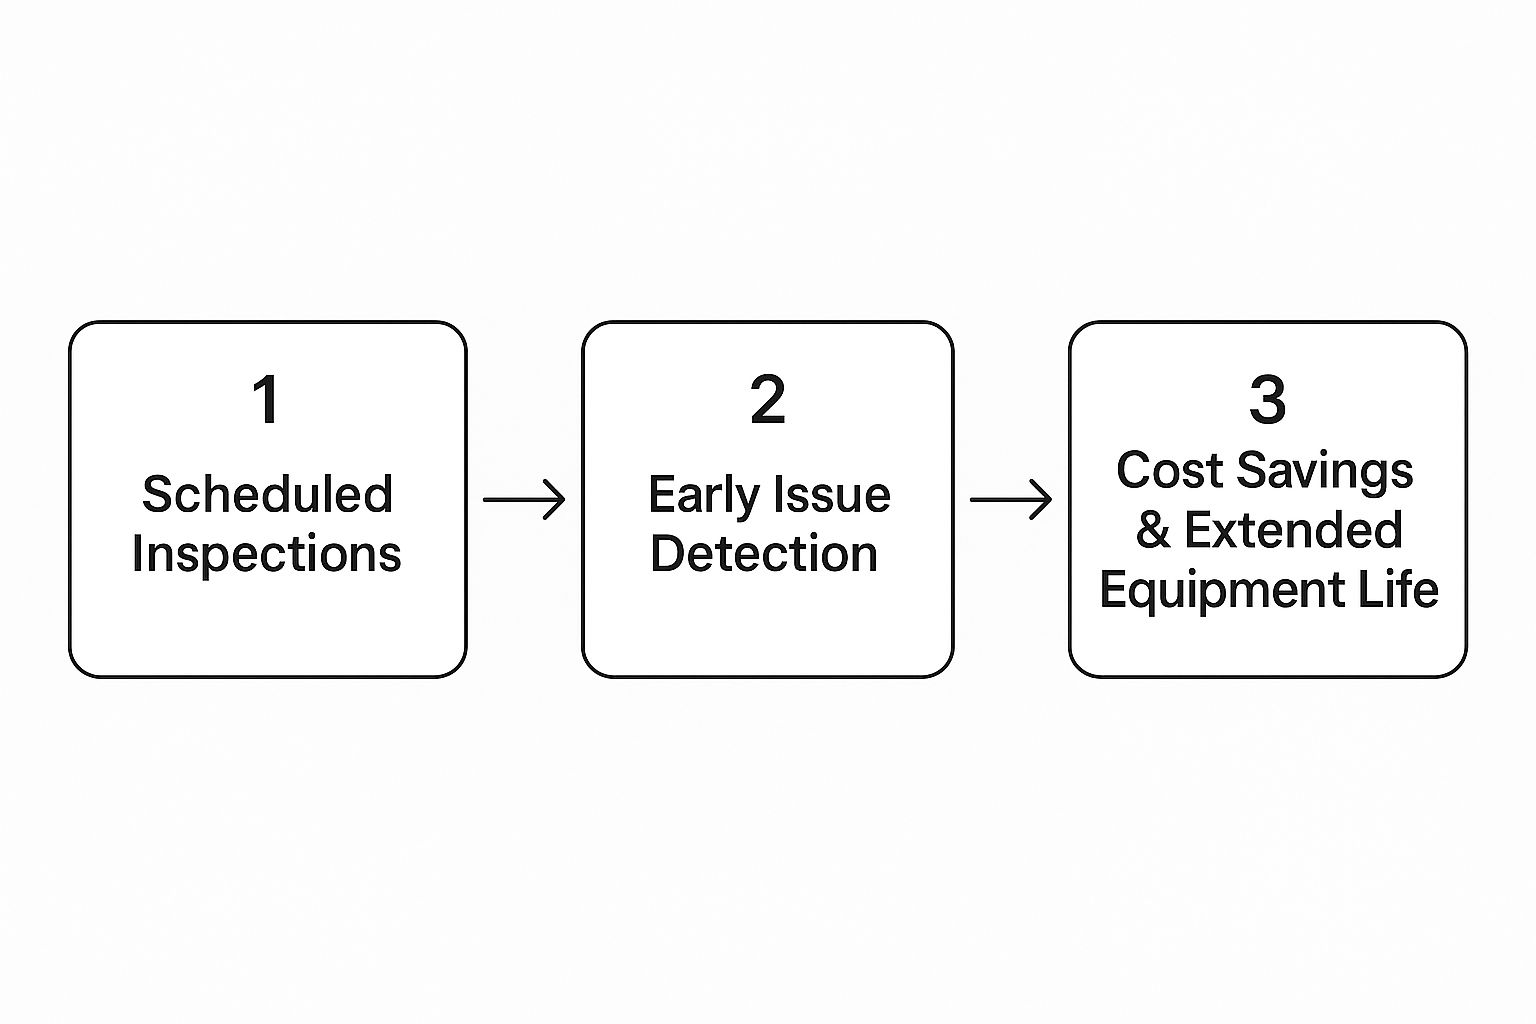
As you can see, getting ahead with proactive checks is the key. It lets you spot the small stuff before it snowballs into a full-blown failure that shuts down your service.
Extending Equipment Lifespan and Ensuring Safety
The commercial gas grill market is huge for a reason—these units are central to how a professional kitchen operates. In North America alone, the market was valued at around USD 245 million in 2025. With that much money on the line, protecting your investment is a no-brainer. The data shows that regular care, like checking gas hoses and clearing out burner tubes, can slash the risk of dangerous flare-ups by over 25%. Better yet, it can add two to three years to your grill’s working life.
This forward-thinking approach is just plain good kitchen management. Putting a clear maintenance plan on paper and training your team on it makes sure everyone knows their part in keeping this vital equipment running strong.
If you're looking to create your own clear, compelling training guides for staff or customers, a professional article writing service for restaurant equipment can help you put together materials that are easy to follow. When you start treating maintenance like the core business function it is, you guarantee your grill stays a source of profit, not problems.
Executing a Thorough Commercial Grill Deep Clean
A quick wipe-down might get you through the dinner rush, but a real deep clean is what keeps your grill a reliable workhorse instead of a kitchen liability. Think of it as hitting the reset button—a process that restores peak performance by blasting away the stubborn, caked-on grime that daily cleaning just can't handle. This is how you get your equipment back to that "like new" condition.
Prep and Teardown: Safety First
Before you even think about grabbing a scraper, your first and most critical move is to completely shut off the gas supply. No shortcuts here. For grills running on propane, that means closing the tank valve tight and detaching the regulator. If you're hooked up to a natural gas line, find the dedicated shut-off valve for the grill and turn it off.
Once you're positive the fuel is secured, it's time for disassembly. This isn’t just yanking parts out; it’s a methodical teardown. Start by lifting out the cooking grates, then remove the flavorizer bars or ceramic briquettes below them. Finally, carefully take out the burner tubes. Laying everything out on a tarp or protected surface gives you a full picture of the job ahead.

Tackling Grease and Carbon Buildup
Alright, time to get your hands dirty. Your standard household cleaners aren't going to make a dent here. For a commercial kitchen, you need the heavy hitters: a commercial-grade degreaser, a stiff-bristle brush (never use steel wool on porcelain-coated parts), a tough plastic scraper, and a big bin for soaking.
Fill that bin with hot water and a healthy dose of degreaser to create a powerful soaking solution. Submerge the grates and flavorizer bars, letting them sit while you focus on the heart of the grill—the burners.
A huge mistake I see people make is attacking burner tubes with aggressive wire brushes, which can easily damage the ports. The right way to do it is with a venturi brush for the inside and a small tool, like a paperclip or a dedicated port cleaner, to meticulously clear out each individual gas port. This one step is the secret to fixing hot spots and getting that perfect, even flame.
Clogged burner ports are the number one cause of uneven cooking, leading to inconsistent results that can kill a dish. Keeping every port clear ensures gas flows freely for that uniform blue flame you want.
Deep Cleaning the Cookbox and Grease System
With the guts of the grill removed, the cookbox is wide open. This area is a magnet for carbonized gunk. Grab your plastic scraper and start dislodging the big flakes of buildup from the bottom and sides of the grill.
After you've scraped it down, a shop vacuum is your best friend. It sucks up all that loose debris without making a bigger mess. Next, hit the interior surfaces with your degreaser, let it work its magic for a few minutes, then wipe everything down with a durable cloth.
Finally, give the grease management system a complete overhaul. Slide out the grease tray and drip pan—these are often the nastiest, most forgotten parts. Scrape out all the solid waste and give them a good soak in your degreaser solution. A clean grease system isn't just about hygiene; it’s a critical fire safety measure. An overflowing grease pan is one of the most common culprits behind dangerous grill flare-ups. To keep your whole operation in top shape, it's smart to roll your grill care into a comprehensive commercial kitchen cleaning checklist.
A well-structured cleaning plan is essential for any commercial kitchen. This table outlines the key steps for a thorough grill deep clean, ensuring no component is overlooked.
Gas Grill Deep Cleaning Checklist
| Component | Task | Recommended Frequency | Tools Needed |
|---|---|---|---|
| Cooking Grates | Scrape, soak in degreaser, scrub, and rinse. | Weekly (Deep) | Grill brush, scraper, soaking bin, degreaser |
| Burner Tubes | Remove, clean ports with port cleaner, brush exterior. | Monthly | Venturi brush, paperclip or port cleaner |
| Flavorizer Bars | Soak in degreaser and scrub to remove buildup. | Monthly | Soaking bin, degreaser, stiff brush |
| Cookbox Interior | Scrape sides and bottom, vacuum debris, wipe with degreaser. | Monthly | Plastic scraper, shop vacuum, cloth |
| Grease Tray/Drip Pan | Scrape solids, soak in degreaser, wash, and dry. | Weekly | Scraper, soaking bin, degreaser |
| Exterior Surfaces | Wipe down with stainless steel cleaner. | Daily | Microfiber cloth, stainless steel cleaner |
Following this checklist helps standardize your maintenance routine, extending the life of your equipment and ensuring it's always ready for service.
Reassembly and Final Touches
Before you put anything back, make sure every single part is bone dry. Any moisture left behind, especially on cast iron, is an open invitation for rust.
Start by reinstalling the burners, ensuring they are seated properly over the gas valves. Next, place the flavorizer bars or heat shields back over the burners.
Once the clean, dry grates are back in place, it's time to season them. Apply a very light coat of a high-smoke-point oil, like canola, with a cloth. This quick step creates a protective, non-stick surface and helps prevent rust from forming.
With everything reassembled, turn the gas back on and fire up the grill. Let it run on high for about 15 minutes. This crucial final step burns off any leftover cleaning solution and locks in the new seasoning on the grates, making sure the grill is perfectly prepped for service with no chemical aftertaste.
Mastering Key Safety and Performance Checks
A meticulously clean grill is great, but a safe grill is absolutely non-negotiable in a commercial kitchen. Once the deep clean is done, a routine of specific safety and performance checks is what truly protects your staff, customers, and your investment.
Think of these inspections as your first line of defense. They’re what turn potential disasters into minor, manageable fixes long before they can throw a wrench in the middle of a busy service. This is where proactive gas grill maintenance goes beyond just cleaning and becomes a critical inspection process, looking for the subtle signs of wear and tear that could lead to a major failure.

The Essential Soap Bubble Test for Gas Leaks
The single most critical safety check you can perform is the soap bubble test. Gas leaks are a silent threat with catastrophic potential, and this incredibly simple test is the best way to find one. Every single kitchen manager and lead cook needs to know this process by heart.
Here’s the right way to do it:
- Mix Your Solution: Get a spray bottle or a small bowl and mix a simple solution of one part dish soap to one part water. You’re looking for something sudsy, but not a mountain of foam.
- Apply It Everywhere: Turn the gas supply on but keep the grill burners off. Now, spray or brush that soapy water on every connection point. That means the hose connection to the gas line or propane tank, the regulator, and where the hose attaches to the grill itself.
- Look for Bubbles: Watch those soapy areas like a hawk. If you see bubbles forming, even tiny ones, you've got a gas leak. Bigger bubbles mean a bigger leak, but any bubble at all is a serious problem.
Found a leak? Shut the gas off at the source immediately. Tighten the connection that was bubbling and run the test again. If it's still bubbling, that hose or regulator is shot. It needs to be replaced before that grill is fired up again.
Inspecting Burners and Ignition Systems
Inconsistent heat is a chef’s worst nightmare during a rush. Reliable performance starts with the burners and the igniter, so a quick visual check is essential.
Take a look at the burner tubes for any signs of corrosion or rust that could weaken the metal. More importantly, check the little gas ports along the sides. Grease and food debris love to clog these up, which results in a weak, yellow flame instead of the crisp, blue flame you want for even cooking.
A grill that won't light easily is a common frustration, and the culprit is almost always the igniter electrode. Make sure the ceramic insulator isn't cracked and the metal tip is clean. The gap between the tip and the burner should be about 1/8 to 1/4 inch—that’s the sweet spot for a strong, reliable spark.
That tiny adjustment can be the difference between a slow, frustrating start and an instant, perfect flame every time.
Checking Structural Integrity and Fuel Lines
Finally, just take a step back and give the whole unit a once-over. Commercial grills take a beating in a fast-paced kitchen.
Keep an eye out for these things:
- Wobbly Legs or Frame: Is the grill stable and level? Give it a gentle shake and tighten any loose bolts or screws.
- Hose Condition: Scan the entire length of the gas hose. You're looking for any cracks, brittle spots, or abrasions that could become a weak point.
- Propane Tank Connection: If you're using propane, always check the tank's O-ring for damage before you connect the regulator. A worn-out O-ring won't create a secure seal.
These checks don't demand special tools—just a trained eye and a consistent schedule. For kitchens looking to formalize their procedures with professional content that resonates, our services for creating well-researched restaurant equipment blog posts can provide clear, actionable training content for your team. Building these simple checks into your weekly routine creates a culture of safety and ensures your grill remains a dependable asset, not a hidden liability.
How to Troubleshoot Common Gas Grill Failures
When a commercial grill decides to act up in the middle of a dinner rush, every second counts. You're not just losing time; you're losing money and risking your reputation with every ticket that gets delayed. Forget guesswork. You need to know exactly where to look and what to do to get back on the line, fast.
Think of troubleshooting as the most critical part of your gas grill maintenance routine. It goes way beyond just scraping the grates. It's about knowing your equipment inside and out, so you can react smartly when things go wrong.

Diagnosing Uneven Heating and Weak Flames
Hot spots, cold spots, and weak, sputtering flames—it's a classic grill problem. Nine times out of ten, the culprit is clogged burner ports. Day after day, grease, bits of food, and burnt-on marinade build up and choke off the small holes where the gas comes out.
The fix is pretty straightforward, but you have to be meticulous. First, shut off the gas completely. Pull off the grates and any heat shields to get a clear look at the burner tubes. Grab a venturi brush to clear out the inside of the tubes, then use a thin, sturdy tool like a straightened paper clip to poke out each individual port. Whatever you do, don't use a wooden toothpick; they snap off and create an even bigger headache.
The color of your flames tells you everything you need to know. A healthy, efficient flame is bright blue with just a hint of yellow at the tips. If you're seeing mostly yellow or orange, that's a dead giveaway your air-to-fuel ratio is off, almost always because of a blockage.
Once you’ve cleared all the ports, you should see an even, consistent flame pattern across the entire burner. This is how you eliminate those frustrating hot spots and get product consistency back.
When the Grill Refuses to Light
Nothing stops service faster than a grill that won't ignite. Instead of panicking, just work through a quick, logical checklist. The issue is almost always in the ignition system or with the gas flow itself.
- Listen for the Spark: Turn a burner knob to 'on' and push the igniter. Can you hear a sharp "click-click-click"? If it's dead silent, you've probably got a dead battery or a loose wire. If you hear clicks but get no flame, the electrode is likely the problem.
- Check the Electrode: The little ceramic piece around the metal electrode tip can crack, and the tip itself gets caked with grease. Wipe it clean and make sure it’s positioned correctly—usually about 1/8-inch from the burner.
- Confirm Gas Is Flowing: If the igniter is sparking perfectly, then you have a fuel problem. Do you smell gas when you turn the knob? If not, double-check that the main gas line is open or that the propane tank valve is turned all the way on.
It's also possible that the safety device in your regulator has tripped, which severely restricts gas flow. To reset it, turn off all the burners and the main gas supply. Disconnect the regulator from the tank, give it a minute, then reconnect it snugly and slowly reopen the valve.
Addressing Flare-Ups and Regulator Issues
Constant, out-of-control flare-ups aren't just annoying; they're a serious fire hazard. Sure, a little flare-up is normal with fatty foods, but massive, persistent flames are usually caused by a thick layer of grease built up in the cookbox or on the flavorizer bars. The only real solution here is a good, deep clean.
A bad regulator can also cause all sorts of issues, from weak flames to dangerous gas leaks. If you've already deep-cleaned the burners and reset the regulator but the flames are still abnormally low, the regulator itself has probably failed and needs to be replaced.
The sheer popularity of gas grills highlights why this maintenance is non-negotiable. With gas models holding a massive 48.2% market share as of 2024, they are the workhorses of countless kitchens. That convenience comes with a catch: improper care affects a huge number of businesses. Simple upkeep, like regular burner cleaning and safety checks, is proven to add three to five years to a grill's lifespan. You can find more details on trends in the barbeque grill market to see just how dominant this equipment is.
When you arm your kitchen staff with this kind of troubleshooting knowledge, they stop being just cooks and become proactive problem-solvers. This mindset cuts downtime, protects food quality, and keeps your entire operation running safely and without a hitch.
Building Your Year-Round Maintenance Schedule
Solid gas grill maintenance isn't about one huge deep clean a year. That’s a rookie mistake. Real pros know it’s about building small, consistent habits that become second nature in the kitchen. If you only clean sporadically, you're just asking for forgotten tasks and, eventually, a dead grill.
A structured, year-round schedule flips the script. It breaks down the work into daily, weekly, monthly, and seasonal duties. This way, maintenance stops being a dreaded chore and becomes a manageable, routine part of your workflow, preventing the gunk and grime that lead to bigger headaches down the road.
Daily Habits: The Foundation of Grill Longevity
The most important maintenance happens every single day, in small doses. These aren't big, time-consuming jobs. We're talking quick actions at the end of each service that stop grease and carbon from getting a permanent foothold.
Think of it like a chef wiping down their station after a busy night. The grill needs that same end-of-day reset. It’s this simple discipline that keeps a grill healthy.
- Scrape Grates Post-Service: Get a quality grill brush and scrape the grates while they’re still warm. The heat makes the job ten times easier.
- Empty the Grease Trap: This is non-negotiable. Every single day. An overflowing grease trap is a massive fire hazard and a welcome mat for pests. Make it a mandatory part of your closing checklist.
- Wipe Down the Exterior: A quick once-over with a damp cloth on the exterior surfaces removes splatters and keeps your stainless steel looking sharp.
Weekly Tasks: Reinforcing the Clean
Once a week, you need to dig a little deeper. These tasks usually take about 15-20 minutes, but they're crucial for tackling the grime that a quick daily scrape might miss. This is your chance to really lock in the clean and prevent stubborn buildup.
For instance, a weekly deep clean of the grates ensures that carbon doesn't get fused to the metal. When that happens, it can flake off onto food, leaving a nasty, bitter taste that customers will definitely notice.
The real secret to a long-lasting commercial grill isn't some miracle cleaning product—it's the simple, unglamorous discipline of a weekly schedule. Kitchens that stick to it see fewer breakdowns, better performance, and a safer work environment. Period.
This consistency makes your bigger monthly and seasonal deep cleans a whole lot less painful.
Monthly Checks: All About Safety and Performance
Your monthly check-in is less about cleaning and more about inspection. These are the preventative steps that catch small problems before they turn into service-killing disasters. Just set a recurring reminder on your calendar for the first of every month to run through these points.
Here’s what you should be looking at:
- Burner Inspection: Pull the grates off and get a good look at the burner tubes. You're searching for clogged ports, heavy rust, or any cracks.
- Gas Leak Test: Grab a spray bottle with soapy water and do the bubble test on all your gas hoses and connections. This is a simple way to find dangerous gas leaks before they become a catastrophe.
- Igniter Check: Test your ignition system. Does it create a strong, consistent spark? If it looks weak, clean the electrode.
This proactive approach is more important than ever as the commercial grill market keeps growing. It's expected to climb from USD 702 million in 2024 to nearly USD 938 million by 2032. Keeping up with maintenance, especially on components like burners, doesn't just keep you safe—it can improve heat retention by 15-20%, saving fuel and cutting down on emissions. You can learn more about how market trends are influencing maintenance best practices.
Seasonal Deep Cleans and Refurbishment
Twice a year, it's time for the main event: a full-scale deep clean and refurbishment. A good time for this is right before your busiest season kicks off and immediately after it ends. This is when you do the complete teardown, soaking all the removable parts and thoroughly degreasing the inside of the cookbox.
- Pre-Season Prep: This deep clean gets your grill in peak fighting shape to handle the high volume of your busy season. It's also the perfect time to replace worn-out parts like cracked ceramic briquettes or rusty burner tubes.
- Post-Season Refurbishment: After the rush, another deep clean gets rid of all the grime that built up. This is also your chance to inspect the entire unit for wear and tear and order any replacement parts you'll need for the next cycle.
A structured schedule like this ensures nothing gets missed. To make it even easier, here’s a sample framework you can steal and adapt for your own kitchen.
Sample Commercial Grill Maintenance Schedule
This table provides a clear, organized template that any restaurant manager can adapt. It breaks down tasks by frequency, making it easy to integrate into your existing operational checklists and ensure every part of the grill gets the attention it needs, right on schedule.
| Frequency | Task | Purpose |
|---|---|---|
| Daily | Scrape grates, empty grease trap, wipe exterior. | Prevents immediate buildup and fire hazards. |
| Weekly | Deep clean grates, scrub flavorizer bars, polish exterior. | Removes stubborn residue and maintains appearance. |
| Monthly | Inspect burners, perform gas leak test, check ignition system. | Ensures operational safety and peak performance. |
| Seasonal | Full deep clean, inspect all components for wear, replace parts. | Restores grill to optimal condition and prevents major failures. |
By adopting this four-tiered schedule, you’re not just cleaning a grill; you're building gas grill maintenance into your kitchen's culture. It stops being an afterthought and becomes a cornerstone of how you run a successful, professional operation.
Frequently Asked Questions About Grill Maintenance
No matter how solid your maintenance plan is, questions about your gas grill are going to come up. In the chaos of a commercial kitchen, having the right answers on hand can save you a world of hurt during a dinner rush. Let's tackle some of the most common questions we hear from restaurant operators.
What Are The Best Cleaners For a Commercial Grill?
When you’re up against serious, baked-on grease, you need a cleaner that gets the job done without wrecking your grill. For the daily wipe-downs after service, a simple mix of hot water and quality dish soap usually does the trick.
But for those heavy-duty deep cleans, you'll need more firepower. Look for a commercial-grade, food-safe degreaser. The ones made specifically for stainless steel are your best bet—they’re tough on grime but won't cause pitting or corrosion over time. And whatever you do, stay away from abrasive cleaners like steel wool on coated surfaces. You'll just scratch them up and invite rust to the party.
Here's a pro tip I always share: check the manufacturer's cleaning recommendations first. Using the wrong chemical could not only damage your grill but might even void your warranty. When in doubt, stick to cleaners made for professional kitchen equipment.
How Often Should I Replace Grill Parts?
Figuring out when to repair a part versus replacing it is a balancing act that directly impacts your budget. Some components are designed to be swapped out regularly, while others are built to last for years with the right care.
- Cooking Grates: If you scrape them daily and give them a good deep clean every week, high-quality cast iron or stainless steel grates can last for years. You only really need to replace them when they're severely warped, cracked, or starting to fall apart.
- Burner Tubes: Give your burners a look-over every month. If you can't get the ports clear anymore, or if you see significant rust or cracks in the metal, it's time for a replacement. A bad burner kills your grill's performance and can quickly become a safety risk.
- Igniters: These little guys are often the first component to give out. If you've cleaned it thoroughly and it's still not producing a strong spark, don't waste any more time on it. It’s a quick, cheap part to replace.
I always recommend keeping a small stash of common parts like igniters and heat shields on hand. It'll save you from costly downtime. For more in-depth advice on maintaining various kitchen tools, you might find our guide on creating a well-researched restaurant equipment blog post useful.
When Is It Time To Call a Professional?
Your kitchen crew can handle most of the day-to-day upkeep, but some problems are best left to a certified technician. You should always call a pro if you even suspect there’s an issue with the gas line or the main regulator. That's not something to mess with.
Also, if you've run through all the troubleshooting steps for a major problem—like the grill just refusing to heat up—and you're still stumped, it's safer to get an expert on the line. Trying to pull off complex repairs without proper training can easily make things worse or, even scarier, create a serious safety hazard. My rule of thumb is simple: if the fix involves taking apart gas valves or primary fuel components, leave it to the pros. It ensures the job is done right and, most importantly, safely.
At Charbroilers.com, we understand that a high-performance charbroiler is the engine of your kitchen's success. Explore our extensive selection of countertop, modular, and floor model charbroilers designed for durability and perfect results every time. Visit https://charbroilers.com to find the ideal equipment to elevate your menu.