

Essential Food Safety Guidelines for Restaurants
Food safety guidelines are the rulebook for your kitchen, the set of non-negotiable systems designed to stop foodborne illness before it ever starts. We're talking about a complete game plan that covers everything from personal hygiene and proper food handling to precise temperature control and ironclad cleaning schedules. Following these rules isn’t just a good idea—it’s the only way to protect your customers and keep your doors open for the long haul.
The Foundation of Restaurant Food Safety
So, why are these guidelines the absolute bedrock of a successful restaurant? Sure, health codes give you a baseline, but real food safety is about much more than just ticking boxes to avoid a violation.
Think of it as the foundation of your entire brand. A solid foundation supports everything you build on it—your menu, your service, and most importantly, your reputation. A single crack, like one foodborne illness outbreak, can bring the whole structure crashing down.
This is all about building trust. Every single meal you serve is a promise to your guests that you’ve got their back. One slip-up can have devastating consequences, from massive fines and forced closures to a shattered reputation that’s nearly impossible to rebuild. The Centers for Disease Control and Prevention (CDC) estimates that a staggering 48 million people get sick from a foodborne illness in the U.S. each year, with restaurants being a major source of those outbreaks.
Building a Framework for Success
To create a food safety culture that actually works, you need a clear roadmap. This framework is what gives structure to all the practical, day-to-day actions your team will take. Before we get into the nitty-gritty, let's lock down these core pillars.
A bulletproof approach to food safety management means mastering a few critical systems:
- Safe Food Handling: This is the entire journey of an ingredient, from the moment it hits your receiving dock until it lands on a customer's plate. It’s all about preventing cross-contamination and treating every item with care.
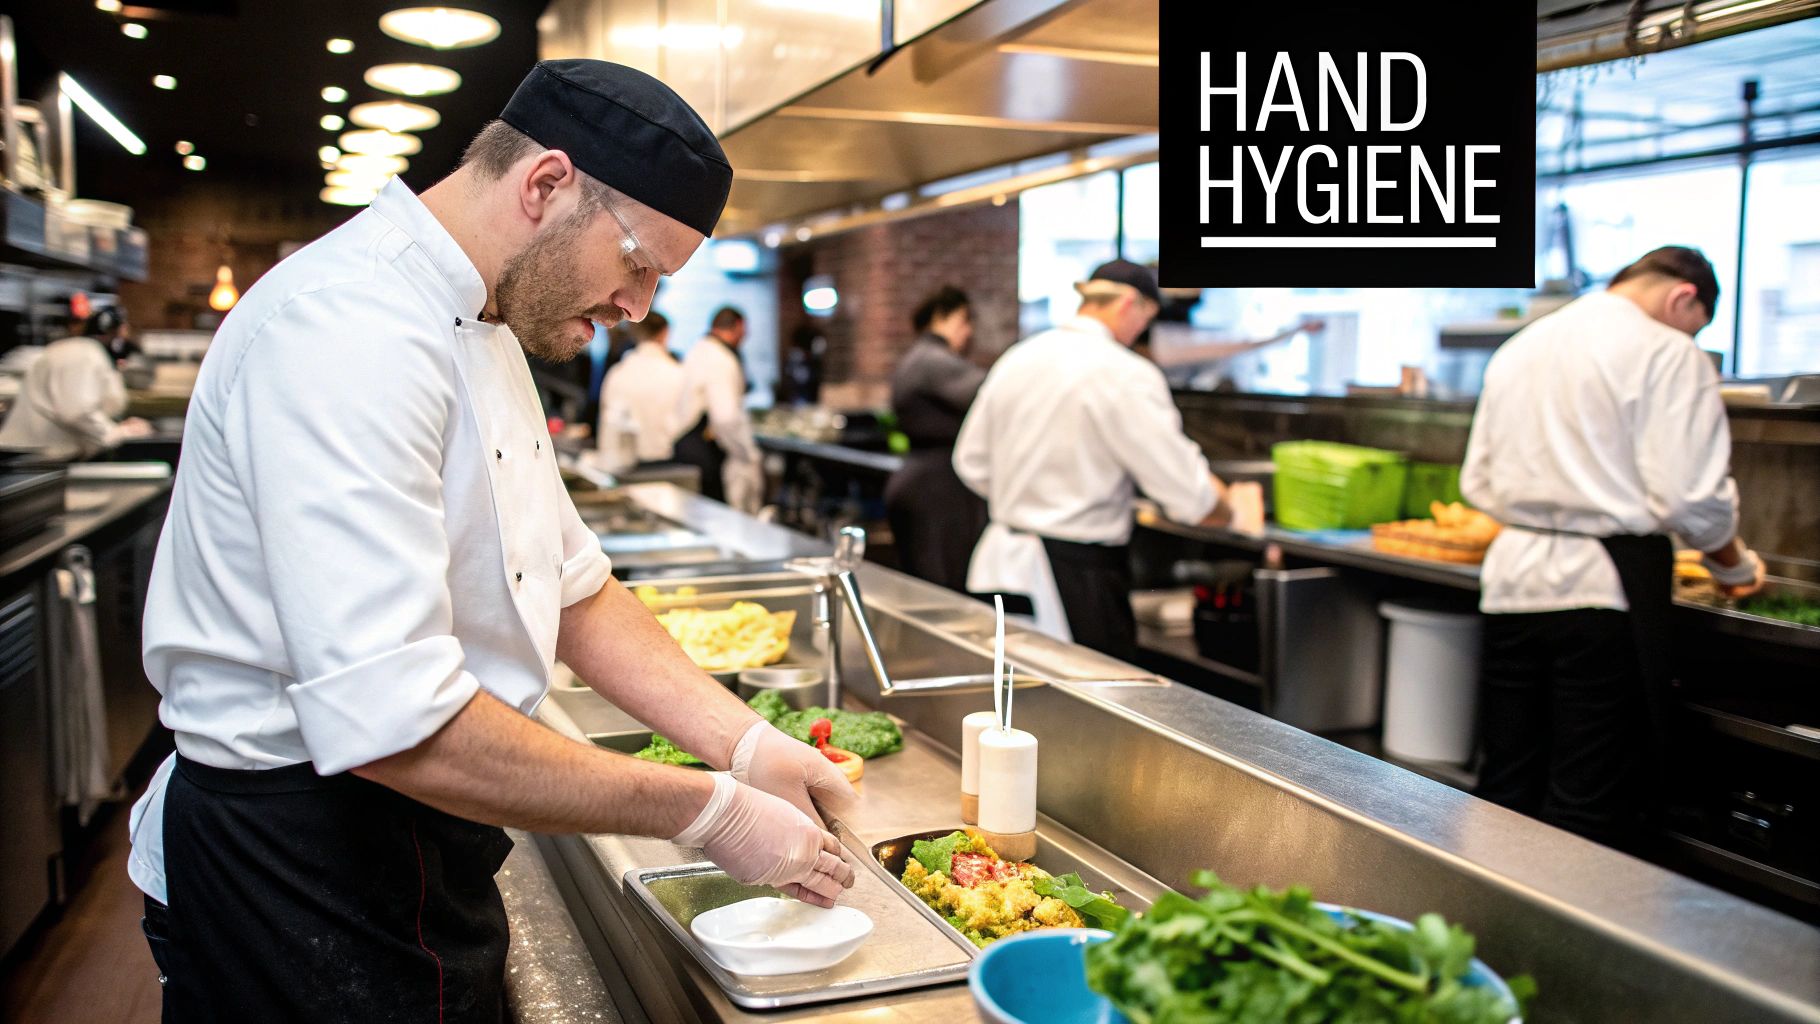
- Impeccable Staff Hygiene: Your team is your first and best line of defense. Proper handwashing, correct glove use, and strict illness policies aren’t just suggestions; they’re the fundamentals that stop pathogens in their tracks.
- Cross-Contamination Prevention: This means creating clear barriers—both physical and procedural—between raw and ready-to-eat foods. Simple tools like color-coded cutting boards and dedicated prep stations are your best friends here.
- Precise Temperature Control: Keeping food out of the "temperature danger zone" (41°F to 135°F) is one of the single most effective ways to slam the brakes on bacterial growth. This rule applies to everything: cooking, cooling, and storing.
When you frame food safety as a core pillar of your brand, you change the conversation. It stops being a list of chores and becomes a shared commitment to excellence. That proactive mindset is the secret to building a restaurant people trust.
Understanding why this matters gives purpose to the how. It transforms food safety from a hassle into a shared responsibility that protects your guests, your staff, and your restaurant’s future.
Mastering Core Food Safety Principles
High-level frameworks are great, but the real battle for food safety is won or lost in the daily habits of your kitchen staff. This is where the simple, proven "Clean, Separate, Cook, Chill" framework becomes your best friend.
It’s not just a catchy slogan. Think of it as a powerful mental checklist that boils down complex regulations into four straightforward actions. Getting these right equips your team to prevent foodborne illness, even when the ticket machine is screaming during a Saturday night rush.
And the stakes couldn't be higher. Globally, around 600 million people—that's nearly 1 in 10 of us—get sick from contaminated food each year, leading to a tragic 420,000 deaths. Restaurants are often ground zero for these outbreaks, which makes nailing your handling, hygiene, and temperature protocols an absolute must. You can dig into more food safety statistics to see the full picture.
Clean Everything Thoroughly
First up is "Clean," and it’s your most basic defense against pathogens. I like to tell new hires to think of bacteria and viruses as invisible glitter—once it’s on your hands, it gets everywhere. This is exactly why a rock-solid cleaning and sanitizing protocol is completely non-negotiable.
And we're talking about more than just wiping down counters. This principle covers three critical zones in your kitchen:
- Handwashing: Staff need to be washing with soap and water for at least 20 seconds. This isn't just a suggestion; it's a must-do before starting a shift, after handling raw meat, after a bathroom break, and before putting on a fresh pair of gloves.
- Surfaces: Every food-contact surface, from prep tables to cutting boards, must be washed, rinsed, and sanitized after every single use. It’s especially critical when you’re switching from one food type to another.
- Utensils and Equipment: Your knives, mixing bowls, and slicers all need the same three-step wash-rinse-sanitize process. No exceptions. This is how you stop germs in their tracks.
Separate to Avoid Cross-Contamination
Next, "Separate" is all about stopping cross-contamination in its tracks. This is how nasty bacteria hitch a ride from a raw ingredient to a food that’s ready to be served.
Picture this: someone preps raw chicken on a cutting board and then, without sanitizing it, slices up lettuce for a salad on the same board. That one simple mistake is a textbook cause of foodborne illness.
To prevent this, you have to create clear physical barriers. One of the best tools for this is a color-coded system. Red cutting boards for raw meat, green for produce, and white for ready-to-eat foods. It’s an instant visual cue that helps prevent those dangerous mix-ups. This rule also applies to storage—raw meats always go on the bottom shelves of the fridge, safely below any ready-to-eat items.
Cook to Safe Temperatures
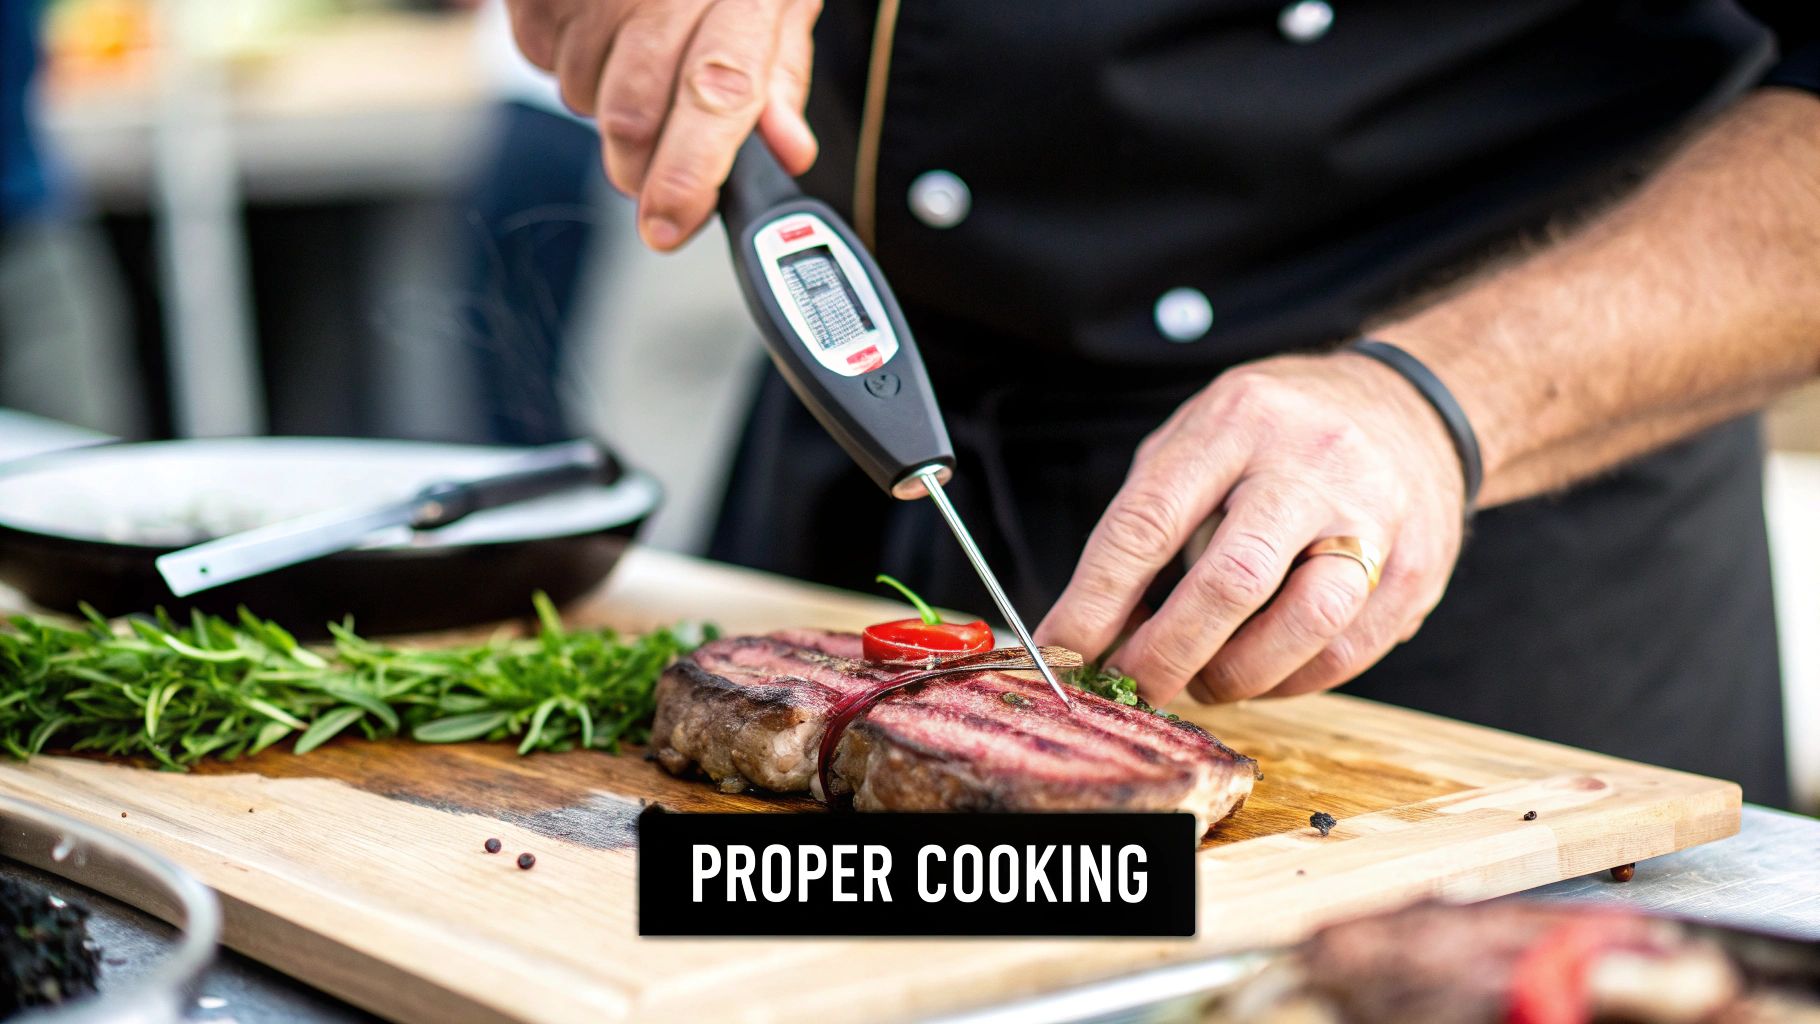
"Cook" is arguably the most important step for wiping out dangerous pathogens in things like raw meat, poultry, and eggs. Cooking isn't just about getting the right flavor and texture; it's a kill step. When food hits a specific internal temperature, bacteria are destroyed.
And you can't guess. Using a calibrated food thermometer is the only way to know for sure that food is safe. This is especially true when you're working with the right equipment. To help your restaurant meet these critical temperature requirements, we offer a wide selection of commercial charbroilers designed for precision and safety.
Whether you're getting a perfect sear with our high-powered infrared charbroilers, grilling up a storm on our versatile gas charbroilers, or getting consistent results from our precise electric char broilers, that thermometer is your proof. It confirms you’ve neutralized any harmful bacteria and the food is safe to serve.
One of the biggest mistakes a kitchen can make is relying on guesswork for temperature control. A food thermometer isn't just a tool; it's a critical piece of safety equipment that confirms your food is safe to serve. Here's a quick-reference table for the key temperature zones you absolutely must know.
Critical Temperature Control Zones for Food Safety
| Zone | Temperature Range (Fahrenheit) | Temperature Range (Celsius) | Significance for Restaurants |
|---|---|---|---|
| Freezing | 0°F or below | -18°C or below | Stops bacterial growth completely. Ideal for long-term storage. |
| Refrigeration | 32°F to 40°F | 0°C to 4°C | Slows down bacterial growth significantly. Essential for short-term storage. |
| Temperature Danger Zone | 41°F to 135°F | 5°C to 57°C | CRITICAL: Bacteria multiply rapidly in this range. Keep food out of this zone. |
| Hot Holding | 135°F or above | 57°C or above | Prevents bacterial growth in cooked food held for service. |
| Cooking (Kill Zone) | 145°F to 165°F+ | 63°C to 74°C+ | Destroys most harmful bacteria. Internal temps vary by food type. |
Mastering these zones isn't just about following rules; it's about actively protecting your customers and your restaurant's reputation with every single dish you serve.
Chill Food Rapidly and Properly
Finally, "Chill" is about getting food refrigerated or frozen properly to slam the brakes on bacterial growth. Bacteria have a favorite playground: the "Temperature Danger Zone," which sits between 41°F and 135°F. Your job is to move food through this zone as fast as humanly possible.
This means your refrigerators need to be set to maintain a temperature at or below 40°F (4°C). And when you're cooling down hot foods like a big batch of soup, you can't just stick the hot pot straight into the walk-in. Doing that will raise the fridge's internal temperature, putting everything else inside at risk.
Instead, you need to cool things down fast. Use methods like an ice bath, an ice paddle, or dividing large batches into smaller, shallow containers. This gets the temperature down quickly before it goes into the refrigerator.
Building Your Restaurant's HACCP Plan
Alright, we’ve covered the daily mantras of “Clean, Separate, Cook, Chill.” Now it's time to graduate from good habits to a full-blown strategy. We're talking about building a system that sees food safety failures coming and stops them in their tracks. This is where a Hazard Analysis and Critical Control Points (HACCP) plan comes in.
Don't let the acronym intimidate you. Think of it as your kitchen’s strategic playbook for sniffing out and neutralizing dangers before they ever have a chance to cause trouble. A HACCP plan is all about shifting your mindset from reacting to problems to actively preventing them. It’s a structured way to map out your food's journey—from the moment it hits your receiving dock to the second it's served—and pinpoint the exact spots where things could go wrong.
This isn't some generic, one-size-fits-all checklist. A good HACCP plan is tailored specifically to your menu, your kitchen, and your unique way of doing things. You identify the potential biological, chemical, and physical hazards that are relevant to your restaurant, and then you build a custom defense system to protect every single dish that leaves your kitchen.
The Seven Principles of HACCP in Action
At its heart, the HACCP system is built on seven core principles. The language might sound a bit technical, but the ideas behind them are incredibly practical. Let's break them down into simple, actionable steps.
- Conduct a Hazard Analysis: Figure out what could possibly go wrong with a food item.
- Determine Critical Control Points (CCPs): Pinpoint the steps in your process where you can actually control that hazard.
- Establish Critical Limits: Set clear, non-negotiable targets for each CCP (like a specific temperature).
- Establish Monitoring Procedures: Decide how you'll consistently check that you're hitting those targets.
- Establish Corrective Actions: Plan exactly what you'll do if you miss a target.
- Establish Verification Procedures: Create a system to double-check that your plan is actually working.
- Establish Record-Keeping Procedures: Document everything. If you didn't write it down, it didn't happen.
Let’s make this real. Imagine you're grilling a chicken breast on one of our commercial charbroilers. It doesn't matter if you're using an infrared, gas, or electric model—the principles are exactly the same.
Hazard Analysis: The number one danger with raw chicken is biological—we’re talking pathogens like Salmonella.
Critical Control Point (CCP): The cooking step. This is your make-or-break moment to eliminate that hazard.
Critical Limit: The chicken absolutely must reach an internal temperature of 165°F (74°C). No exceptions.
This is precisely where having the right equipment makes all the difference. Our commercial charbroilers—whether it's the intense searing power of an infrared model, the fine-tuned control of a gas charbroiler, or the consistent heat from an electric charbroiler—are all designed to help you nail those critical limits every single time. For a deeper dive on meat temperatures, our complete burger temperature chart is a great resource.
From Plan to Practice
Okay, back to our chicken. The next steps are what bring your HACCP plan to life on the line. It’s about your team actively monitoring the process and knowing exactly what to do when things don't go perfectly.
Monitoring is as simple as a line cook grabbing a calibrated food thermometer and checking the internal temp of every single chicken breast. And the corrective action? That’s the pre-planned response for when the thermometer reads 155°F. The cook knows immediately: keep grilling until it hits the safe 165°F limit.
The infographic below drives home some of the fundamental pillars of food safety that you'll be monitoring in your HACCP plan, especially when it comes to storage.
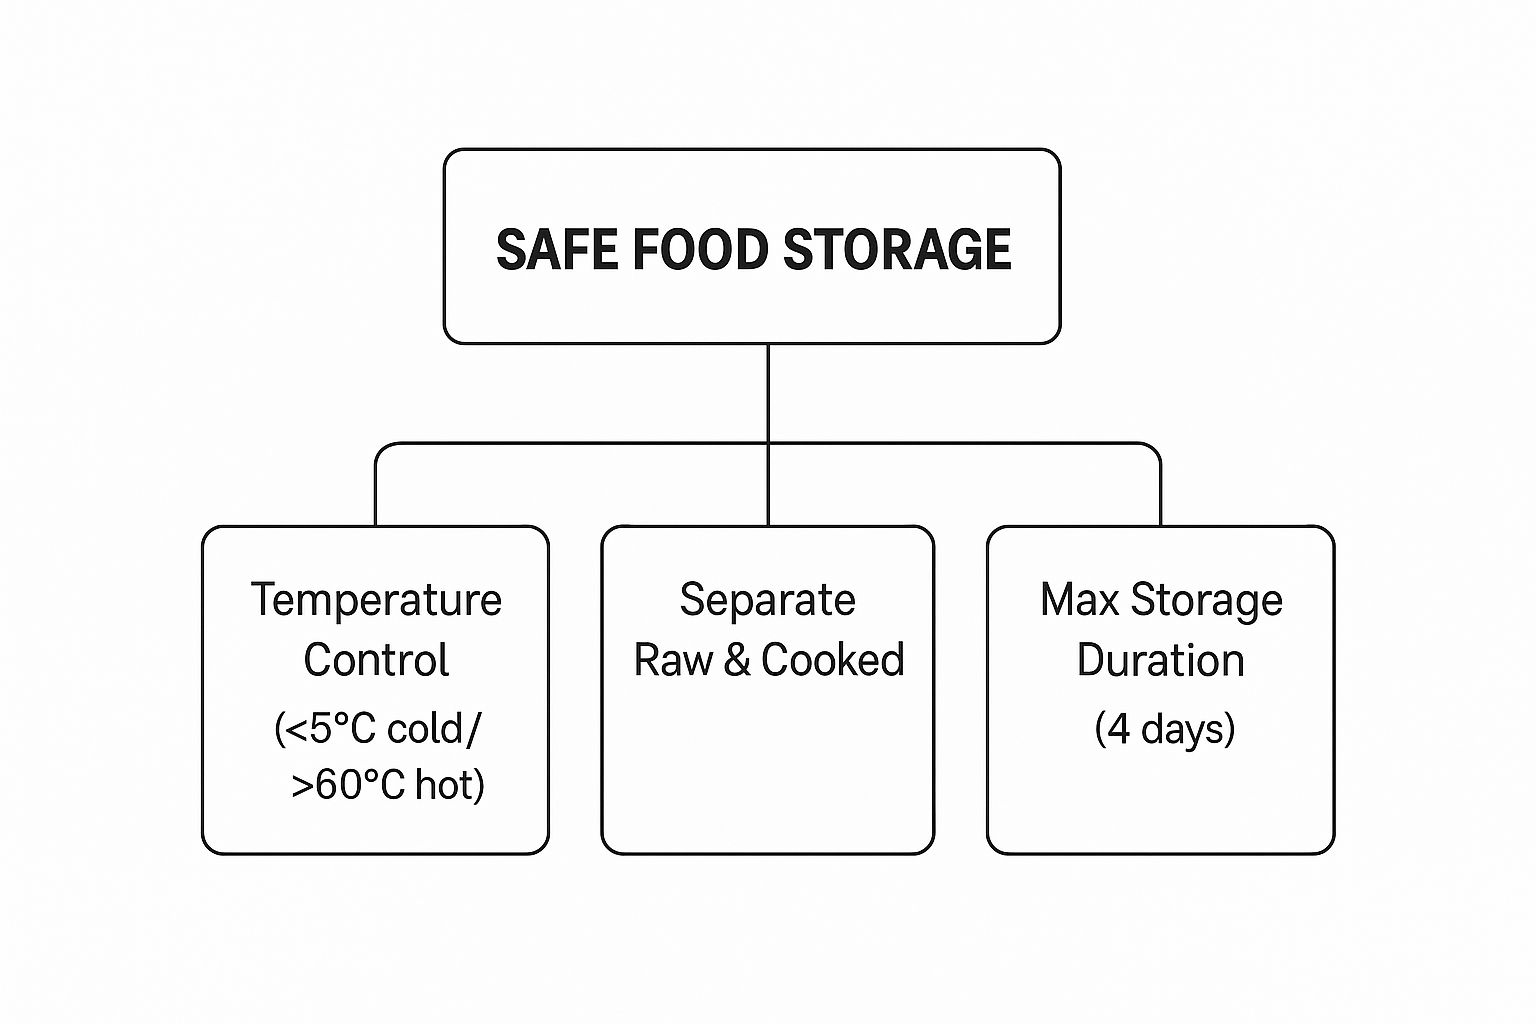
This visual is a great reminder that temperature control, proper separation, and storage times are non-negotiable. These are the things you control to prevent hazards long before that chicken ever hits the grill.
Finally, verification is when a manager periodically reviews the temperature logs to make sure the team is following the procedures. And record-keeping is the simple act of maintaining those logs. This documentation is your proof for health inspectors—and for yourself—that your system works. It’s how HACCP goes from being a concept on paper to a powerful, practical tool that keeps every meal you serve safe.
Developing Effective Staff Training and Hygiene Protocols
You can have the best kitchen equipment and a bulletproof HACCP plan, but they mean nothing without the right people executing them. Your team is your single most important line of defense in food safety, turning rules on paper into real-world, everyday actions. Building a true culture of safety goes way beyond handing someone a manual on their first day; it’s an ongoing commitment to training, reinforcement, and accountability.
A program that actually works isn't about just checking a box. It's about creating an environment where everyone, from the executive chef down to the newest dishwasher, feels responsible for protecting your guests and your business. This is where you hammer home the non-negotiables. For a deeper dive into setting your crew up for success, it’s worth exploring guides on effective restaurant employee training.
This all starts with the absolute basics, executed perfectly every single time. The goal is to build muscle memory around hygiene so that it becomes second nature, even in the middle of a chaotic dinner rush.
Building the Foundation of Personal Hygiene
Poor personal hygiene is a top cause of foodborne illness outbreaks, but the good news is, it's also one of the easiest to prevent. Your training has to be crystal clear about the standards every single person is expected to meet from the second they walk in the door.
- Proper Handwashing Technique: This is the big one. Staff must be trained to wash their hands with soap and warm water for at least 20 seconds. Make it clear this happens before a shift, after touching raw meat, after using the restroom, and before putting on a new pair of gloves. No exceptions.
- Uniform and Apron Standards: Cleanliness extends to what your team wears. Every uniform and apron should be spotless at the start of a shift. If an apron gets dirty, it gets changed immediately and kept far away from food prep areas.
- Hair Restraints: Every food handler needs a hat or hairnet. If they have a beard, they need a beard guard. It’s a simple step that stops hair from becoming a physical contaminant in your food.
A "when in doubt, throw it out" policy is more than a rule—it's a mindset. It empowers your staff to prioritize safety over saving a few bucks on inventory, which is always the right call. This is a cornerstone of a strong food safety culture.
From Initial Training to Ongoing Reinforcement
A one-time orientation is never enough. The best food safety guidelines are backed by continuous education that keeps these critical practices top-of-mind. Repetition is everything. Regular refreshers and hands-on demonstrations, especially for high-risk tasks that can lead to cross-contamination, are what make the training stick for the long haul.
Mastering Critical Handling Protocols
Beyond personal cleanliness, your team needs to master the rules for handling anything that touches food. This is where a small slip-up can have massive consequences.
Glove Usage Policy:
- Wash Hands First: Always, always wash hands thoroughly before putting on a fresh pair of single-use gloves. Gloves don't replace handwashing.
- Change Frequently: A new pair of gloves is needed after handling raw meat, before touching ready-to-eat food, and any time they get torn or dirty.
- Four-Hour Rule: If someone is doing the same task continuously, gloves must be changed at least every four hours to prevent dangerous bacteria from building up.
Investing in your staff's knowledge with programs like ServSafe certification is one of the smartest moves you can make. A certified employee doesn't just know the "what"—they understand the "why" behind the rules. This makes them far better at spotting risks before they turn into real problems. That investment pays you back with a safer kitchen, a protected reputation, and a team that takes genuine pride in its professionalism.
Creating Robust Cleaning and Pest Control Systems
A kitchen that looks clean on the surface is just the starting line. Real food safety is built on something much deeper: ironclad, documented systems for both cleaning and pest control that leave zero room for guesswork. This isn't just about passing an inspection; it's about actively creating an environment where bacteria and pests simply can't gain a foothold.
Think of your kitchen as a complete ecosystem. Every countertop, slicer, and storage shelf is connected. If one area fails, the entire system is at risk, and the consequences can be huge. Food safety breakdowns are a constant threat. In August 2025 alone, global government agencies flagged around 3,500 food safety incident mentions. Incidents related to basic controls—like cleaning and sanitation—were the biggest culprits, accounting for 2,239 of those cases.
Differentiating Cleaning from Sanitizing
This is one of the most fundamental concepts your team needs to nail down, yet it's often misunderstood. Cleaning and sanitizing are two separate steps, and you can't have one without the other.
- Cleaning: This is the simple, physical act of getting the gunk off. It means using soap, water, and some elbow grease to remove all the visible dirt, food scraps, and grease from a surface. It always comes first.
- Sanitizing: This is the chemical step that happens after cleaning. Sanitizing uses a specific solution to kill microscopic germs like bacteria and viruses, reducing them to a safe level. A dirty surface can't be sanitized—period.
Here's a simple way to think about it: Cleaning is like using a sponge and soap to wash all the mud off your car. Sanitizing is like applying the protective wax coat afterward. You’d never put wax on a muddy car, right? The same logic applies to a food prep table.
Designing an Ironclad Cleaning Schedule
Consistency is the key to a truly clean kitchen. The best way to guarantee nothing gets missed is to build detailed checklists for daily, weekly, and monthly jobs. This takes the guesswork out of the equation and holds everyone accountable. If you need a solid framework to start with, check out our guide on building a commercial kitchen cleaning checklist.
Daily Tasks (End of Every Shift):
- Wash, rinse, and sanitize every surface that touches food (cutting boards, prep tables, etc.).
- Clean all your cooking equipment—charbroilers, flattops, fryers.
- Sweep and mop the kitchen floors.
- Empty all trash cans and sanitize the bins.
Weekly and Monthly Tasks:
These are the deep-cleaning jobs that stop grime from building up over time. This is what keeps pests away and bacteria from finding a place to hide. Think cleaning out walk-in coolers, descaling the dishwasher, and degreasing the vent hoods.
Building a Fortress Against Pests
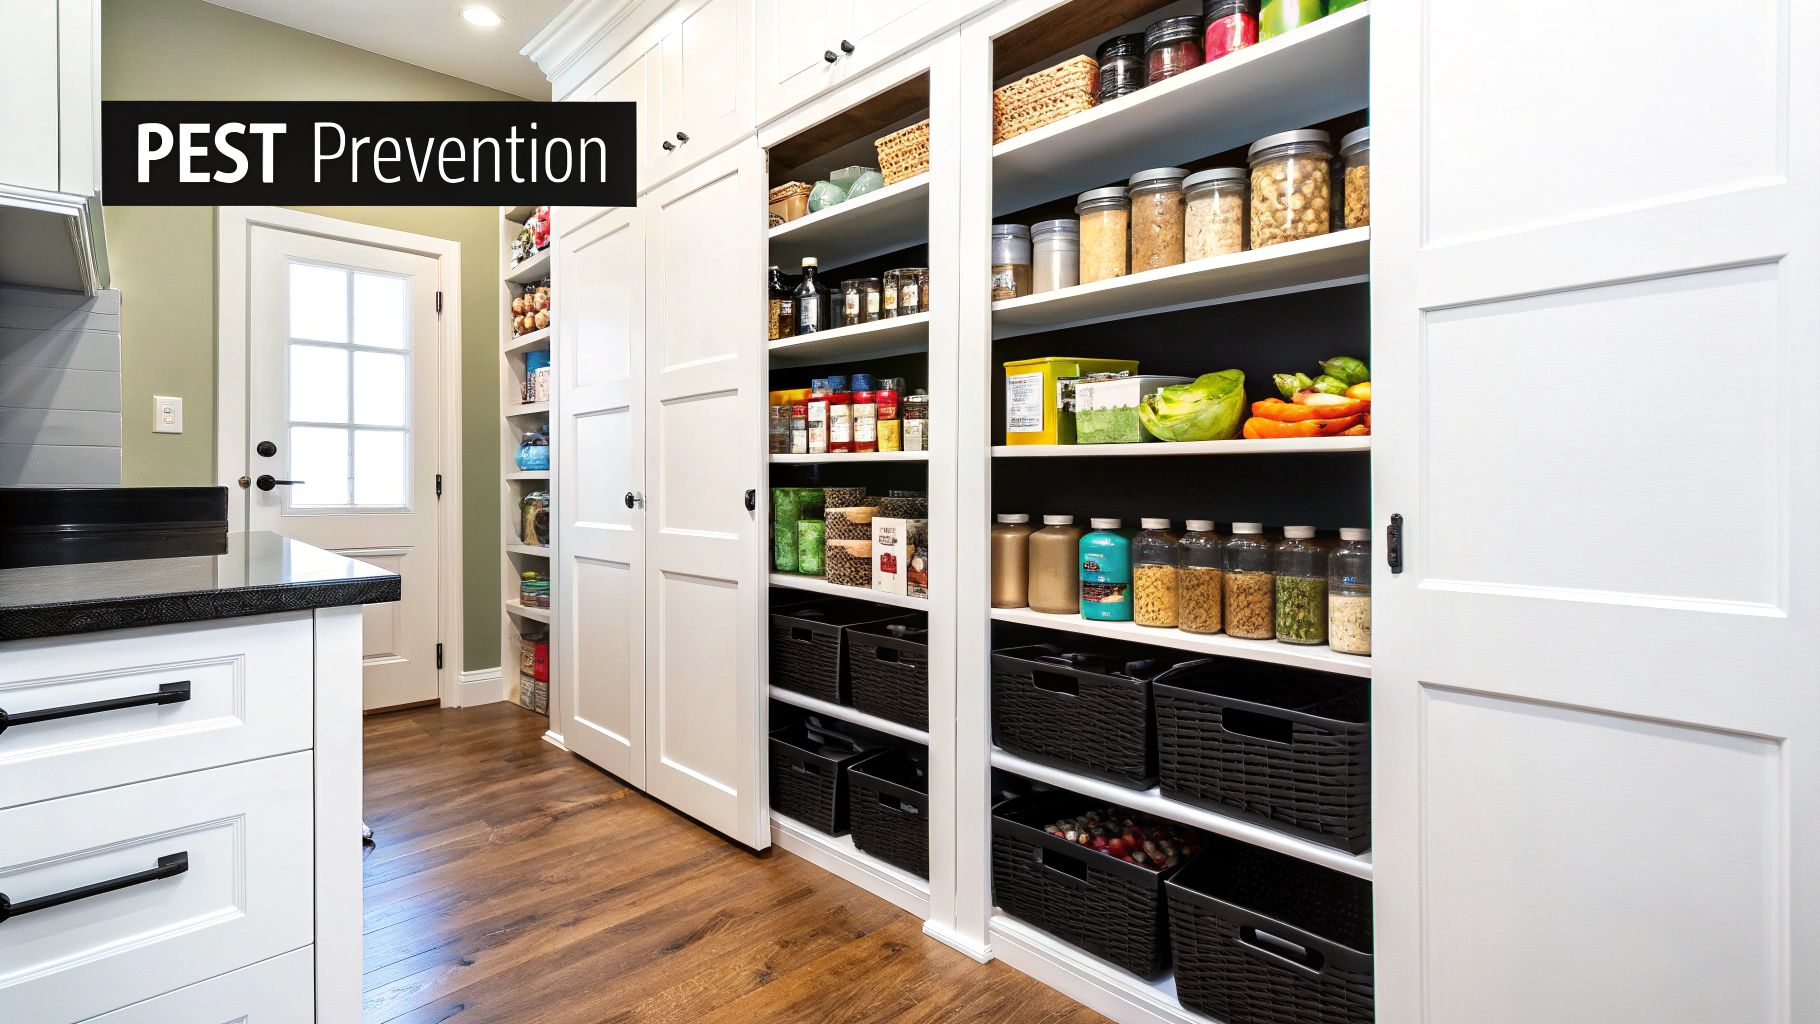
Pests aren't just an annoyance; they're a direct threat to your customers' health and your restaurant's reputation. A smart pest control plan isn't about reacting to a problem—it's about building a defense so strong that pests never become a problem in the first place.
- Deny Access: First, seal up every possible entry point. Pests are sneaky. Walk the perimeter of your building and look for cracks in the foundation, gaps around pipes, and even tiny rips in window screens. A simple door sweep can close that gap at the bottom of the back door that mice love.
- Deny Food and Shelter: Pests won't stick around if there's nothing for them to eat and nowhere to hide. This comes back to hardcore cleanliness. Store all food in tightly sealed containers, at least six inches off the floor. Clean up spills the second they happen. And make sure your dumpster area is clean with lids that are always sealed tight.
- Partner with Professionals: Even with the best in-house efforts, you need a pro on your team. A licensed pest control operator is a non-negotiable part of your food safety plan. They have the expertise to spot vulnerabilities you’d miss and can safely handle any issues that pop up. And don't just think about inside—if you have a patio, you’ll also need expert wasp control for businesses to protect your guests.
Choosing the Right Kitchen Equipment for Safety
Let's be honest: your food safety plan is only as good as the tools you use to pull it off. The right kitchen equipment is the foundation of your safety protocols. It’s what makes it possible for your team to hit their marks every single time, serving safe, high-quality food without a hitch.
Investing in commercial-grade, NSF-certified equipment isn't just a suggestion; it's a must. This gear is built to take a beating, designed for easy cleaning, and performs when the pressure is on.
Think of these appliances as partners in your kitchen. They will either help you nail your food safety standards or actively work against you. For a deeper dive into the essential gear every kitchen needs, you can explore our detailed guide on the top commercial kitchen appliances for your restaurant.
The Critical Role of Temperature Control Equipment
Nowhere is the connection between equipment and safety clearer than with temperature control. Hitting precise cooking temperatures is your number one weapon against dangerous pathogens in meat, poultry, and seafood. A grill you'd use in your backyard simply doesn't have the muscle or the accuracy for a commercial kitchen. That kind of inconsistency is a recipe for disaster.
This is exactly where a high-performance commercial charbroiler becomes one of your most valuable players. These units are engineered from the ground up to maintain exact temperatures, ensuring every single item is cooked to a safe internal temperature. That reliability is the bedrock of any solid HACCP plan.
Selecting the Right Commercial Charbroiler
The perfect charbroiler for your kitchen comes down to your menu, your customer volume, and your kitchen's layout. We have a full lineup of commercial charbroilers built to handle different needs while holding the line on the highest safety standards.
Here’s a quick look at the main options:
- Infrared Charbroilers: These models use intense radiant heat to cook fast and even, locking in flavor while torching surface bacteria. They’re perfect for getting that powerful sear that’s crucial for both taste and safety.
- Gas Charbroilers: Known for their versatility and quick heat-up, gas units give chefs pinpoint control over the flame. This allows for on-the-fly adjustments to make sure different proteins hit their specific target temperatures without overcooking.
- Electric Charbroilers: If consistency is king in your kitchen, electric units are your answer. They're great at eliminating hot spots and providing a uniform cooking surface, which makes following safety protocols a lot simpler for your staff.
Proper equipment isn't a shortcut to food safety—it's the highway. It removes variables and empowers your team to consistently execute your safety plan with confidence and precision, turning best practices into second nature.
This focus on precision is only getting more important. The FDA's 'New Era of Smarter Food Safety' initiative is pushing the industry toward digital solutions. Think wireless temperature monitors that replace old-school, error-prone manual logs, giving you real-time accuracy and peace of mind.
Answering Your Top Food Safety Questions
Even with the best systems in place, specific questions always pop up. Let's tackle some of the most common ones I hear from restaurant operators to make sure these core principles are crystal clear.
What Is the Temperature Danger Zone for Food?
Think of the temperature danger zone as the perfect breeding ground for bacteria. This is the range between 41°F (5°C) and 135°F (57°C), where pathogens can multiply like crazy—sometimes doubling their numbers in just 20 minutes.
Your mission is simple: keep food out of this zone as much as humanly possible. Hot foods must stay hot (at or above 135°F), and cold foods must stay cold (at or below 41°F). There’s really no wiggle room here.
How Often Should We Sanitize Food Contact Surfaces?
Every single time they're used. A cutting board, a prep table, a knife—if it touches food, it needs to be cleaned and sanitized right after the task is done.
This is non-negotiable, especially when you’re switching from raw chicken to chopping vegetables for a salad. It’s your first line of defense against cross-contamination. And for surfaces in continuous use with the same type of food? The rule is to stop, clean, and sanitize them at least once every four hours to prevent a slow, invisible buildup of harmful bacteria.
What Is the Biggest Cause of Foodborne Illness?
I wish it were more complicated, but it's not. The single biggest culprit behind foodborne illness outbreaks is, overwhelmingly, human error. It all comes down to the small mistakes that have massive consequences.
We see the same few slip-ups time and time again:
- Poor personal hygiene, with improper handwashing leading the pack.
- Cross-contamination, like using the same tongs for raw steak and cooked vegetables.
- Time and temperature abuse, which means failing to cook, cool, or hold food at safe temperatures.
This is exactly why consistent, engaging staff training isn't just a good idea—it's the most powerful tool you have to protect your customers and your business.
What Is the Two-Stage Cooling Method?
Cooling down a big pot of chili or stock isn't as simple as sticking it in the fridge. The two-stage cooling method is the FDA-approved process for getting hot foods down to a safe temperature without letting them linger in the danger zone.
It’s a race against the clock, broken into two steps:
- Stage One: First, you have to get the food from 135°F down to 70°F within two hours. This is the most critical part of the temperature danger zone.
- Stage Two: Then, you have another four hours to get it from 70°F down to 41°F or lower.
Mastering this two-step process is fundamental. It’s how you safely handle large batches of food and stop bacterial growth dead in its tracks.
At Charbroilers, we know that hitting the right temperatures starts with having the right equipment. Our commercial charbroilers—from powerful infrared and versatile gas models to precise electric units—are built to give you the consistent heat you need for safe, delicious results. Take a look at our full collection at charbroilers.com and build a kitchen you can trust.