

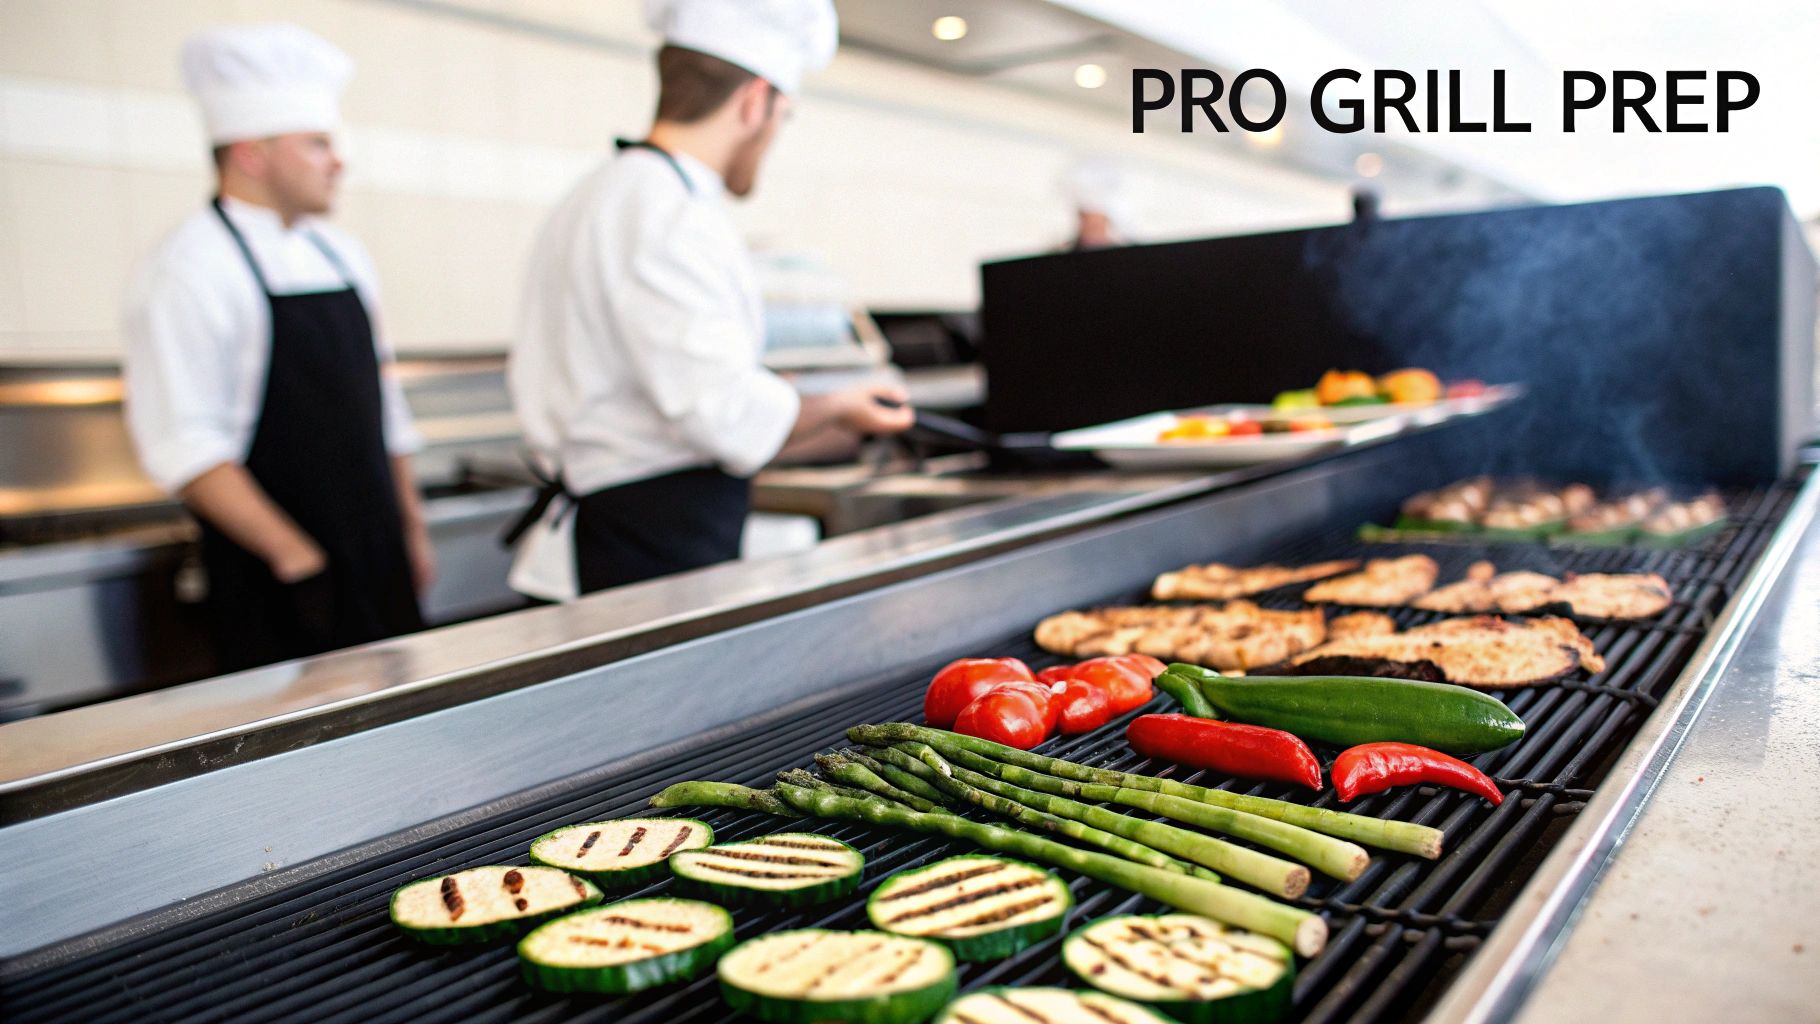
The Pro Chef's Best Way to Grill Vegetables
The secret to incredible grilled vegetables isn't some magic recipe. It's about combining methodical prep with smart heat management—a system that delivers deep flavor, perfect texture, and consistency every single time. For a commercial kitchen, this means focusing on uniform cuts, using the right high-smoke-point oil, and truly mastering your charbroiler's heat zones.
Mastering Vegetable Grilling in a Pro Kitchen
Grilling vegetables is no longer just a backyard afterthought; it's a serious culinary and commercial focus. For restaurant equipment supply businesses, understanding these trends is key to providing value. The global barbeque and grill market was already valued between USD 5.1–6.8 billion in the mid-2020s, with a huge part of that growth coming from diners wanting healthier, plant-forward options. Projections show this market just keeps climbing, proving that helping chefs nail their grilled veg is now a core opportunity.
This guide isn't for the casual weekend cookout. It's a playbook for turning produce into a profitable, signature menu item that holds up under the pressure of a dinner rush. We’re moving past basic tips and getting into the nitty-gritty of what it takes to execute this on the line, night after night, leveraging professional equipment and SEO strategies to attract the right customers.
What Sets Professional Grilling Apart
Success in a busy kitchen boils down to two things: control and efficiency. While a home cook might grill a few things at once, a pro needs a system that can pump out dozens of perfectly cooked orders without missing a beat. This operational excellence is where restaurant equipment suppliers and marketing services can make a real impact.
Here’s what that system looks like in practice:
- Precision Cuts: Every piece of zucchini, pepper, or onion needs to be cut to a specific thickness. This isn't just for looks; it guarantees even cooking and predictable grill times.
- Strategic Seasoning: You need a versatile house seasoning that punches up flavor without masking the natural sweetness of the vegetables. It should work on everything.
- Heat Zone Mastery: A good line cook knows their charbroiler inside and out. They use the direct and indirect heat zones to cook different vegetables to their ideal doneness, all at the same time.
- Workflow Efficiency: The whole process, from prep to grill, has to be streamlined for high-volume service. This often means using smart techniques like par-cooking and holding.
The real goal here is to create a menu item that's not only delicious but also operationally bulletproof. For suppliers, promoting equipment that enables these high-margin, low-labor dishes is a powerful sales strategy. Optimizing online content around these techniques through article writing and blog posting can attract restaurant owners looking for solutions.
Of course, mastering the grill is only part of the equation. Understanding the health and safety side of your equipment is just as crucial. For a great rundown on this, check out this resource on selecting cookware for health and safe cooking.
On top of that, managing the intense smoke and heat from a charbroiler going full tilt is critical for your team's safety and comfort. It all ties back to proper kitchen airflow. For a deeper look, you might want to read our guide on commercial kitchen ventilation requirements.
Building Your Flavor Foundation Before the Fire
Great grilled vegetables don’t just happen on the charbroiler—they’re made in the prep kitchen. The secret to flavor that stands out starts long before anything meets the fire. Moving beyond a simple toss of salt and oil is what separates a forgettable side from a signature menu item, and it's the kind of detail that effective content marketing and SEO can highlight.
It all begins with your knife work. The way you cut a vegetable directly impacts how it cooks and how much char it develops. A uniform cut isn't just for looks; it's about consistency and control during a busy service.
Strategic Cuts for Superior Results
Think of each cut as a way to engineer the perfect bite. For vegetables like zucchini or Japanese eggplant, slicing them into long, thick planks maximizes the surface area touching the hot grates. This approach is your ticket to beautiful grill marks and a satisfying, smoky flavor.
On the other hand, for denser items like carrots or parsnips, a bias cut (slicing at an angle) exposes more of the interior. This helps them cook through faster and more evenly, preventing that dreaded raw-in-the-middle, burnt-on-the-outside scenario.
The Right Oil and the Perfect Ratio
Not all oils can handle the intense heat of a commercial charbroiler. You need an oil with a high smoke point to prevent burning and introducing bitter, acrid flavors. This is not the time for extra virgin olive oil.
Instead, reach for oils built for high-heat cooking:
- Avocado Oil: With a smoke point over 500°F, it's a premium choice that can take the most intense heat you can throw at it.
- Grapeseed Oil: A versatile, neutral-flavored oil with a high smoke point, making it a reliable workhorse in any professional kitchen.
- Canola Oil: An economical and widely available option that performs well under the high temperatures of a charbroiler.
The goal is to coat, not drench. Too much oil just leads to dangerous flare-ups and greasy results. A good rule of thumb is about 1-2 tablespoons of oil per pound of vegetables. They should have a light sheen, not be swimming in a pool.
The science of salting is just as important. For most vegetables, salt right before they hit the grill. Salting too early draws out moisture, causing them to steam rather than sear. That’s a surefire way to rob yourself of that essential char and caramelization.
Creating a Versatile House Seasoning
A consistent, scalable house seasoning blend is a game-changer for any efficient kitchen. It ensures every batch of grilled vegetables has that same balanced, crave-worthy flavor your customers expect. This consistency is a cornerstone of good restaurant management and a topic that resonates in B2B copyrighting.
A solid base blend is simple but effective:
- Kosher Salt
- Coarse Black Pepper
- Granulated Garlic
- Granulated Onion
- Smoked Paprika for color and depth
From this base, you can spin up variations for different menu items by adding dried herbs like oregano or a touch of chili flake for heat. To make sure every vegetable is packed with a rich, complex flavor, it's crucial to understand how to apply seasonings correctly. You can find detailed tips on how to use rubs on vegetables that will help your team execute flawlessly every time.
Crafting Marinades That Enhance, Not Overwhelm
While dry seasonings are fast and effective, a good marinade can add another layer of flavor and help tenderize tougher vegetables. The key here is balance. Unlike marinades for meat, you want less acidity to avoid breaking down the vegetables and turning them to mush.
A great, scalable house marinade should be simple enough for any line cook to replicate.
Basic House Marinade Ratio (Scalable):
- 3 Parts Oil: Use a neutral, high-smoke-point oil like grapeseed.
- 1 Part Acidity: Lemon juice or a mild vinegar like white wine or rice wine vinegar works well.
- Flavor Elements: Add minced garlic, shallots, and chopped fresh herbs like parsley, thyme, or rosemary.
- Seasoning: Finish with kosher salt and black pepper.
A quick dip is all you need—15-30 minutes is plenty of time. This gives the vegetables a chance to absorb the flavors without compromising their firm texture, ensuring they hold up perfectly on the hot grates of the charbroiler.
Managing Heat Zones on a Commercial Charbroiler
Your commercial charbroiler is more than just a searing-hot surface—it's a precision instrument. The secret to grilling vegetables consistently at scale is treating it like one, and that starts with mastering multi-zone grilling. This technique of creating distinct hot and cool areas on the grill is the foundation of high-volume, high-quality production in any professional kitchen. For equipment suppliers, demonstrating this level of control is a key selling point.
The whole idea is to establish a reliable two-zone fire. This setup gives you the control to cook different types of vegetables at the same time, each at its ideal temperature, ensuring you get that perfect caramelization without turning everything to mush. In the chaos of a busy service, control is everything.
Setting Up Your Two-Zone Fire
Creating distinct heat zones transforms your charbroiler from a blunt instrument into a versatile cooking station. One side becomes your high-heat, direct-contact zone for a quick sear, while the other serves as a cooler, indirect zone for slower roasting and finishing things off.
- Direct Heat Zone: This is your powerhouse. Crank the burners on one side of your charbroiler to medium-high or high. This is where you get that beautiful, deep char and those coveted grill marks on items that cook fast. Think of it as your searing station.
- Indirect Heat Zone: On the opposite side, set the burners to low or just leave them off entirely. This cooler area gets its heat from the hot side, creating a gentler, oven-like environment. It’s perfect for finishing dense vegetables or holding items without scorching them.
This two-zone setup is non-negotiable for consistency. Remember, how you arrange your equipment is also a massive factor in creating an efficient workspace. You can learn more about optimizing your kitchen by exploring our insights on commercial kitchen design and layout.
Matching Vegetables to the Right Heat Zone
Knowing where to place each vegetable is what separates a seasoned line cook from a rookie. Just throwing everything over the direct heat is a recipe for disaster—you'll end up with delicate items burning to a crisp before the dense ones are even cooked through.
The principle is pretty simple:
- Direct Heat is for Tender Vegetables: Anything with high water content and a delicate structure belongs here for a short, intense sear. We're talking asparagus spears, mushroom caps, zucchini planks, and sliced bell peppers. The goal is to get color on them fast and pull them off.
- Indirect Heat is for Dense Vegetables: Sturdy, starchy vegetables need more time to cook all the way through. Starting them on the indirect side lets them soften up without burning on the outside. Whole bell peppers, thick-cut onion rounds, and par-cooked potato wedges are perfect candidates for this zone.
A common workflow I've seen in countless kitchens involves starting denser vegetables on the indirect side to tenderize, then shifting them to the direct side for the last minute or two to get that final, perfect char. This two-step process gives you complete control over both texture and appearance.
The science backs this up. Most culinary guides will tell you to grill vegetables somewhere between 350°F and 450°F. This temperature range is the sweet spot where the Maillard and caramelization reactions create those incredible smoky flavors without turning your produce into mush. Denser items like potatoes do best at the lower end of this spectrum with longer cook times, while something tender like asparagus cooks perfectly at the higher end in just a few minutes. This is exactly why a multi-zone strategy isn't just a "nice-to-have"—it's a proven method for getting superior results every time.
Of course, before vegetables even touch the grates, a solid prep process ensures every piece cooks evenly. This simple workflow is the foundation for any great grilled vegetable dish.
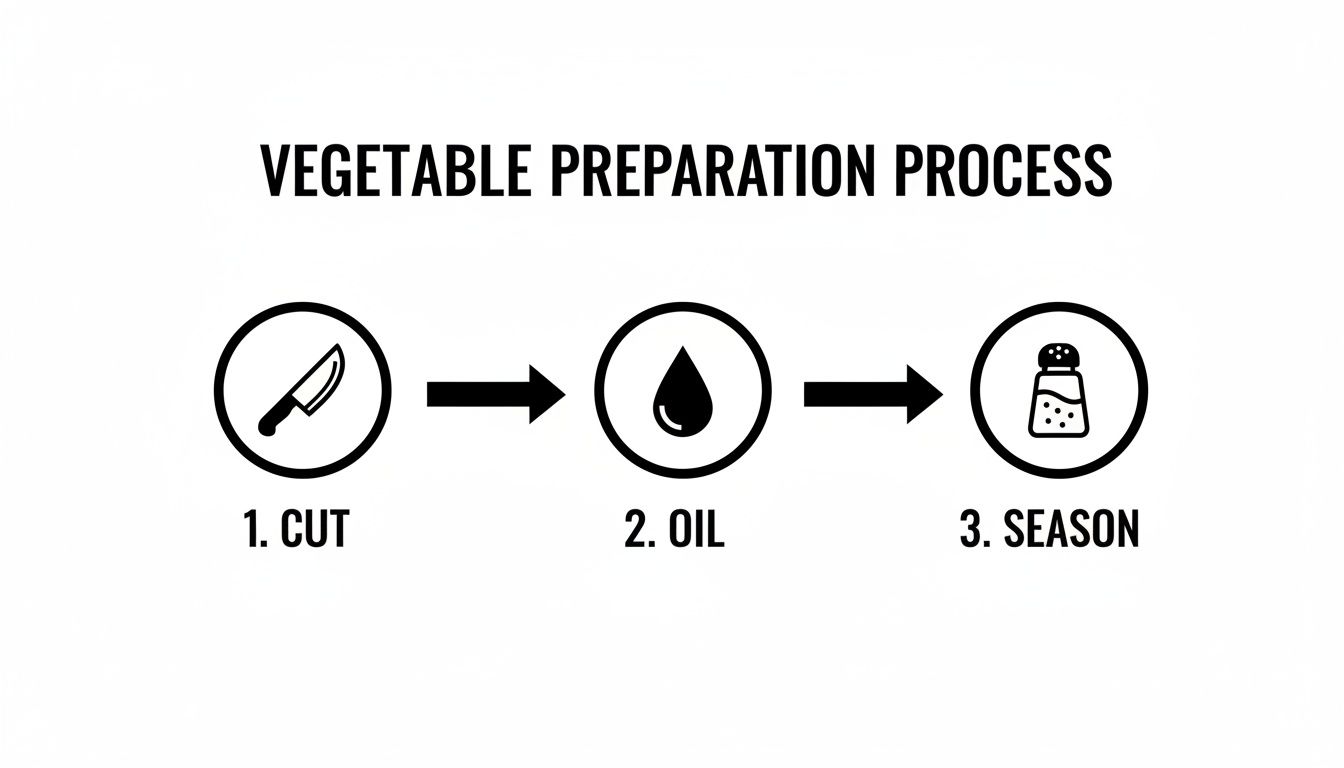
This just reinforces that the road to perfectly grilled vegetables starts with methodical prep—uniform cuts, a light coat of oil, and proper seasoning—long before the heat ever gets involved.
Maintaining Consistent Heat During Service
Your grill zones aren't "set it and forget it." During a slammed dinner service, the constant opening of the lid (if you have one) and loading it up with cold food will cause temperatures to drop. A vigilant cook knows how to read their grill and make those little adjustments on the fly.
Keep an infrared thermometer nearby to spot-check the grate temperature in each zone. If your direct zone starts to cool down, give the burners a small boost. If you get a flare-up, have a designated "safe zone" on the indirect side where you can move items until the flames die down. This kind of active management is what maintains quality from the first ticket of the night to the very last.
Tools and Workflow for High-Volume Service
In a slammed commercial kitchen, how you grill vegetables isn't just about taste—it's about survival. When tickets are flying, your entire service hinges on a bulletproof system that delivers speed and consistency every single time. The right tools and a smart workflow are what separate a smooth, profitable service from pure chaos.
This is about moving beyond grilling every order from scratch. Real success comes from a well-oiled process that starts hours before your first customer walks in. It’s all about prep, efficiency, and giving your line cooks a system they can execute flawlessly under pressure. For those in the restaurant equipment supply industry, providing insightful article writing on these processes establishes authority.
Choosing the Right Tools for the Job
Your choice of grilling tools has a massive impact on your speed and the quality of the final dish. For vegetables, the two workhorses you'll rely on are heavy-duty grill baskets and classic skewers. Knowing when and why to use each is the first step to an efficient line.
- Heavy-Duty Grill Baskets: These are your best friends for small or diced veggies that would instantly fall through the grates. Think pepper and onion medleys, sliced mushrooms, or corn. Baskets let you cook huge batches fast, tossing them for an even char. It’s way more efficient than trying to flip dozens of tiny pieces one by one.
- Skewers: For kebabs or any dish where presentation matters, skewers are the clear winner. Threading zucchini chunks, cherry tomatoes, and onion wedges keeps everything uniform and makes for a clean plate-up. A pro tip I’ve learned: always use flat metal skewers. They stop the veggies from annoyingly spinning around when you go to turn them.
The choice between baskets and skewers really comes down to the menu. Baskets are built for speed and volume—perfect for sides or components. Skewers are for precision and presentation on your feature plates. A truly organized kitchen uses both strategically.
Having the right gear is just part of the battle. If you want a full rundown of what every professional kitchen should have on hand, checking out a commercial kitchen equipment checklist can help you spot any gaps in your arsenal.
The Power of Par-Cooking for Speed
One of the single most effective strategies for a busy service is par-cooking your dense vegetables ahead of time. Things like potato wedges, thick carrots, or big cuts of root vegetables take forever to cook on a grill from raw—time you absolutely don't have during the dinner rush.
Par-cooking is the answer. By blanching, steaming, or baking these items until they’re about 80% tender, you slash their final grill time to almost nothing.
During service, all they need is a few minutes over direct heat to get color, char, and heat through. This simple technique can turn a 20-minute pickup into a 2-minute one. It’s a game-changer.
The "Grill-and-Hold" Technique
For vegetables that can't be par-cooked, like bell peppers or asparagus, the "grill-and-hold" method is your secret weapon. This is where you grill items like zucchini planks or pepper strips until they have perfect grill marks but are still a bit al dente.
Then, you pull them off the grill and cool them on sheet pans in a single layer to halt the cooking process.
You can hold them at room temp or in a low-boy cooler, ready for action. When an order fires, they just need a quick 30-60 second flash back on the charbroiler, a toss in a hot pan, or a pass through the salamander. This is how you serve perfectly grilled vegetables with that deep, smoky flavor in just minutes, even when you're completely slammed.
Here’s a sample workflow you can adapt for your kitchen to streamline everything from prep to plate.
| Phase | Task | Key Objective |
|---|---|---|
| Morning Prep | Wash, peel, and cut all vegetables to spec. | Create uniformity for even cooking. |
| Mid-Day | Par-cook dense items like potatoes and carrots. | Drastically cut down grill time during service. |
| Pre-Service | Par-grill and cool items for "grill-and-hold." | Build up a bank of ready-to-finish vegetables. |
| During Service | Finish par-cooked/held items to order. | Deliver high-quality dishes with speed and consistency. |
Putting these tools and workflow strategies in place creates a system that’s not just efficient but also guarantees a consistent, top-quality product every single time.
Advanced Techniques for Unforgettable Flavor
Once you’ve nailed the basics—your timing, temperature control, and workflow are solid—it's time to start building signature flavors. This is where you graduate from simply grilling vegetables to crafting a dish that people remember and come back for. It's the small, advanced touches that separate a decent plate from a truly great one.
The real art of grilling vegetables for deep, complex flavor comes from layering. You’re not just cooking; you’re building a taste profile. A few simple adjustments can completely change the game, turning a standard side dish into a menu standout. This is the kind of expert content that can be amplified through blogger outreach and local citation services to build brand credibility.
Introducing Subtle Smokiness
Even if you're running a gas charbroiler, you can still get that authentic wood smoke flavor into your vegetables. This technique adds a layer of complexity that instantly tells your customers you’re serious about flavor.
A smoker box or even a simple foil packet of soaked wood chips does the trick beautifully. Just place it over a hot burner, and once the chips start to smolder, that aromatic smoke will infuse everything on the grates.
- For Delicate Vegetables (Asparagus, Bell Peppers): Go with lighter woods like alder or cherry. They add a touch of sweetness without steamrolling the vegetable's natural taste.
- For Hearty Vegetables (Eggplant, Onions): This is where you can bring in the big guns. Bolder woods like hickory or mesquite deliver that classic, robust barbecue smoke that stands up to stronger flavors.
This one step can completely transform the final product, giving your vegetables a character all their own.
The "Dirty Grilling" Method
For a char you can't get anywhere else and a truly rustic flavor, some of the best chefs embrace "dirty grilling." It’s exactly what it sounds like: placing vegetables directly onto hot wood or lump charcoal embers, completely bypassing the grates.
This method is perfect for vegetables with a built-in protective layer or a dense structure that can handle intense, direct heat. Think whole onions, thick-skinned eggplants, or even a whole head of cabbage.
The direct contact with the coals creates a deep, blistered char on the outside, which in turn steams the inside to a state of smoky, tender perfection. After cooking, you just peel away the charred outer layers to reveal a succulent, intensely smoky interior. It's a flavor you just can't replicate any other way.
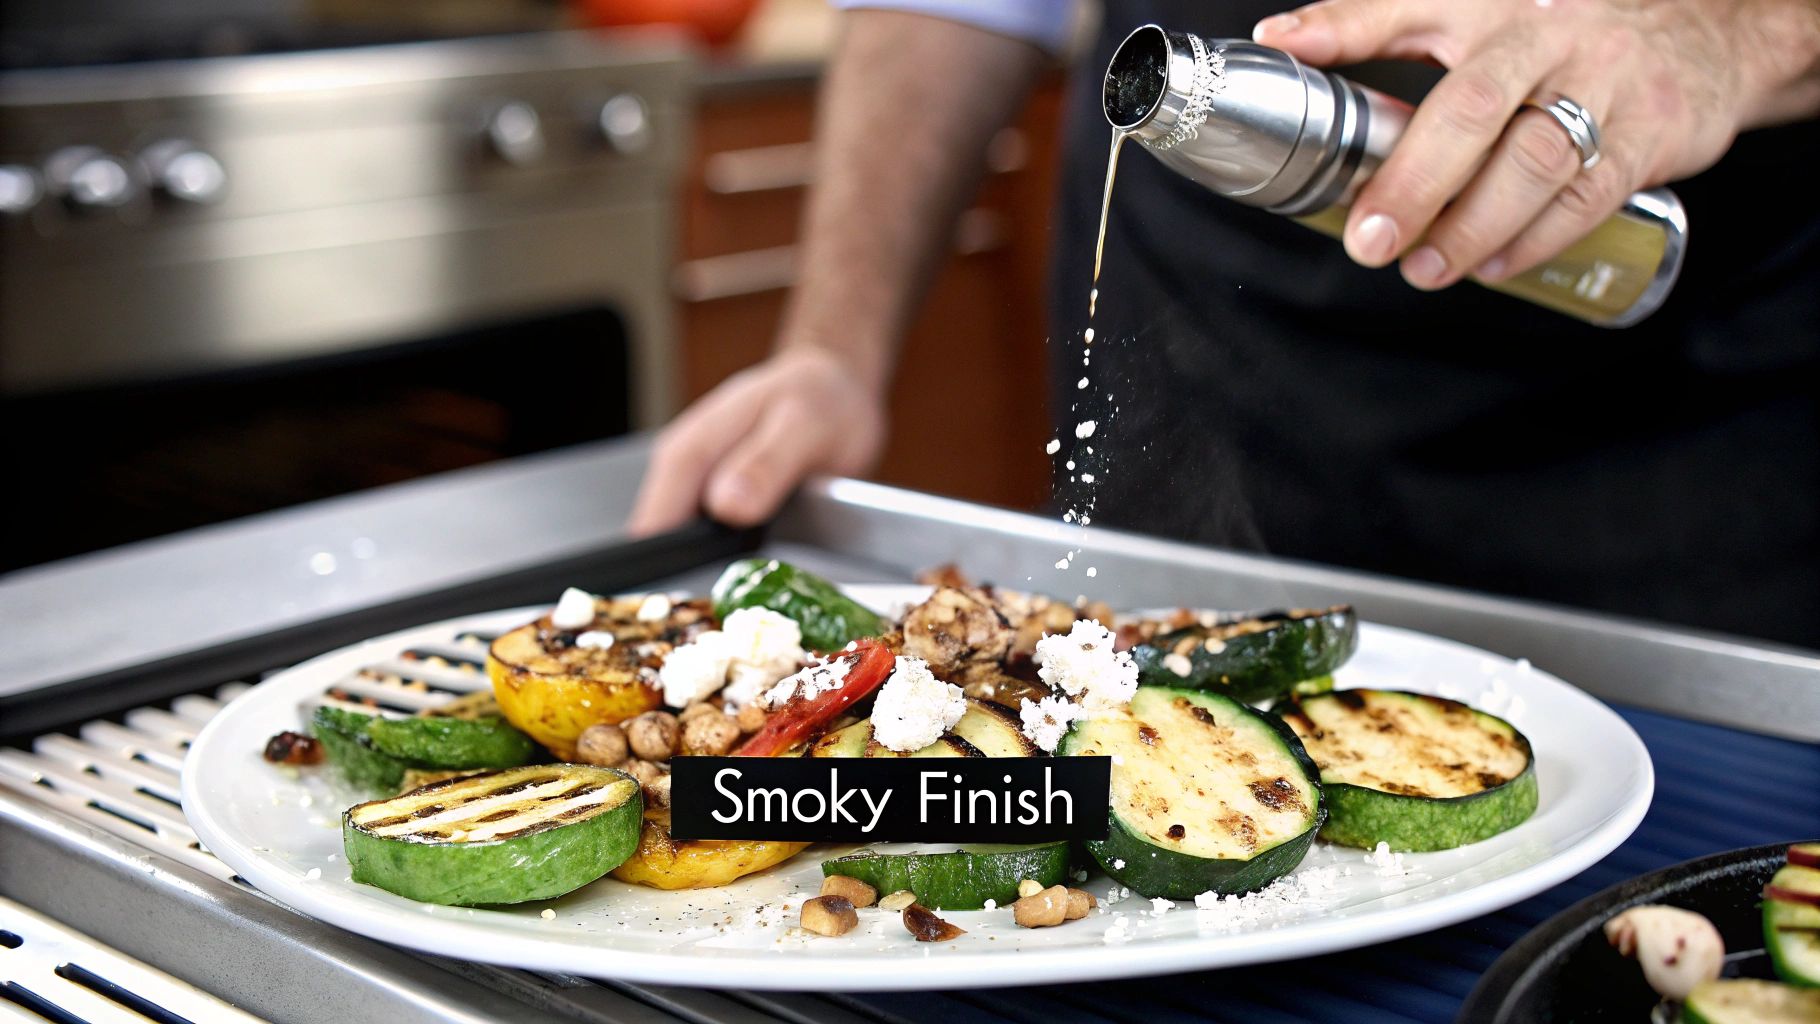
Perfecting the Finishing Touches
What you do after the vegetables come off the charbroiler is just as crucial as the grilling itself. Those final moments before plating are your last chance to add brightness, richness, and texture. Don't skip this step.
A few strategic finishes can pull the whole dish together:
- High-Quality Finishing Oil: A quick drizzle of extra-virgin olive oil, a nutty walnut oil, or an aromatic truffle oil adds a final layer of richness and scent.
- A Squeeze of Fresh Citrus: Nothing cuts through smoky richness like a hit of fresh lemon or lime juice. It brightens everything up and makes the whole dish pop.
- A Sprinkle of Flaky Salt: Using a good finishing salt, like Maldon, adds a clean salinity and a satisfying textural crunch.
Your final plating is the last impression you make. A simple crumble of feta or goat cheese adds a creamy tang. A handful of toasted pine nuts or sliced almonds brings a much-needed crunch. These are the details that add perceived value and show you've put thought into the dish.
And don't forget the visuals. Perfect crosshatch marks are a sign of a pro. Just remember the technique: place your vegetable at a 45-degree angle to the grates, get a good sear, then give it a 90-degree turn to create that classic diamond pattern. It’s these professional touches, from the smoke to the garnish, that truly define the best way to grill vegetables.
Your Questions on Professional Vegetable Grilling Answered
Even with the best prep and a solid workflow, things can go sideways during a hectic service. Knowing how to troubleshoot on the fly is what separates the pros from the rookies. Let's tackle some of the most common issues that pop up on the grill line.
Think of this as your back-pocket guide to fixing the small stuff before it snowballs into a real problem. Get these down, and you’ll have the confidence to handle anything the charbroiler throws at you.
How Do I Stop Vegetables from Sticking to the Grill Grates?
Sticking is probably the most frustrating issue, but it's almost always preventable. It really just comes down to three things: dirty grates, not enough heat, or not enough oil. If you get these three right, your vegetables will lift off cleanly every single time.
First off, cleanliness is non-negotiable. Your grates have to be scrubbed with a stiff wire brush while they're hot to get all that baked-on gunk off. Right after you brush them, wipe them down with a towel lightly dipped in a high-smoke-point oil. This seasons the grates and creates a natural non-stick surface.
Second, the grill must be fully preheated. Tossing vegetables on a lukewarm grate is just asking for them to weld themselves to the metal. You need that immediate, intense heat to sear the surface, which creates a barrier and stops the sticking before it starts.
Finally, make sure the vegetables themselves are properly oiled. You're looking for a light, even coating—not a greasy mess. Every piece should have a subtle sheen. A classic mistake is oiling the grate instead of the food; always oil the vegetables directly for the best, most consistent results.
What Is the Best Way to Grill a Mix of Different Vegetables?
Whatever you do, don't just dump a mixed bag of vegetables onto the grill at once. Different densities and water content mean they cook at wildly different speeds. The real secret is a strategic approach that respects what each vegetable needs.
Your best bet is to use a two-zone fire. Start the dense, long-cooking stuff—like par-cooked potato wedges or thick carrot planks—over on the cooler, indirect heat side. This gives them a head start to get tender all the way through without torching the outside.
Once they've had some time, you can add the quicker-cooking items like bell pepper quarters and thick onion slices to the hot, direct-heat zone. The really delicate things, like asparagus spears or sliced mushrooms, should only hit that direct heat for the last couple of minutes of cooking.
If you're in a situation where speed is everything, you can cut all your vegetables to a similar small size and cook them together in a grill basket. It's incredibly efficient, but you do lose that fine-tuned control over the texture you get with zone grilling.
Can I Grill Vegetables Ahead of a Busy Service?
Absolutely. In fact, most high-volume kitchens rely on it. The technique is called par-grilling, and it's a total game-changer for service. The idea is to cook the vegetables until they have great color and char marks but are only about 80% of the way to being tender.
Once they hit that mark, pull them off the heat immediately and spread them in a single layer on a sheet pan to cool down fast. This step is critical. If you pile them up while they're hot, the trapped steam will keep cooking them, and you'll end up with a mushy, sad product.
When an order comes in, you can reheat them in a few ways. Flash them on the hottest part of your charbroiler for 30-60 seconds, toss them in a screaming-hot sauté pan, or run them through a salamander. This way, you get that fresh-off-the-grill flavor and perfect texture in a fraction of the time.
How Do I Get Perfect Crosshatch Grill Marks?
Those beautiful diamond grill marks aren't just for show—they signal that a cook has skill and patience. Getting them consistently is all about a simple, disciplined two-step turn.
Start with clean, hot, oiled grates and well-oiled vegetables. Place your item—say, a long plank of zucchini—down on the hot grates at a 45-degree angle. Now for the hard part: leave it alone. Don't press it, don't nudge it, just let it sear.
Once you have deep, defined marks, use your tongs to lift it cleanly. Then, rotate it 90 degrees. The easiest way to think about it is moving from pointing at '10 o'clock' to '2 o'clock' on a clock face. Place it back down on a fresh hot spot on the grates, and you'll create that perfect crosshatch every time.
At Charbroilers.com, we know that great technique needs great equipment to back it up. Our wide selection of commercial charbroilers is built to give you the precise heat control and rugged durability your kitchen demands. Execute these techniques flawlessly, service after service. Explore our professional-grade charbroilers and find the right fit to take your menu to the next level.