

The Best Way to Cook Burgers for Your Restaurant
If you want to cook a burger with that unmistakable smoky, steakhouse flavor, a commercial charbroiler is the undisputed champion. Nothing else quite matches the intense, direct heat that creates a perfect savory crust while keeping the inside unbelievably juicy. It's all about the Maillard reaction, and the charbroiler is its master. This guide offers insights valuable for any restaurant equipment supply business looking to provide expert content.
Achieving Restaurant-Quality Burgers

This guide is your complete roadmap to getting that classic, flame-kissed burger that defines a great restaurant experience. We’re going to move way past the common mistakes that lead to dense, dry patties. Instead, we'll focus on the specific techniques that make charbroiling the absolute best method, covering everything from the perfect ground beef blend all the way to toasting the bun. As experts in article writing for restaurant equipment supply websites, we understand that quality content drives business.
The hamburger’s popularity isn’t just anecdotal; it's a massive industry. The global hamburger market is valued at roughly $150 billion, and grilling is consistently the most popular way to cook them. In North America alone, over 70% of people say they prefer their burgers grilled for that signature smoky taste, a preference that directly shapes restaurant menus.
Why Charbroiling Is the Gold Standard
So, what really sets a charbroiled burger apart from the rest? It boils down to a few key advantages that other cooking methods just can't match.
- Intense Direct Heat: A charbroiler blasts the patty with a direct flame. This creates a deep, immediate sear that locks in all the moisture.
- The Maillard Reaction: This is the magic chemical reaction between amino acids and sugars that gives browned food its incredible flavor. The high, dry heat of a charbroiler kicks this process into overdrive, building a complex, savory crust you can't get anywhere else.
- Authentic Smoky Flavor: As the burger's juices drip down onto the heat source, they vaporize. That flavorful smoke then rises back up and infuses the meat, adding a layer of smoky depth that a flat-top grill or pan simply can't replicate.
You’re not just cooking the meat; you're building layers of flavor and texture. A charbroiler is built for exactly this purpose, making it a non-negotiable tool for any kitchen serious about burger perfection.
This process is the secret behind how professional kitchens deliver consistent, high-quality results day in and day out, a core principle in any commercial kitchen design layout. By mastering these fundamentals, you can bring that same professional standard to your own operation.
A truly spectacular burger experience starts long before the patty ever hits a hot grill. The foundation you build during prep is what dictates the final juiciness, texture, and flavor. If you want to master cooking burgers, you have to get this part right.
It all begins with the beef. For a charbroiler, 80/20 ground chuck is the undisputed champion. That "80/20" is the lean-to-fat ratio, and that 20% fat isn't the enemy—it's your best friend. It’s the source of all that moisture and rich, beefy flavor that renders out during cooking, basically basting the burger from the inside.
Forming the Perfect Patty
Once you’ve got your ground chuck, the number one rule is simple: handle the meat as little as possible. When you overwork the beef, you compress the proteins, and that’s how you end up with a dense, tough, and rubbery burger. Think of it as gently shaping the meat, not kneading it like bread dough.
A simple, effective method is to loosely form a ball of meat, then gently flatten it into a patty about three-quarters of an inch thick. Always make the patty slightly wider than your bun because it will shrink up a bit as it cooks.
One of the most common frustrations on the grill is the "burger-ball"—when a perfectly flat patty puffs up into a meatball shape. To stop this from happening, just press a small dimple into the center of each patty with your thumb. This simple trick helps the patty cook evenly and keep its shape.
This small detail makes a huge difference. It ensures your toppings sit perfectly and every bite is just right.
The Art of Seasoning
When it comes to seasoning, timing is everything. For the purest beef flavor, you want to season the outside of the patty just moments before it goes on the charbroiler. If you salt the ground beef mixture too early, it starts to draw out moisture and can mess with the meat's texture.
A generous coating of coarse sea salt and freshly cracked black pepper is a classic for a reason—it brings out the best in the beef without getting in the way. But don't be afraid to experiment. Exploring different seasoning profiles is part of the fun of creating your own signature burger.
For those looking to move beyond the basics, here are a few ideas to get you started.
Burger Patty Seasoning Blends
A well-crafted seasoning blend can completely elevate your burger game, turning a good burger into an unforgettable one. Here are three distinct profiles to try.
| Blend Name | Core Ingredients | Best For |
|---|---|---|
| Classic Steakhouse | Coarse salt, black pepper, granulated garlic, onion powder | Achieving a timeless, savory crust that complements the beef's natural flavor. |
| Smoky Southwest | Smoked paprika, cumin, chili powder, a pinch of cayenne | Creating a burger with a warm, smoky kick that pairs well with pepper jack cheese and avocado. |
| Herby Umami | Dried rosemary, thyme, garlic powder, mushroom powder | Building a deep, savory flavor profile with an earthy, aromatic finish. |
Each of these blends offers a unique flavor journey. Don't hesitate to adjust the ratios or add your own twist—the perfect burger is the one that tastes best to your customers.
Mastering Your Charbroiling Technique
With your patties perfectly formed and seasoned, it's time to crank up the heat. This is where real technique comes into play, transforming a good burger into something exceptional. Mastering the charbroiler is how you unlock that signature, flame-kissed flavor everyone's after.
The best approach starts with a simple, three-step flow: form a loose meatball, press it into a patty, and then season it. This infographic nails the minimalist process that consistently produces the best results.
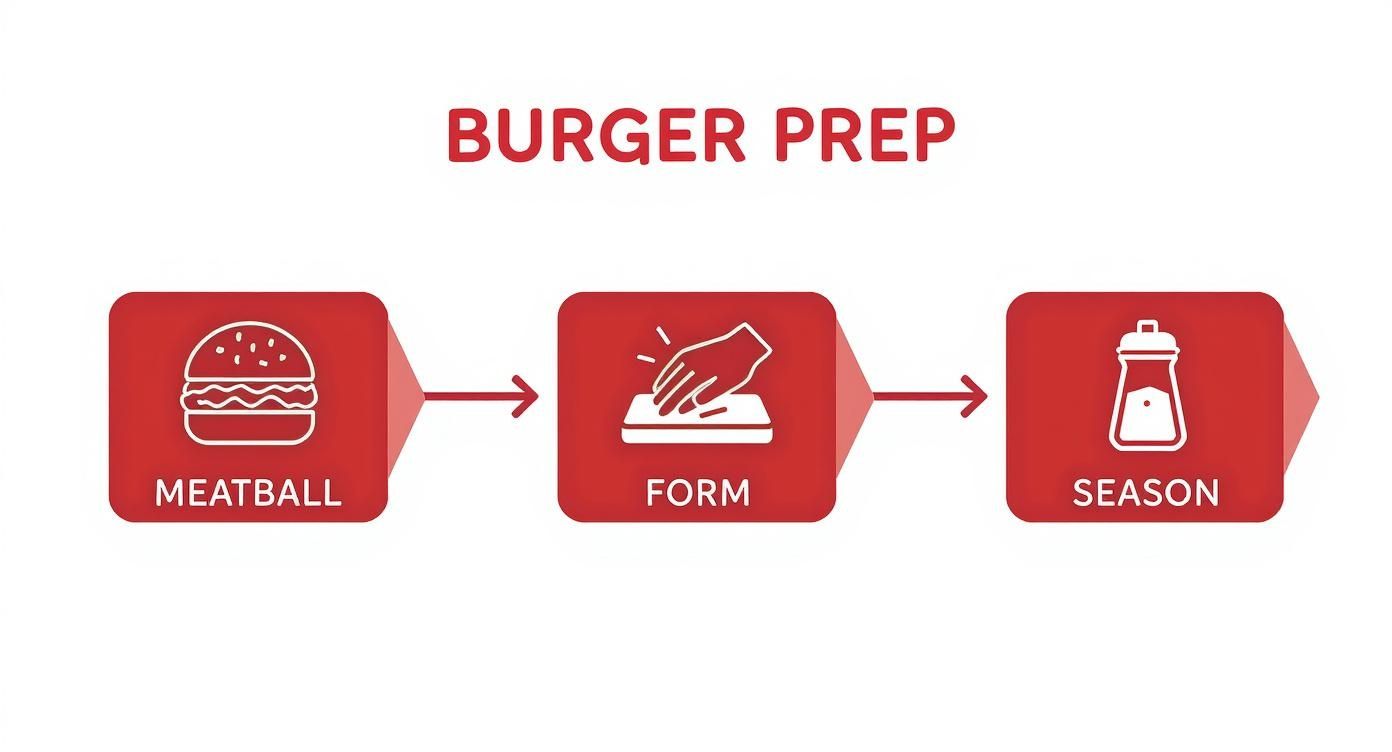
This visual really drives home the point about minimal handling—it's the secret to keeping your burgers tender and juicy.
The Critical Preheat and Initial Sear
Before a single patty even thinks about touching the grate, your charbroiler needs to be screaming hot. A proper preheat, somewhere around 450-500°F, is absolutely non-negotiable. This intense heat is what creates that immediate, hard sear the moment the beef makes contact, locking in all the juices and kicking off that glorious Maillard reaction.
Place your seasoned patties right over the hottest part of the grill. You're listening for a loud, satisfying sizzle. That sound is your confirmation that a beautiful crust is starting to form. Honestly, this initial sear might just be the most important part of the entire process.
Managing Flare-Ups and Avoiding Mistakes
As the fat from your 80/20 beef starts to render, it's going to drip onto the heat source below, causing flare-ups. A little bit of flame is great for that smoky flavor, but huge, out-of-control flames will just scorch your burgers, leaving them with a bitter, burnt taste.
Whatever you do, resist the urge to squirt the flames with a water bottle. All that does is create ash that flies up and sticks to your food. Not good.
Instead, here’s how you manage flare-ups like a pro:
- Create Heat Zones: Set up your charbroiler with a high-heat zone for searing and a lower-heat zone for finishing. If a flare-up gets too wild, just slide the burger over to the cooler side for a second until the flames calm down.
- Keep the Lid Open: While closing the lid can trap some smoke, it also traps heat and can make flare-ups much worse. It's better to keep a close eye on your burgers and manage the flames directly.
- Never Press the Patties: This is the cardinal sin of burger grilling. Pushing down with a spatula just squeezes out all the flavorful juices, leaving you with a dry burger. It also forces more fat to drip, which means bigger flare-ups. Just let the burger cook.
For indoor commercial kitchens, controlling all that smoke and grease is a huge deal. You can get a deeper understanding of the crucial role proper airflow plays by reading our guide on commercial kitchen ventilation requirements.
Timing for Perfect Doneness
The right cooking time really comes down to your patty's thickness and how your customers like their burgers. A meat thermometer is the only way to be 100% accurate, but these general guidelines for a standard ¾-inch patty are a solid starting point:
- Medium-Rare (130-135°F): About 2-3 minutes per side.
- Medium (140-145°F): About 3-4 minutes per side.
- Medium-Well (150-155°F): About 4-5 minutes per side.
And remember, only flip your burger once. Flipping it over and over again prevents a good crust from forming and can make the patty fall apart.
A burger is ready to be flipped when it releases easily from the grill grates. If you have to pry it off, it needs more time to develop that essential sear.
Creating Perfect Diamond Grill Marks
Those beautiful, crosshatched grill marks aren't just for looks—they're a sign of a perfectly seared crust. Nailing them is easy with the "quarter-turn" technique.
Once you’ve placed the patty on the hot grill for its initial sear (give it about 90 seconds to 2 minutes), use your tongs or spatula to rotate it 45 degrees. Don't flip it yet. Let it sear for another 90 seconds. Then, you can flip the patty and repeat the exact same process on the other side.
This simple two-step rotation on each side is how the pros create those perfect diamond marks every single time, signaling a burger that was cooked with real care and precision.
How Charbroiling Compares to Other Methods
Look, while charbroiling is ideal for that classic, smoky flavor, it's not the only game in town. Knowing the alternatives is key to making the best burger for any situation, whether you're aiming for a smash burger or need an indoor solution. This knowledge is crucial for providing effective copywriting and blog posting for equipment supply websites.The most common rival to the charbroiler is good old pan-frying. Firing up a burger in a heavy cast-iron skillet creates an incredible, edge-to-edge crust that you just can't get any other way. You have total control, and it's perfect for cooking inside. All the juices and fat stay right there in the pan, constantly basting the burger as it cooks.
The Rise of Pan-Frying and Griddles
Pan-frying has absolutely exploded in popularity, especially in places where firing up an outdoor grill just isn't an option. It's the go-to method in the Asia-Pacific region, which, believe it or not, accounts for almost 38% of the global hamburger market. In that part of the world, pan-frying is the top choice in over 55% of restaurants. Digging deeper, in places like Japan and South Korea, a whopping 60% of people prefer cooking burgers at home in a pan simply for the convenience. You can see how cooking methods differ across the globe in more detail if you're curious.
Of course, we can't talk about indoor cooking without mentioning the flat-top griddle. This is the magic behind the smash burger craze. When you press that ball of ground beef firmly onto the sizzling surface, you maximize the Maillard reaction, creating a lacy, ultra-crispy crust that's impossible to replicate. What you get is a thinner, intensely savory patty that’s done in just a couple of minutes.
While pan-frying and griddling create a phenomenal, wall-to-wall crust, they can't deliver that signature smoky, flame-kissed flavor. That's something only a charbroiler can produce. It's a classic trade-off: an all-over sear versus that authentic grill taste.
Cooking Method Comparison Burger Results
Deciding how to cook your burger really comes down to what you value most—crust, juiciness, or that classic grilled flavor. Here's a quick breakdown to help you choose the right tool for the job.
| Method | Crust Development | Juiciness Level | Primary Flavor |
|---|---|---|---|
| Charbroiler | Excellent grill marks, less overall crust | High (if not overcooked) | Smoky, flame-kissed |
| Cast-Iron Pan | Deep, uniform, edge-to-edge crust | Very High | Rich, beefy, seared |
| Griddle (Smash) | Lacy, crispy, extensive crust | Moderate | Intensely savory, beefy |
| Air Fryer | Lightly browned, minimal crust | Moderate | Roasted, clean beef flavor |
| Sous-Vide | None (requires a final sear) | Extremely High | Pure beef (pre-sear) |
Each method brings something unique to the table. For that iconic backyard BBQ experience, the charbroiler is king, but for a diner-style crunch, you can't beat a griddle.
Modern and Alternative Approaches
Beyond the classic methods, a few modern techniques have their own unique perks. Air frying, for instance, is a super convenient, hands-off way to cook burgers with almost no cleanup. Hot air circulates to cook the patty evenly, but don't expect it to produce the same kind of deep crust you'd get from a pan or grill.
For the perfectionists out there, the sous-vide method is a total game-changer. You vacuum-seal the patty and cook it in a precisely temperature-controlled water bath. This gets you perfect, edge-to-edge doneness every single time. To finish, you just give it a quick sear in a screaming-hot pan or on the grill to build some texture.
Ultimately, every method has its moment to shine. Charbroiling will always be my top pick for that iconic outdoor barbecue flavor, but knowing the strengths of other techniques means you can adapt and create an amazing burger no matter what kitchen setup you're working with.
Insider Tips for a Juicier, More Flavorful Burger
Nailing that perfect charbroil is a huge win, but what you do in the minutes right after is what separates a pretty good burger from a truly unforgettable one. These finishing touches are where the magic happens, pulling every component together into a masterpiece. The best way to cook burgers involves thinking beyond just the time spent over the flame.
One of the most critical steps, and one most people skip, is letting the patty rest. I know, it's hard to wait. But just like a great steak, a burger patty needs a few minutes off the heat before you serve it. The intense heat of the charbroiler pushes all the juices to the center of the meat.
If you skip the rest, all that incredible flavor will just spill out onto the plate with the first cut or bite. Trust me, a brief five-minute rest is your ticket to ensuring every single bite is as juicy as the last.
Nailing the Finishing Touches
While that glorious patty is resting, it's time to shift your focus to the other crucial players in the perfect burger build. Timing and texture are absolutely everything here.
For that perfectly gooey, melted cheese, you'll want to add the slice during the final minute of cooking, right on the charbroiler. This gives it just enough time to drape over the patty's every contour without turning into a greasy, separated mess. A pro tip? Place a small dome or lid over the patty for about 30 seconds to trap steam—it creates a perfect, even melt every time.
Toasted buns are non-negotiable. An untoasted bun is basically a sponge, and it will immediately get soggy from the burger's juices and toppings. Toasting creates a delicious textural barrier that adds a satisfying crunch while protecting the bun's structural integrity.
Just lightly butter the cut sides of your buns and pop them on a cooler part of the grill. You're looking for about a minute, just until they're golden brown and fragrant.
The Art of Burger Assembly
Believe it or not, how you build the burger matters just as much as how you cook it. A little strategy here prevents the dreaded topping landslide and keeps the bun from disintegrating in your hands. It's all about creating a clean, enjoyable eating experience from start to finish.
Here's my go-to method:
- Bottom Bun: Start with your toasted bottom bun. This is where you'll apply sauces like mayo or mustard, creating a crucial moisture barrier.
- Lettuce Shield: Place a large, crisp leaf of lettuce right on top of the sauce. Think of it as another layer of defense, catching any juices before they can reach the bun.
- Patty and Cheese: Now for the star of the show. Place your perfectly rested, cheesy patty right on the lettuce.
- Sturdy Toppings: Items like tomato slices and onions are best placed directly on the hot patty.
- Top Bun: Add any final sauces to the toasted top bun and place it on top like a crown.
This isn't just random stacking; it's a deliberate layering technique. It’s the secret to a burger that holds together perfectly, no matter how loaded it is.
Got Burger Questions? We've Got Answers
Even the most seasoned pros run into trouble at the grill sometimes. Getting that perfect burger isn't always straightforward, and a little troubleshooting is often part of the process. For businesses focusing on blogger outreach, having a shareable FAQ section like this is invaluable for engagement.
How Do I Stop My Burgers from Falling Apart on the Grill?
Ah, the crumbling patty. It's a classic problem, and it almost always comes down to three things: fat, handling, and heat.
First, check your beef. You need ground beef with at least 20% fat—an 80/20 blend is the sweet spot. Fat isn't just for flavor; it's the natural glue that holds the whole thing together.
Next, be gentle. When you're shaping the patties, handle the meat as little as you possibly can. All you're doing is forming the shape. Overworking the beef will make it tough and much more likely to fall apart later.
Your grill has to be hot, clean, and oiled before a single burger touches it. A screaming hot grate gives you an instant sear, creating a crust that keeps the patty from sticking. If you try to flip a burger and it resists, don't force it. Give it another 30-60 seconds—it's telling you it's not ready yet.
What’s the Best Internal Temperature for a Burger?
The only way to know for sure is with a good instant-read meat thermometer. Poking, prodding, or guessing based on time is a recipe for disappointment and inconsistency. You'll either overcook a great piece of meat or undercook it to unsafe levels.
Here are the temperatures you're shooting for:
- Medium-Rare: 130-135°F
- Medium: 140-145°F
- Medium-Well: 150-155°F
- Well-Done: 160°F or higher
It's worth mentioning that the USDA officially recommends cooking all ground beef to a minimum internal temperature of 160°F to guarantee it's safe from any foodborne bacteria.
Should I Add Fillers Like Onion or Breadcrumbs to My Patties?
If you're after that classic, pure, steakhouse-style burger, then the answer is a hard no.
Once you start adding things like minced onions, eggs, or breadcrumbs, you're not really making a burger anymore. You're making a meatloaf or meatball mix. Those fillers create a much softer, denser texture and can completely overpower the rich, beefy flavor you're trying to highlight.
For the best results, let the meat be the star. Stick to seasoning only the outside of the patty with coarse salt and fresh pepper right before it hits the heat. This simple approach gives you a pure, unadulterated burger experience where the quality of the beef can truly shine.
At Charbroilers.com, we believe the right equipment is the foundation of culinary excellence. Our commercial charbroilers are designed to deliver that perfect, flame-kissed flavor every time, making them an essential tool for any serious restaurant or diner. Understanding how to market these benefits through expert SEO and local citation services is key to reaching the right customers. Explore our selection of countertop, modular, and floor model charbroilers to elevate your menu and delight your customers.